How to Set Up a Residential Proxy in Ghost Browser
 ·August 15, 2026·8 min read
Ghost Browser is used in cases where multiple working sessions, accounts, or projects need to run in parallel within a single browser. Its main feature is the separation of workspaces and identities, which makes it possible to isolate tabs, cookies, and connection settings. When proxies are configured properly, this allows connections to be distributed flexibly across different tasks and reduces the likelihood of conflicts between sessions.
There are two practical ways to work with proxies in Ghost Browser. The first is to use the operating system’s proxy settings, as in regular Chromium-based browsers. The second is to manage addresses through the browser’s built-in tools, where proxies can be imported as a list, tested, and assigned to individual tabs or workspaces. It is the second approach that offers more control when multiple accounts and independent processes are involved in the workflow.
A Natural Companion to Antidetect
Node Proxy residential proxies complement separate browser profiles.
Setting Up Through Ghost Proxy Control
For more precise connection management in Ghost Browser, the built-in proxy manager is used. Through it, you can upload a list of addresses, check whether they are working, and distribute them across tabs or session groups.
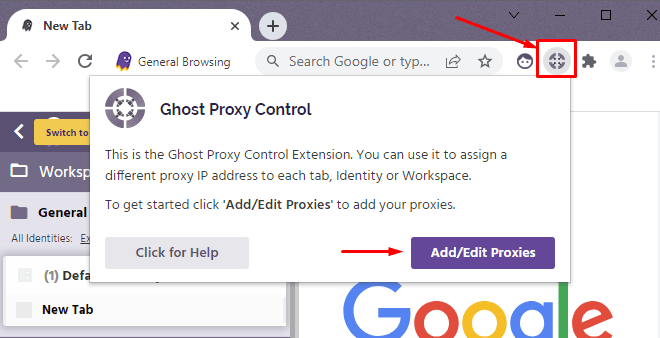
The setup begins by opening the proxy control panel. After launching the browser, click the Ghost Proxy Control icon in the toolbar and go to the Add/Edit Proxies section. This opens the interface where new connections are added, lists are imported, and checks are initiated.
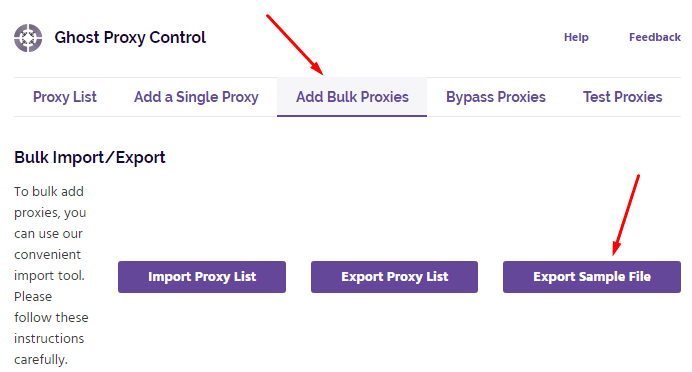
For bulk upload, select Add Bulk Proxies in the manager, then choose Export Sample File. The browser will download a template that only needs your own data to be filled in. This method is preferable to creating the file manually from scratch, because it immediately provides the correct field structure and reduces the risk of import errors.
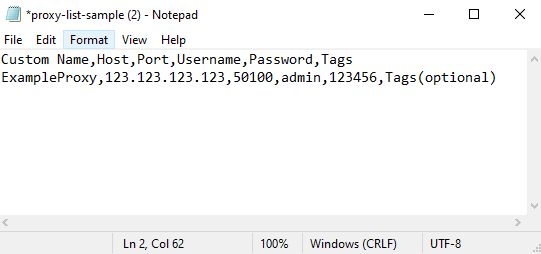
In the table, specify the IP address, port, connection type, and, if required, authentication details (This information can be found on our website node-proxy.com). If access is configured through IP binding, the username and password fields can be left blank. It is important that each line corresponds to one server and that the format matches the template requirements. Errors at this stage are the most common cause of failed imports.
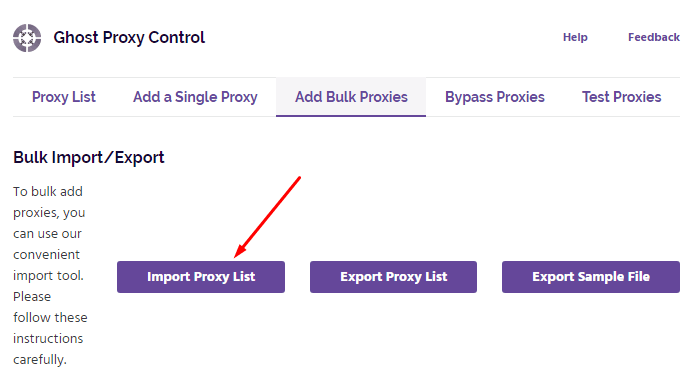
Once the file is complete, it must be uploaded back into Ghost Browser through the Import Proxy List option. After processing, the data will appear in the list of available connections. From there, they can be distributed across tabs or other workflow elements, depending on how the specific working setup is organized.
Checking Connections After Import
Right after uploading the list, it is worth checking that all entries are working correctly. For this, Ghost Browser provides the Test Proxies tab. There, you can specify any test address and run a check on all imported connections.
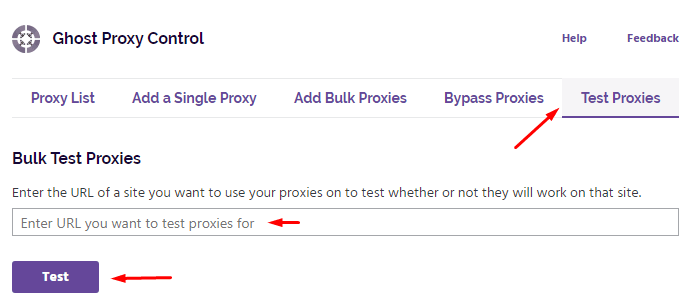
Once the test is complete, the browser shows the result for each row. A successful connection means the server is available and the parameters were entered correctly. A connection error usually indicates that the address is unavailable or that there is a network-side problem. An authentication error points to incorrect credentials. If the system reports an invalid format, then the issue is in the proxy file itself: the structure is broken, fields are missing, or the wrong connection type was specified.
Automatic Proxy Assignment
One of Ghost Browser’s strengths is the ability not only to select a server manually for each task, but also to automate distribution. This is especially convenient when many tabs are involved at the same time.
The browser supports several assignment models. Proxies can be distributed randomly across tabs. A no-repeat mode can also be used, where each address is assigned in turn and is not reused until the entire list has been exhausted. There is also a sequential mode, in which the browser takes the next available server in order. This method is especially useful where configuration predictability matters and where it is important to quickly understand which connection is assigned to which task.
The choice of method depends on the task. Random distribution is suitable for dynamic scenarios. Sequential distribution is better for systematic and controlled work. The no-repeat mode is convenient where it is important to avoid overlapping connections between active sessions.
Setting Up Through Windows System Settings
If there is no need to manage proxies for individual tabs, standard operating system settings can be used. Since Ghost Browser runs on Chromium, the basic workflow here is the same as in other browsers in this family.
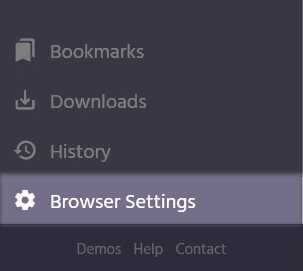
In Windows, open the browser menu and go to Settings.
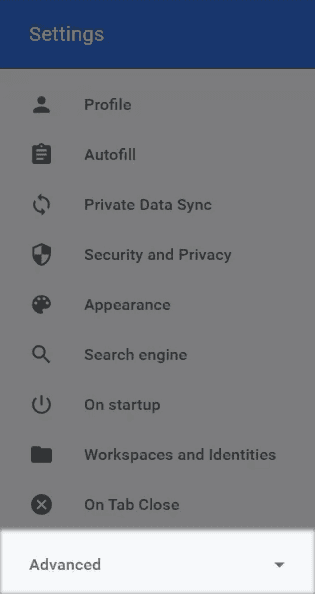
Then expand the Advanced section.
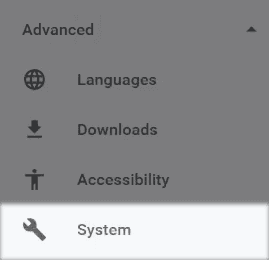
In the System section, select Open your computer’s proxy settings.
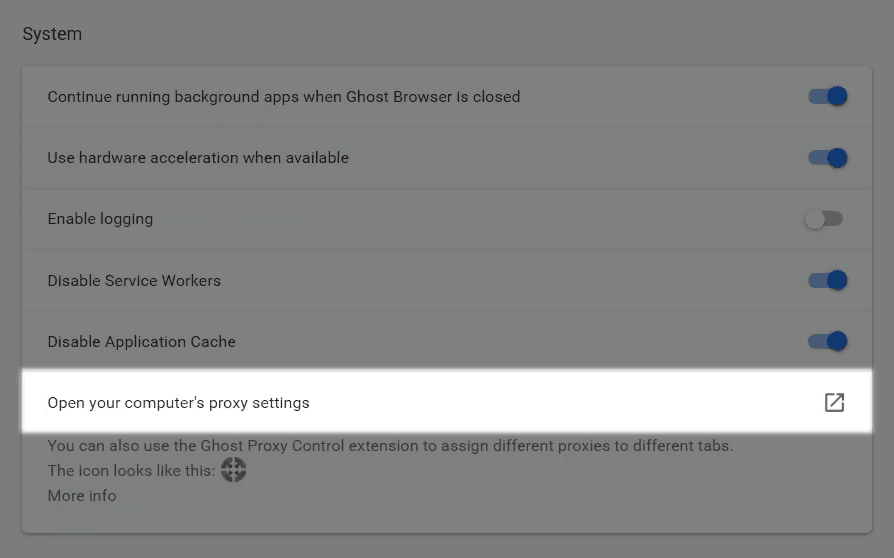
This will open the Windows system proxy settings window. There, you can enable manual configuration and enter the server address and port. After saving the changes, the browser must be restarted for the new settings to take effect.
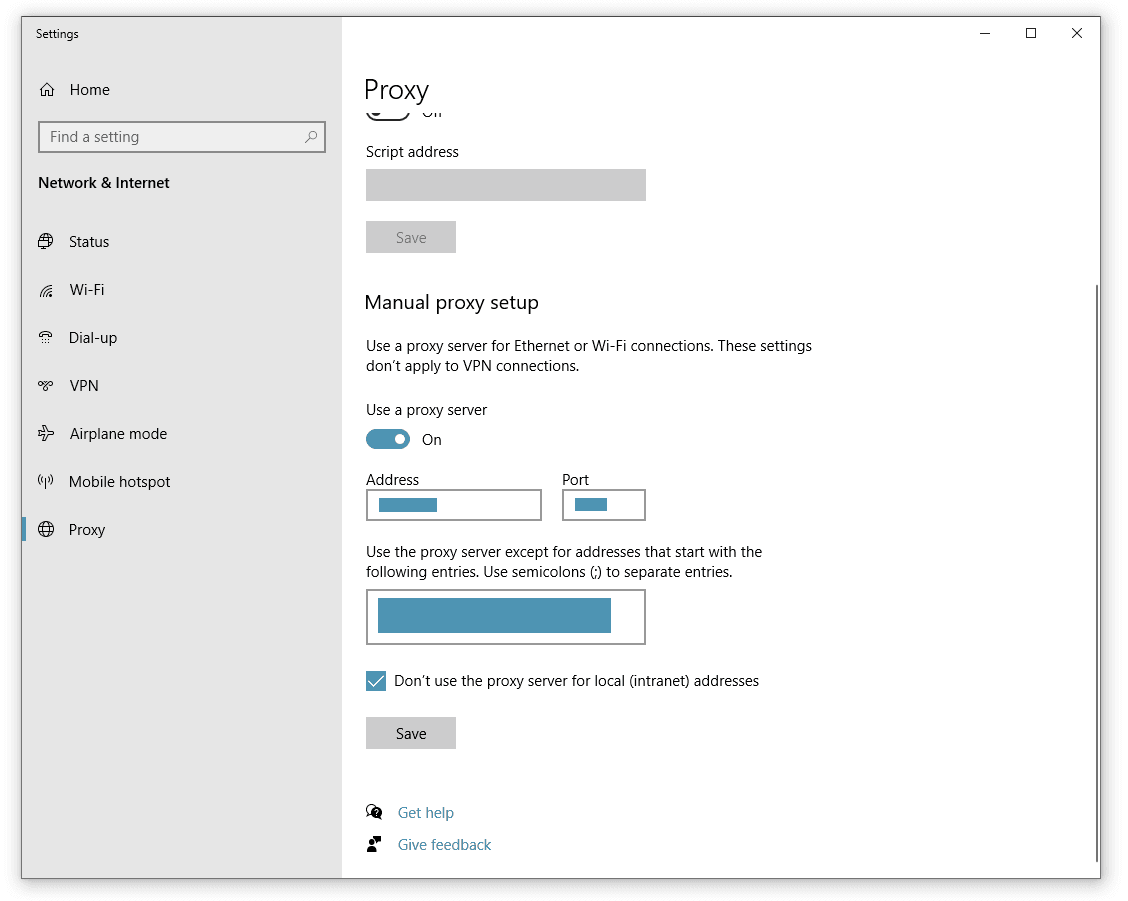
This method is suitable in cases where one connection should apply to the entire browser at once and no detailed session-level segmentation is required.
Setting Up Through macOS System Settings
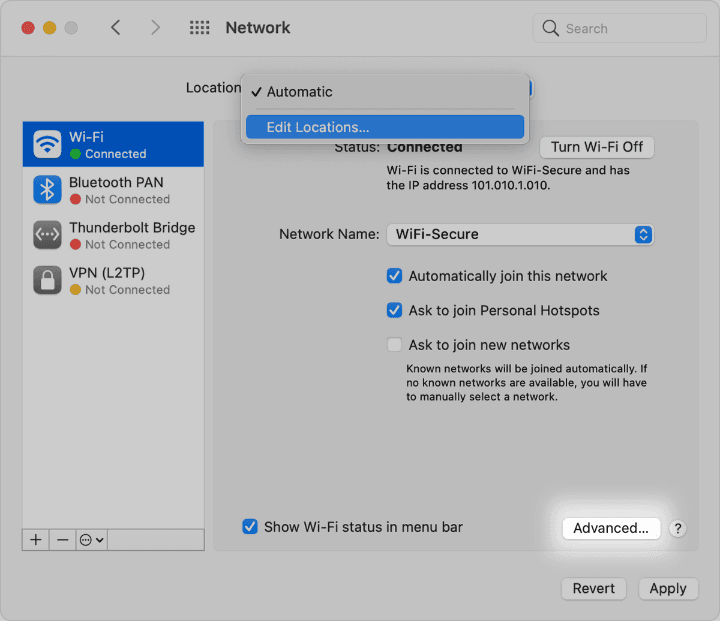
On macOS, the logic is similar: in Ghost Browser, open Settings, go to the advanced parameters, and in the System section choose to open the system network settings. The system will then redirect you to the Network section.
There, select the active connection, such as Wi-Fi or Ethernet, and open the additional settings using the Advanced button.
On the Proxies tab, different proxy types are available: HTTP, HTTPS, FTP, and SOCKS. After selecting the required option, enter the address, port, and, if needed, authentication details. Then save the settings by clicking OK and Apply, and restart the browser itself.
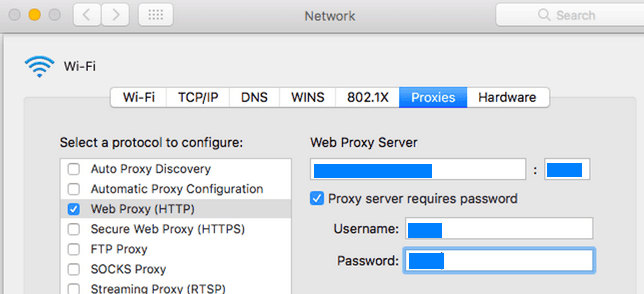
This option also works at the level of the entire system or a specific network interface, rather than for individual sessions inside Ghost Browser.
Common Issues and Ways to Check Them
When working with proxies in Ghost Browser, the three most common types of failures are authentication errors, connection timeouts, and configuration correctness issues. An authentication error is usually caused by incorrectly entered credentials. A timeout means the server is not responding or the connection is being blocked. Format errors occur when the structure of the proxy file is broken or the connection type is specified incorrectly.
For diagnostics, it is best to start with the built-in testing inside Ghost Browser itself. If the problem persists, the specific server should also be checked with external tools. This helps separate a browser configuration error from an issue with the connection itself.
It also makes sense to clear the cache and cookies periodically. During long-term use, old session data can interfere with proper testing and create the impression that the problem is related to the proxy, when the actual cause lies in the browser’s stored data.
Conclusion
Setting up a proxy in Ghost Browser is not just a matter of changing network parameters, but a way to create a controlled environment for parallel work. The browser allows both a basic system-wide configuration and a more flexible model with list imports, testing, automatic assignment, and manual overrides at different levels.