How to Set Up a Residential Proxy in Linken Sphere
 ·August 13, 2026·5 min read
Linken Sphere allows you to connect proxies when creating a new session and use either individual addresses or a proxy list for bulk import. The main setup is done in the session creation window: the user selects the connection type, enters the proxy parameters, checks the connection, and then launches the working environment. Below is a step-by-step guide covering both the basic setup of a single proxy and bulk import.
Antidetect + Residential Proxies
A reliable combination for multi-profile workflows.
Setting Up a Single Proxy in Linken Sphere
First, install Linken Sphere and sign in to your account. After launching the browser, proceed to create a new session. To do this, open the main window and select the option to create a new session. If a quick setup mode is available on the start screen, it is better to disable it so that you can manually specify all the required connection parameters.
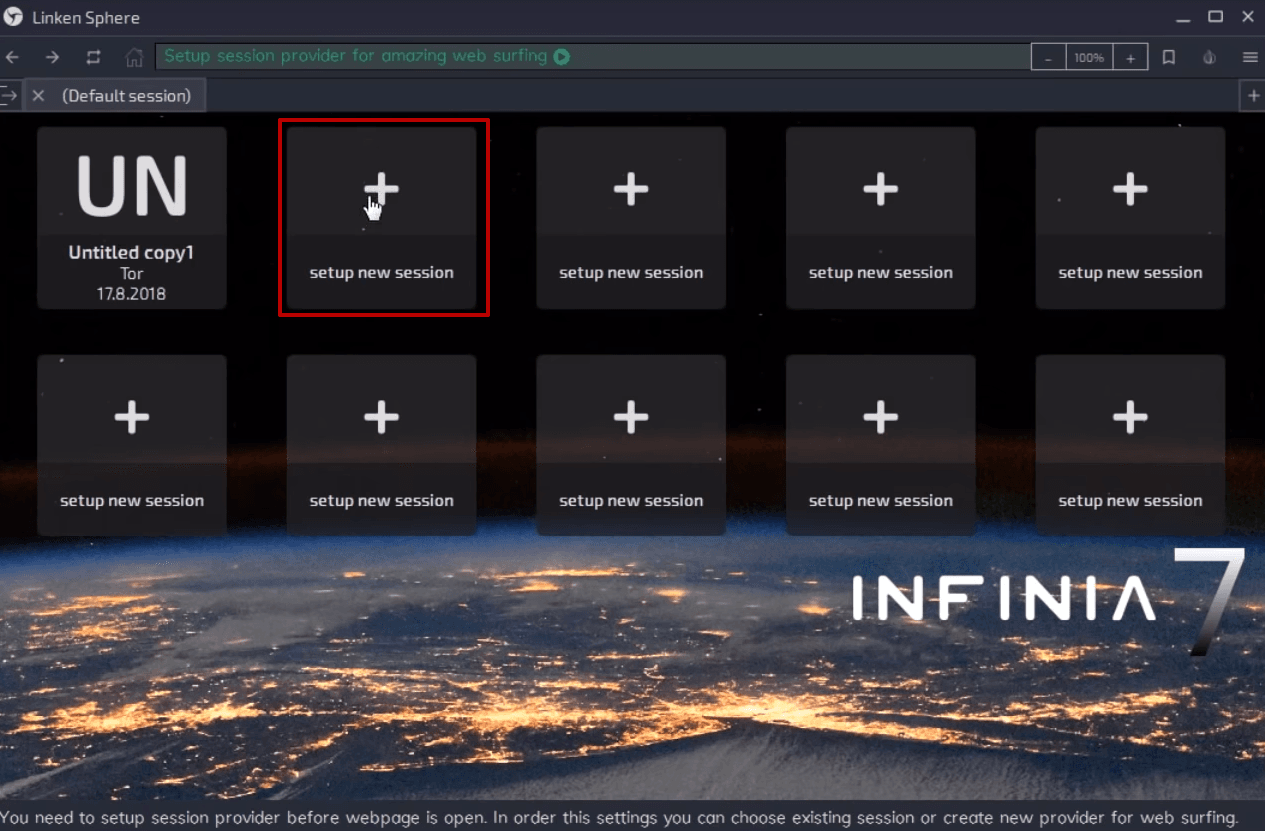
This will open the session configuration window. At the first stage, you can specify the profile name and, if necessary, add a description or tags. This makes further navigation easier, especially if there are many sessions and they are used for different tasks.
Next, go to the connection settings.
Protocol Selection and Data Entry
In the network settings section, you need to select the required protocol. Depending on the parameters of the proxies you use, this may be HTTP or SOCKS5.
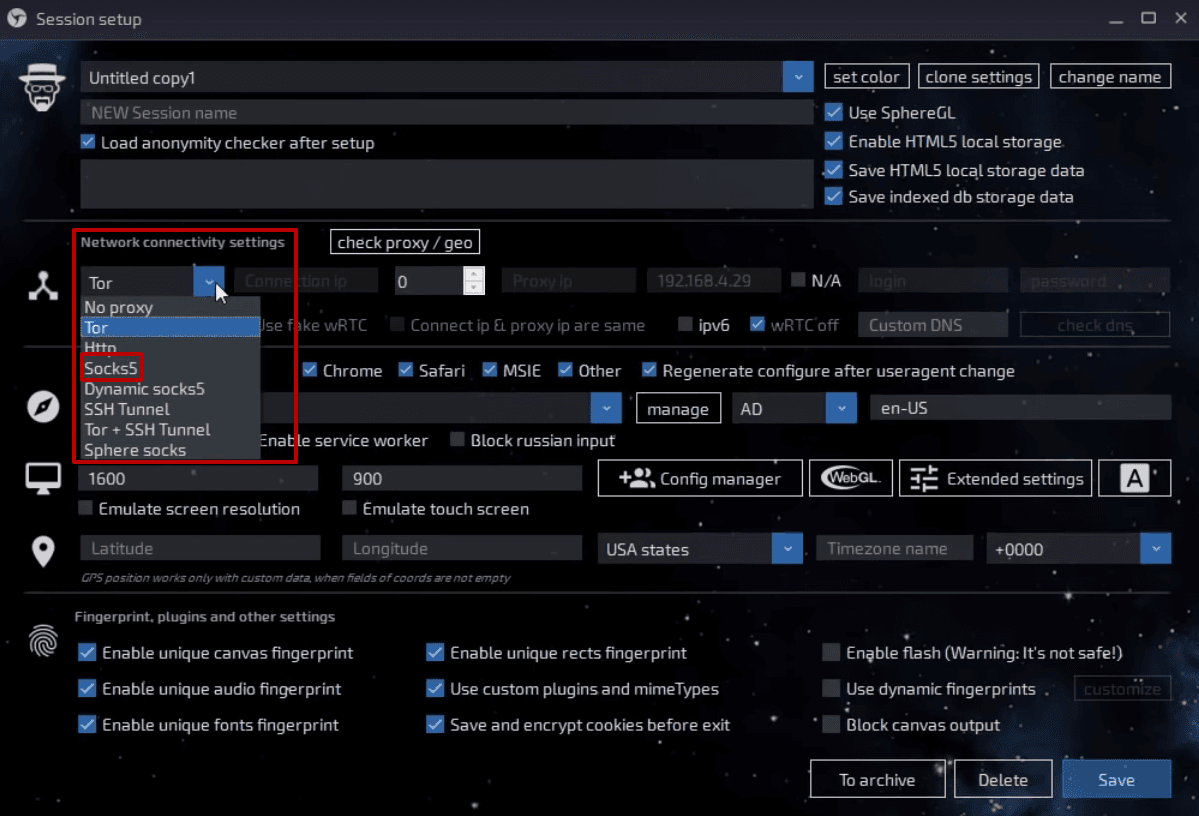
After selecting the protocol, fill in the main fields:
- IP address
- port
- username
- password
This information can be found on our website.
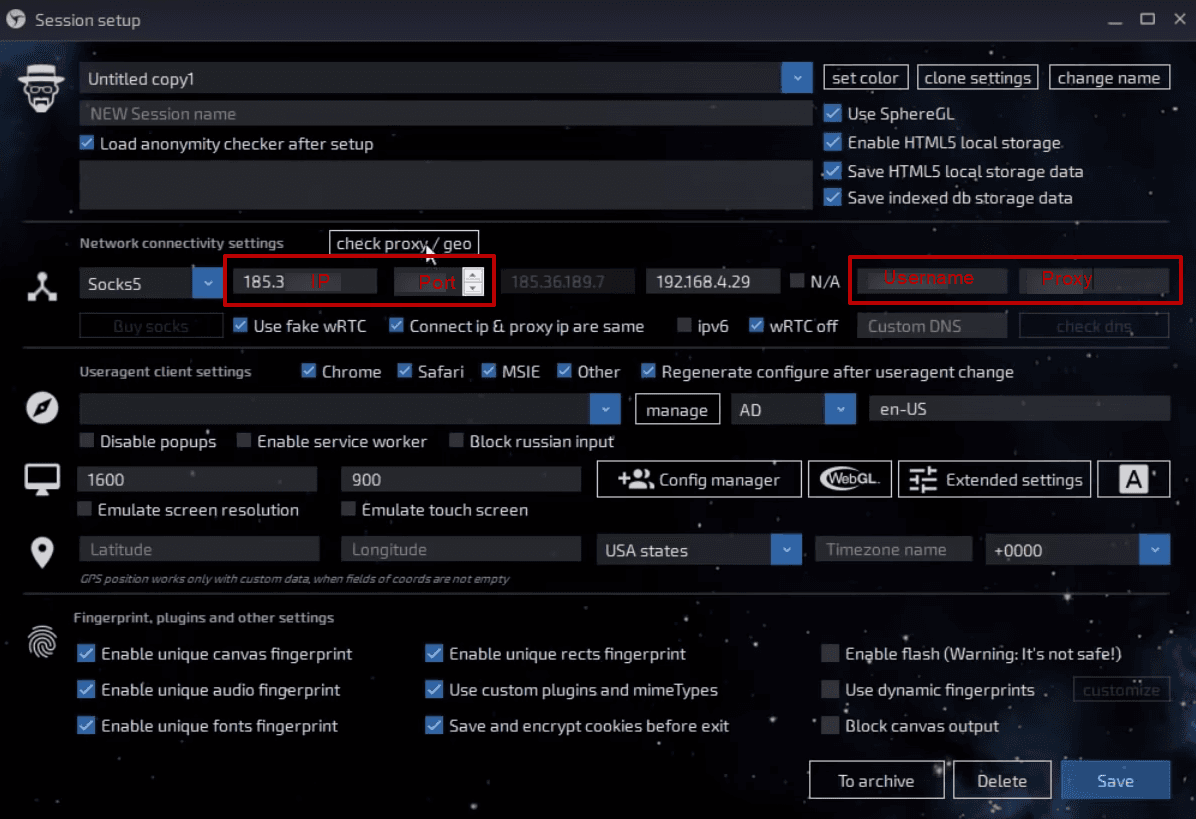
In some configurations, Linken Sphere also supports a single address field where the parameters are inserted as one line. The usual format is one in which the IP address, port, login, and password are separated by colons.
Before saving the configuration, it is worth carefully checking all values. At this stage, errors most often occur because of extra spaces, an incorrect port, a wrong login, or a mismatch between the selected protocol and the proxy parameters.
Connection Check
After entering the data, run the check using the proxy and geodata verification button.
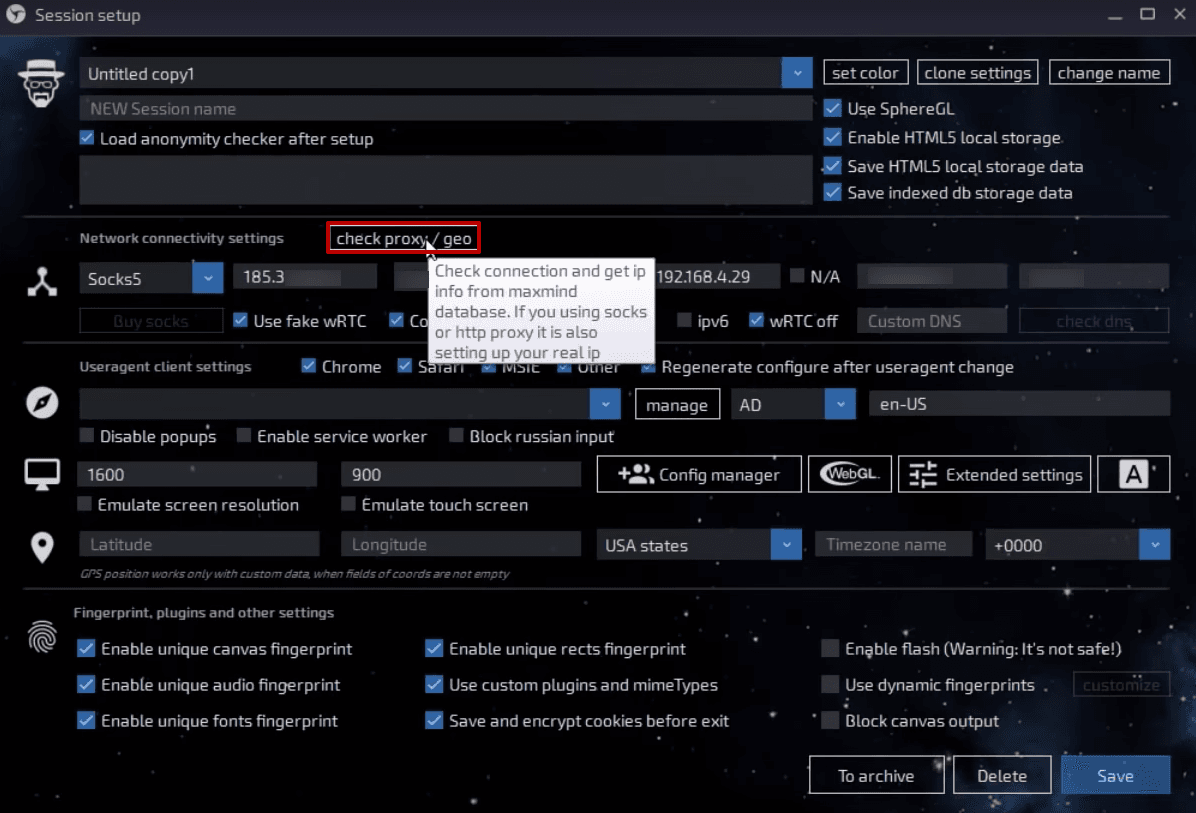
If the parameters are entered correctly, the system will confirm the connection and display region information. This is the main indicator that the proxy has been recognized and is ready for use in the session.
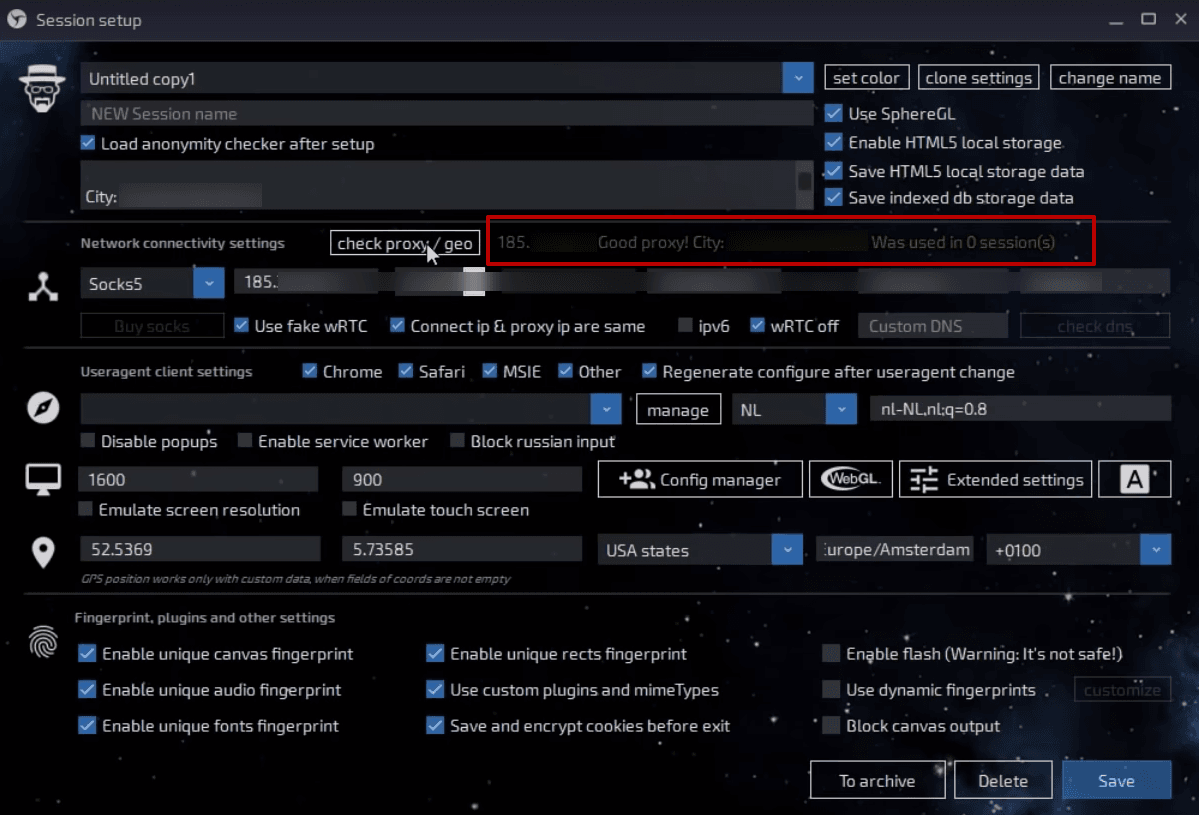
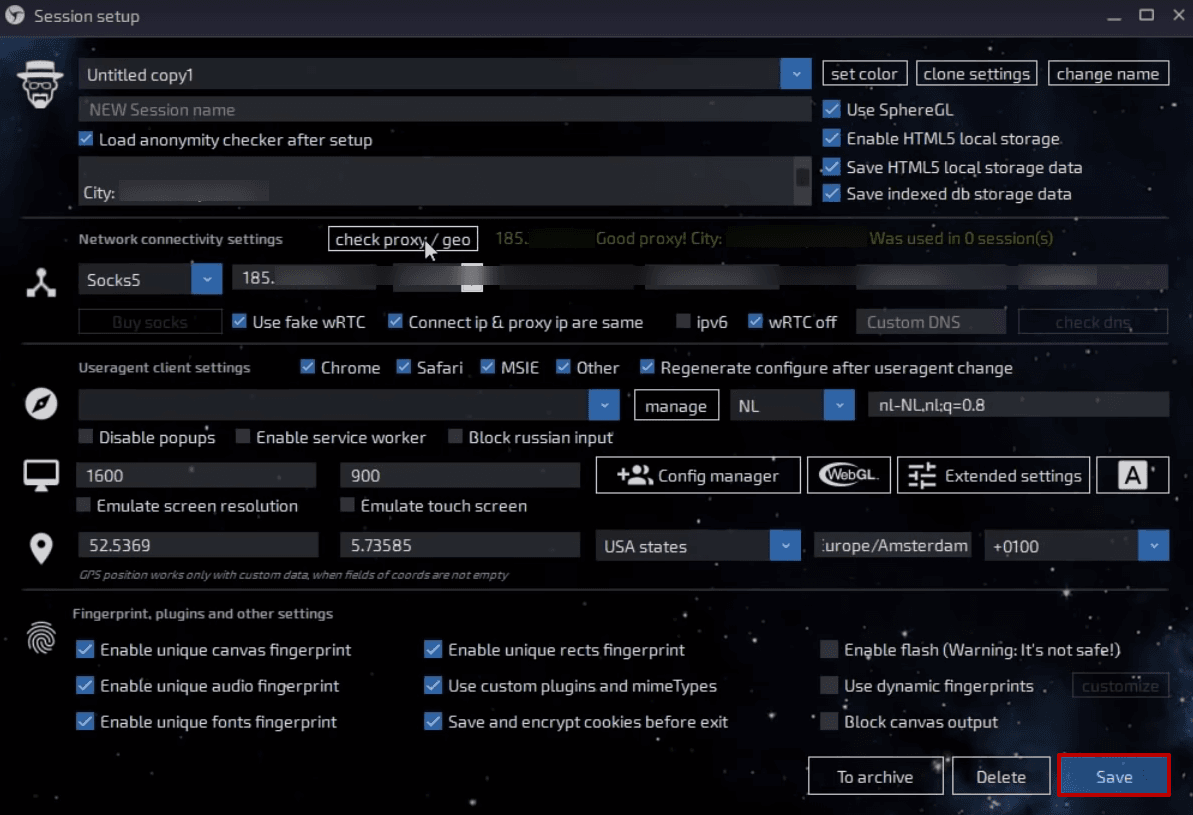
If the check ends with an error, first recheck the address, port, login, and password fields. It also makes sense to make sure that the correct proxy type has been selected. After a successful check, the settings can be saved.
Bulk Proxy Import
If you need to prepare several sessions with different addresses at once, it is more convenient to use bulk import. To do this, you first need to prepare a text file containing the list of proxies. Each proxy is specified on a new line in a single format: address, port, login, and password.
When the file is ready, you can use the bulk import function in the main Linken Sphere window.
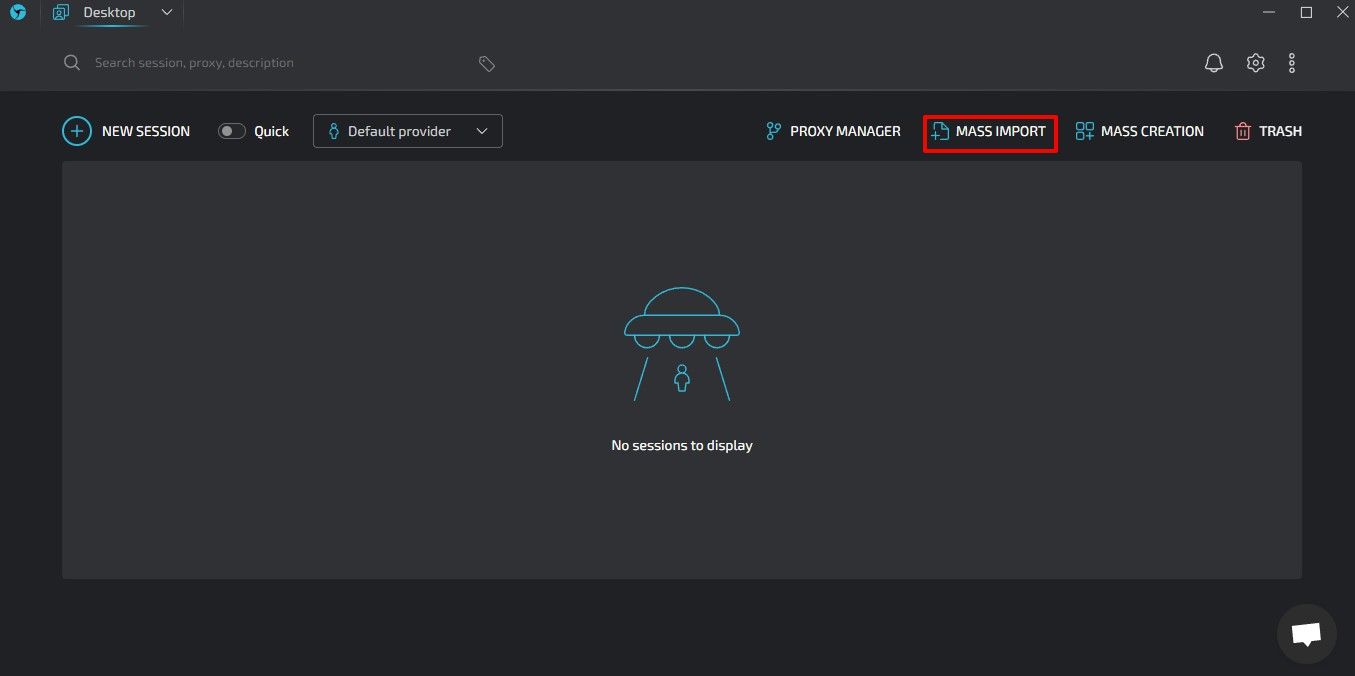
After selecting the file, the browser will add the proxy list to the system, which allows you to distribute them across sessions more quickly and avoid entering each address manually.
After the import, it is advisable to check the added proxies before starting work. This preliminary verification helps identify non-working entries, formatting errors, or outdated parameters in advance and avoids wasting time fixing them during session launch.
Conclusion
Setting up a proxy in Linken Sphere comes down to several main actions: creating a new session, selecting the protocol, entering the connection parameters, checking the connection, and saving the configuration. At the same time, the browser supports both one-time proxy connection within a specific session and bulk import of lists for working with several addresses at once.