How to Set Up a Proxy in Telegram
 ·September 27, 2026·5 min read
Telegram supports using proxies directly in the app, so there is no need to install a separate program for the connection. All you need to do is purchase a proxy, obtain the connection details, and enter them in Telegram's settings.
In this guide, we will look at how to use static datacenter IPv4 proxies from Node Proxy with Telegram: where to buy a proxy on the website, how to obtain the connection details, and where to enter them in Telegram on a computer or smartphone.
We will also cover the choice of protocol separately. Telegram supports SOCKS5 and HTTP proxies depending on the client, so when purchasing a proxy from Node Proxy, you can choose the appropriate option. Telegram's official documentation confirms that proxy settings are available in both mobile and desktop apps, while Telegram Desktop specifically provides HTTP and SOCKS5 connection options.
What Is a Static Datacenter IPv4 Proxy?
A datacenter proxy is a proxy server hosted in a datacenter infrastructure. In this case, we are talking about a static IPv4 address that remains assigned to the user for the entire paid period.
This differs from rotating proxy scenarios, where the IP address being used may change periodically. With a static proxy, the address remains the same for as long as the rental period is active.
For Telegram, this option can be convenient if the application needs to connect through the same IP address consistently.
Node Proxy datacenter proxies are rented by time. When purchasing a proxy, the user selects the GEO, number of IP addresses, and rental period in advance. You can order from 1 to 1,000 IP addresses for a period ranging from one month to one year.
The purchased addresses remain static throughout the rental period, while the amount of traffic transferred through datacenter proxies is not limited.
The usage model is therefore quite simple:
choose GEO → choose the number of IPs → choose the rental period → receive static IPv4 addresses → add the required address to Telegram.
Datacenter and Residential proxies
For Telegram and not only
Where to Buy a Datacenter IPv4 for Telegram
To purchase a proxy, go to the Node Proxy panel:
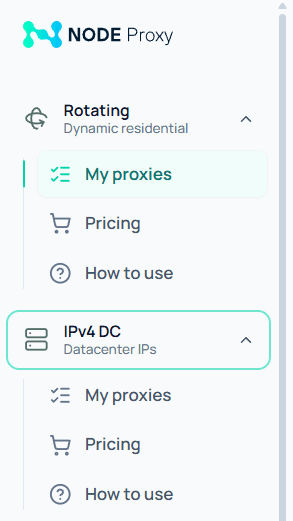
The sidebar contains separate sections for different types of connections. Residential and datacenter proxies are listed separately.
For this guide, you need to open the datacenter proxies section.
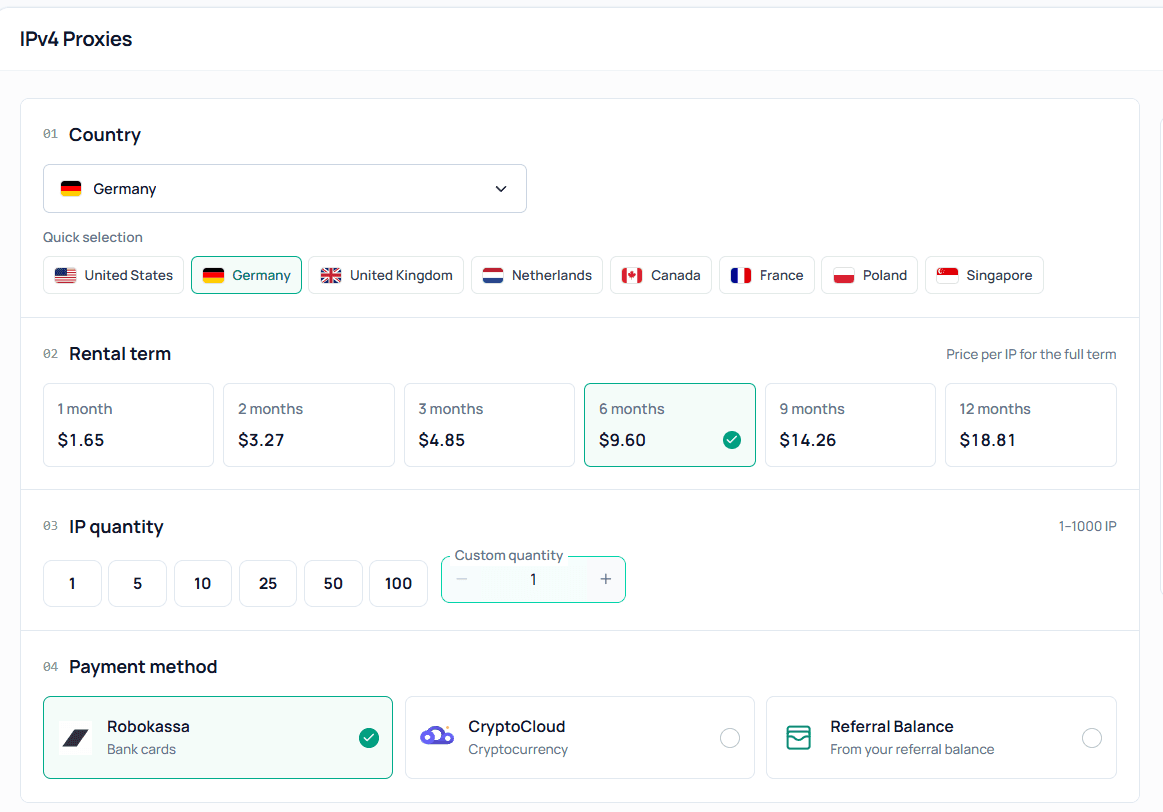
After that, select your order parameters.
1. Choose the GEO
First, determine which region should be used for the connection. GEO affects the region associated with the IP addresses you purchase.
For example, you can select the United States, Germany, the United Kingdom, or another available region.
For Telegram, GEO selection can be relevant if the connection needs to use an IP address from a specific country.
2. Choose the Number of IPs
If you need one permanent proxy for Telegram, purchasing 1 IP address is enough.
If you need to prepare several connections or have multiple separate addresses, you can select a larger number of IPs — up to 1,000.
3. Choose the Rental Period
Node Proxy datacenter proxies are paid for according to the usage period. The available period ranges from one month to one year.
After selecting the parameters, the system will display the order price. Once the payment is completed, the purchased IP addresses will become available in the Node Proxy panel.
Where to Get the Connection Details
After purchasing the proxy, open your purchased proxies in the Node Proxy panel.
To configure the connection in Telegram, you will need the details of the specific proxy:
- IP address or hostname;
- port;
- username;
- password.
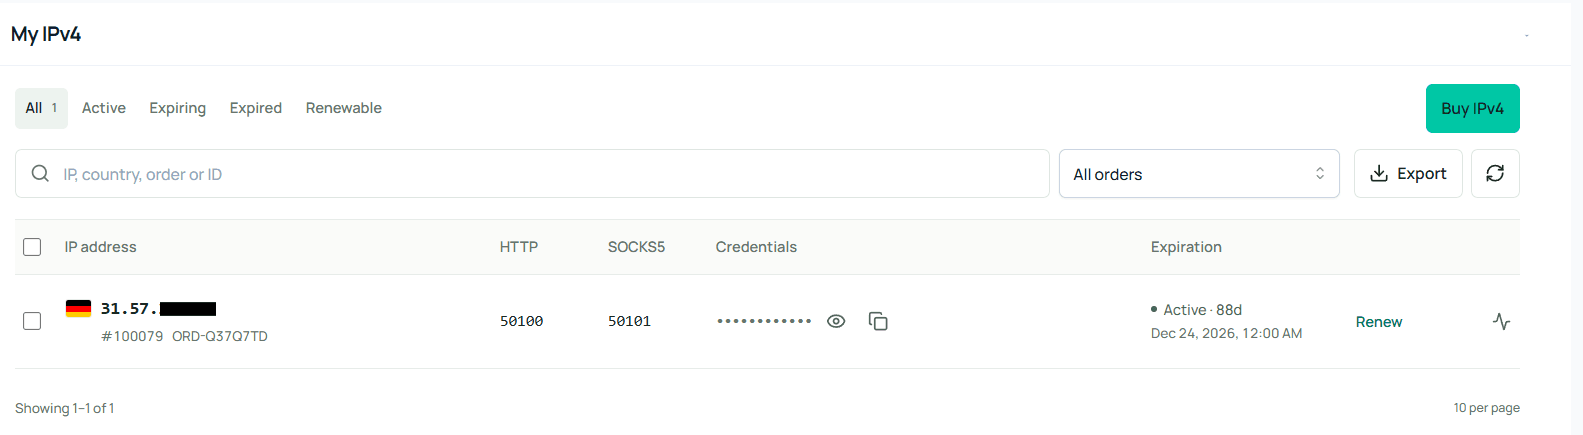
If you purchased several IPs, select the address you want to use for a particular Telegram connection.
It is important to keep the corresponding details together. The IP address should be entered in the server field, the port in the port field, and the username and password in the respective authentication fields.
Telegram supports proxies with a server and port and, depending on the connection type, authentication details. Telegram supports protocols such as SOCKS5 and MTProto, while specific clients, including Telegram Desktop, also support HTTP proxies.
SOCKS5 or HTTP: Which One Should You Choose?
Telegram can work with different types of proxies depending on the client being used. For our setup, you can use SOCKS5 or HTTP.
In Node Proxy, these options can be selected when obtaining the proxy connection details. For the same IP, the main connection details remain the same, while the protocol is determined by the port being used.
The logic is as follows:
IP / hostname + HTTP port → HTTP proxy
IP / hostname + SOCKS5 port → SOCKS5 proxy
Therefore, when configuring the connection, make sure to use the port corresponding to the selected protocol.
On a computer, Telegram Desktop directly provides HTTP with custom http-proxy and TCP with custom socks5-proxy options. The interface includes separate options for HTTP and SOCKS5, as well as fields for hostname, port, username, and password.
There is no need to purchase two different IPs just to choose between HTTP and SOCKS5: if both options are available for the purchased address in the Node Proxy panel, you only change the port being used, not the IP itself.
How to Set Up a SOCKS5 Proxy in Telegram
Let's start with SOCKS5.
On mobile devices, Telegram provides a dedicated proxy section. On Android, the path is:
Settings → Data and Storage → Proxy Settings
On iOS:
Settings → Data and Storage → Proxy
These paths are specified in Telegram's official documentation.
Next, add a new proxy and select SOCKS5.
Enter the data from the Node Proxy panel into the corresponding fields:
- Server → Node Proxy IP address
- Port → SOCKS5 port
- Username → username from the proxy details
- Password → password from the proxy details
After that, save the settings and enable the proxy.
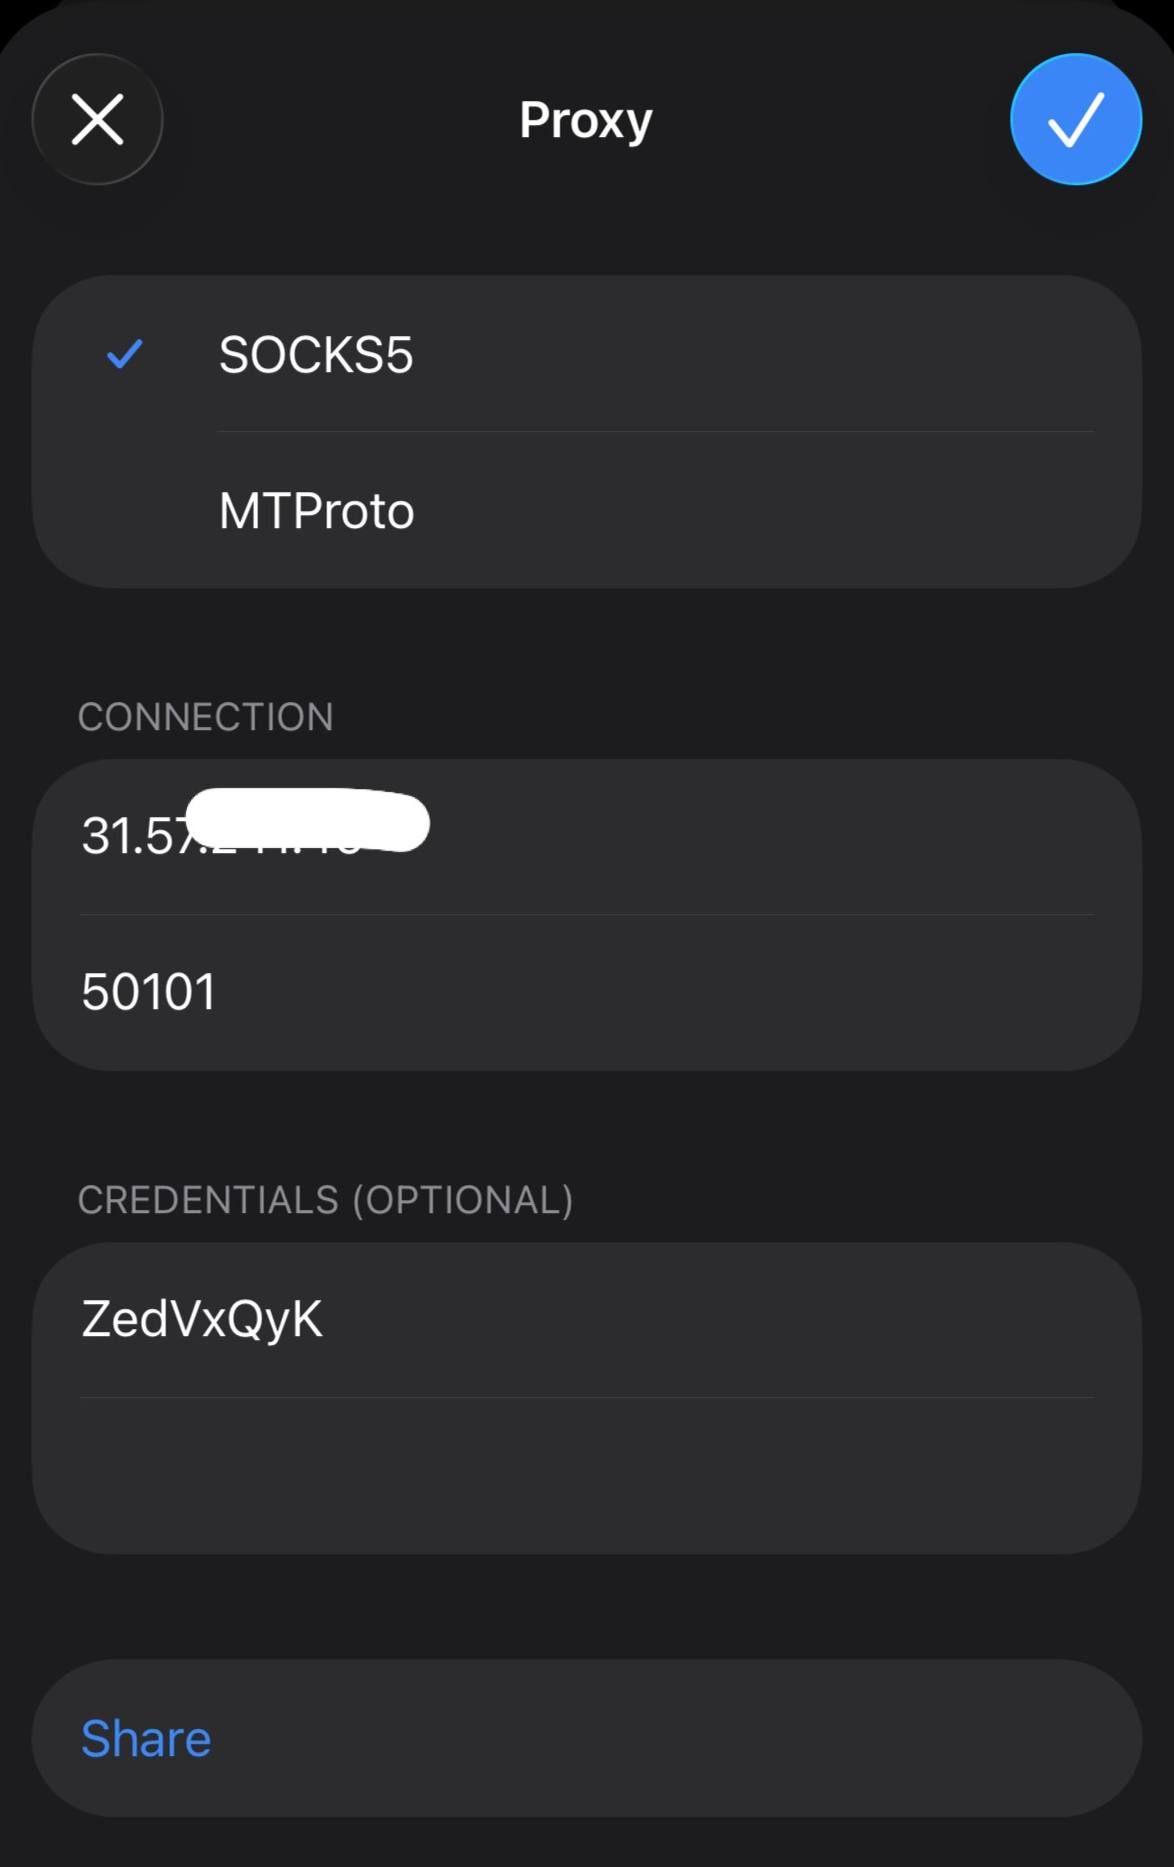
Telegram will check the connection to the server. If the connection is successful, the application will use the selected proxy.
Telegram's interface also provides an indicator showing that a proxy is being used. When the connection is active, a shield icon may appear at the top of the chat list.
How to Set Up an HTTP Proxy in Telegram
If you want to use HTTP, the configuration principle is practically the same.
On a computer, Telegram Desktop provides a separate HTTP with custom http-proxy option in the connection settings. It uses hostname, port, username, and password.
Open:
Settings → Advanced → Connection Type
Telegram's official English interface uses the name Connection type for this section.
Select the custom HTTP proxy option.
Then enter:
- Hostname — IP of the Node Proxy proxy;
- Port — HTTP port from the Node Proxy panel;
- Username — username;
- Password — password.
Save the settings.
Here it is especially important not to confuse the HTTP port with the SOCKS5 port. If you already have the IP address and authentication details, switching between protocols only requires using the corresponding port.
How to Configure a Proxy in Telegram Desktop
On a computer, the configuration is performed directly in Telegram Desktop.
Open:
Settings → Advanced → Connection Type
Telegram Desktop offers several connection options, including automatic mode, HTTP through a custom HTTP proxy, and TCP through a custom SOCKS5 proxy. The official English interface uses the labels Auto (TCP if available or HTTP), HTTP with custom http-proxy, and TCP with custom socks5-proxy.
Select the required option.
If You Use SOCKS5
Enter:
- Hostname — Node Proxy IP;
- Port — SOCKS5 port;
- Username — username;
- Password — password.
If You Use HTTP
Select:
HTTP with custom http-proxy
and enter:
- Hostname — Node Proxy IP;
- Port — HTTP port;
- Username — username;
- Password — password.
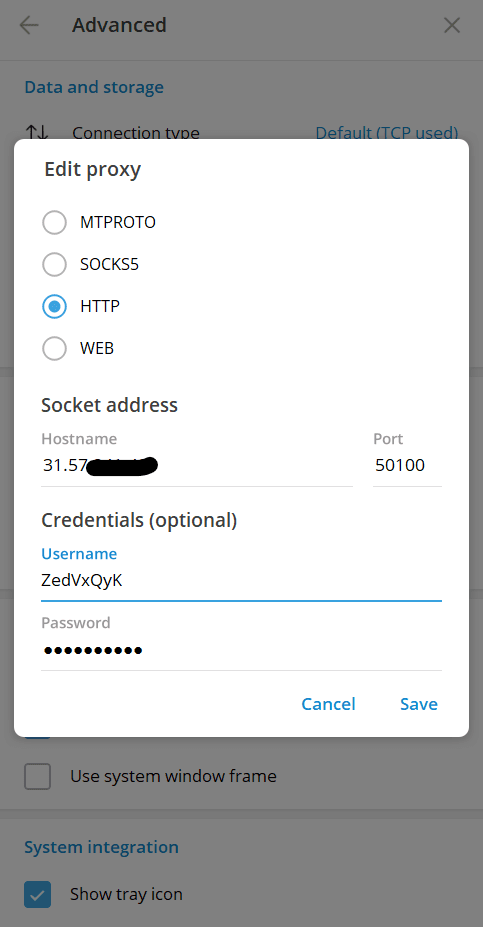
After saving, Telegram will try to establish a connection through the specified proxy.
How to Check the Connection
After saving the settings, Telegram should establish a connection through the proxy.
If everything works, you can continue using the application normally.
If there is no connection, check the parameters in the following order:
- Make sure the IP or hostname is correct.
- Make sure the port is correct.
- Check that the port corresponds to the selected protocol.
- Make sure the username and password are entered correctly.
- Make sure the purchased proxy is active.
- Make sure its rental period has not expired.
If you are using SOCKS5, SOCKS5 and its corresponding port must be selected. For HTTP, the same principle applies: use HTTP and its corresponding port.
Telegram also supports saving multiple proxies. The official interface includes Auto-switch proxies, which can automatically connect to another active proxy if the current one stops working. Telegram describes this feature as allowing the app to automatically connect to the nearest active proxy when the current one becomes unavailable.
This can be useful if you have purchased several static IPs and want to prepare backup connections in advance.
Why a Static IP Is Convenient for Telegram
The main difference with a static proxy is that the address remains constant.
After purchasing a datacenter IPv4 in Node Proxy, the IP is assigned to you for the entire rental period. It does not change with every new connection, so Telegram can be configured to use a specific address and continue using it later.
For scenarios where a consistent connection point is important, this can be more convenient than an IP address that changes constantly.
In addition, Node Proxy datacenter proxies are paid for the rental period, rather than by the amount of traffic used. They also have no traffic volume limit.
The resulting model is:
Static datacenter IPv4 → one assigned IP → selected protocol → Telegram.
What to Choose: HTTP or SOCKS5
Both options can be used depending on which protocol is more convenient in the particular Telegram client.
The IP itself remains the same. The difference is the port through which the client connects to the proxy.
Therefore, when configuring the connection, you do not need to change the GEO, purchase a new IP, or create a new order solely because you want to use a different protocol, provided that the required option is already available for the purchased proxy.
Conclusion
To set up a Node Proxy proxy in Telegram, all you need to do is select a suitable static datacenter IPv4, purchase it through the panel, and enter the connection details in the application settings.
In the Node Proxy panel, first open the datacenter proxies section, select the GEO, number of IPs, and rental period. After purchasing the proxy, open its connection details and select the protocol you want to use with Telegram.
Telegram supports SOCKS5, while Telegram Desktop also provides an option for configuring a custom HTTP proxy.
For Node Proxy proxies, the configuration principle is straightforward: one static IP can be used with the required protocol, while HTTP and SOCKS5 use their corresponding ports. Therefore, you only need to take the connection details from the panel, correctly enter the server, port, username, and password, and save the connection in Telegram.