How to Set Up a Residential Proxy in Octo Browser
 ·August 15, 2026·7 min read
Octo Browser allows you to connect proxies either individually or as a list, and then assign them to separate profiles. This is convenient if your workflow uses different runtime environments, independent profiles, and separate network settings for each task. All main actions are performed through the built-in Proxies and Profiles sections, so the setup does not require complex manual configuration.
Why Add Proxies to Octo Browser
In Octo Browser, proxies are used as part of a profile’s network settings. They help separate working environments, manage connections for different profiles, and centrally control connection parameters. The platform allows you to save proxies in the manager in advance, check their availability, and then quickly select the required option when creating a new profile.
A separate advantage is the ability to work not only with individual proxies, but also with bulk upload. This is useful when you need to prepare several profiles at once and do not want to spend time adding each entry manually.
Antidetect Works Better with Residential Proxies
Real IPs help every browser profile look more natural.
What Types of Proxies Does Octo Browser Support
When adding a proxy, Octo Browser prompts you to choose the connection type. The original instructions mention the following options:
• HTTP
• HTTPS
• SOCKS5
Before saving, it is important to specify the exact type that matches the parameters of the proxy you are using. An error at this stage may cause the connection to fail the check.
How to Add a Single Proxy in Octo Browser
A single proxy is configured through the built-in manager.
Procedure:
1. Open Octo Browser and sign in to your workspace.
2. Go to the Proxies section.

3. Click Add Proxy.

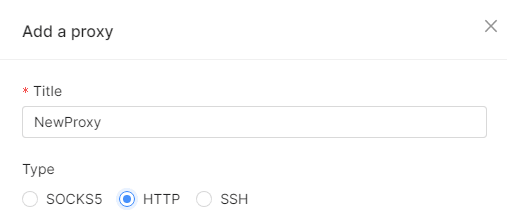
4. In the window that opens, specify the proxy name and type.
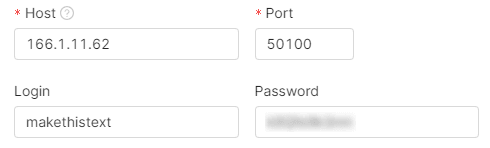
5. Fill in the main fields (this information can be found on our website node-proxy.com):
o IP Address / Host
o Port
o Username
o Password
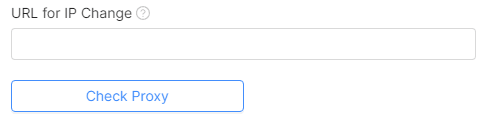
6. Click Check Proxy to test the connection.
7. If the check is successful, confirm the addition by clicking Confirm.
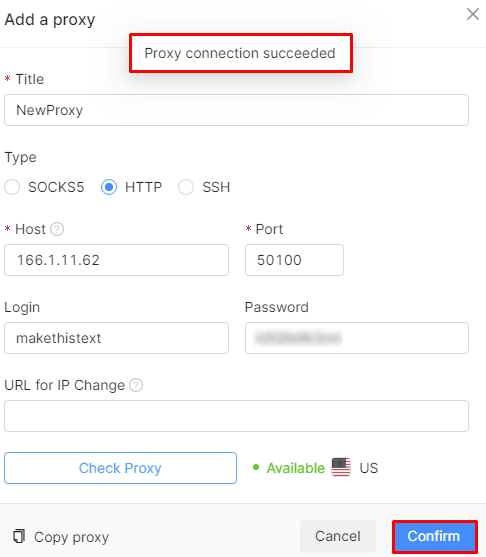
After that, the proxy will appear in the manager and become available for assignment to profiles.
If the connection fails, the proxy is marked as unavailable.
If the check does not pass, it is usually worth rechecking:
• the proxy type;
• the IP address or domain;
• the port;
• the username and password;
• the format of the inserted string.
It is better to run the check immediately after adding the proxy so that you do not have to look for the error later, already at the profile launch stage.
How to Assign a Proxy to a Profile
After saving the proxy in the manager, you need to link it to a specific profile.
How to do it
1. Open the Profiles section.

2. Click Create Profile.

3. Go to the connection settings.
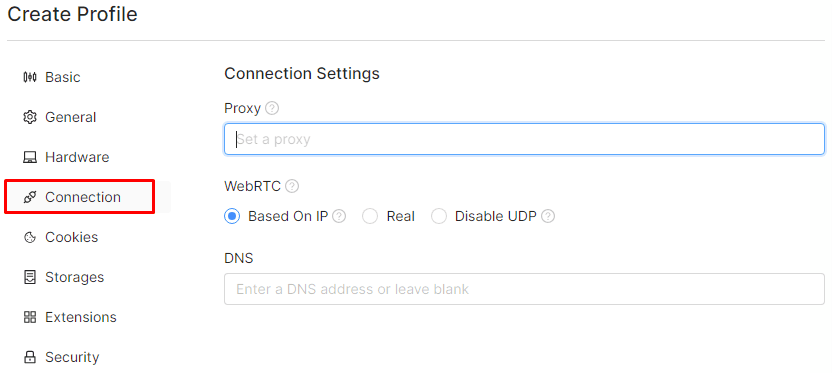
4. Specify one of two options:
o select a proxy that has already been added to the Proxy Manager;
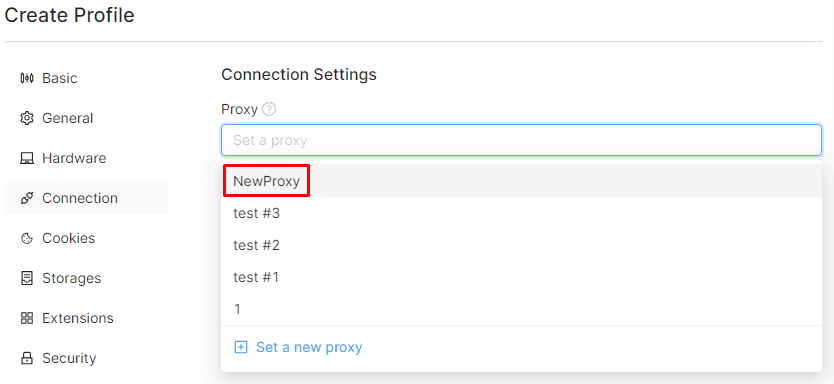
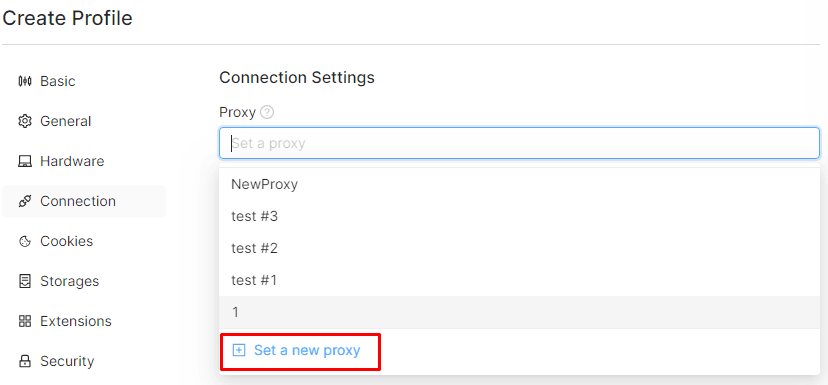
o set a new proxy directly while creating the profile.
5. Fill in the remaining profile parameters and click Create Profile.
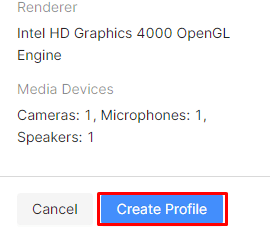
After creation, the profile will appear in the general list and will use the network connection assigned to it when launched.
Bulk Adding Proxies in Octo Browser
If you need to upload several proxies at once, Octo Browser provides a bulk import mode.
How to Upload a Proxy List:
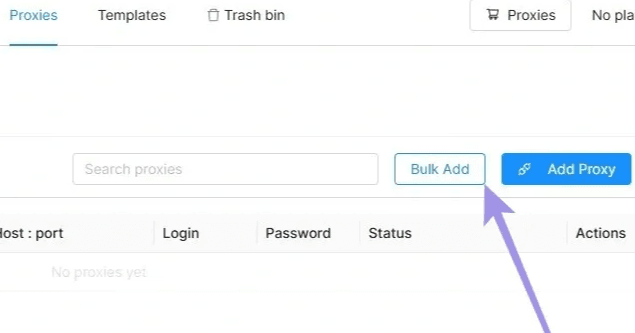
1. Go to the Proxies section.
2. Click Bulk Add.
3. Drag and drop the file with the proxy list.
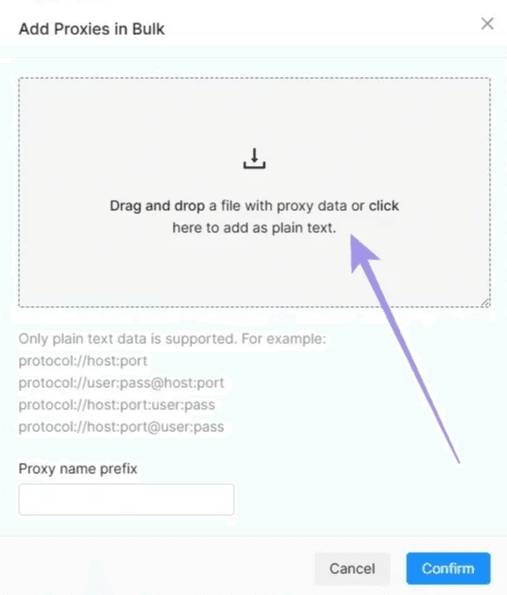
4. Confirm the import by clicking Confirm.
After that, all added entries will appear in the general list and will be available for selection in profiles.
Summary
In Octo Browser, proxy setup is organized quite straightforwardly: first, the server is added through Proxies, then checked and assigned to the required profile through Profiles. For individual connections, regular addition through Add Proxy is suitable, while for a large number of entries, import through Bulk Add is the better option.
If you work with multiple profiles, it is more convenient to organize the proxy list in advance: give the proxies clear names, check the connection, and only then use them in profiles. This approach simplifies navigation within the project and reduces the number of errors during launch.