Residential Proxy Setup Guide for ClonBrowser
 ·July 28, 2026·6 min read
ClonBrowser allows you to assign separate connection settings for each browser profile. A proxy can be added in advance to the general list or specified directly when creating a new profile.
Option 1. Adding a Proxy Through the Proxy Section
This method is suitable if you need to save the proxy in the system first and then assign it to one or more profiles.
Access the Internet Through Real Networks
Node Proxy uses residential proxies instead of datacenter IPs.
Step 1. Open the Proxy Section
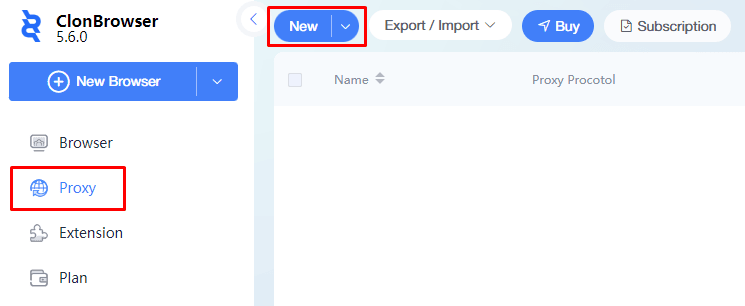
Launch ClonBrowser and go to the Proxy tab.
Click the New button to open the form for adding a new connection.
Step 2. Enter the Proxy Parameters
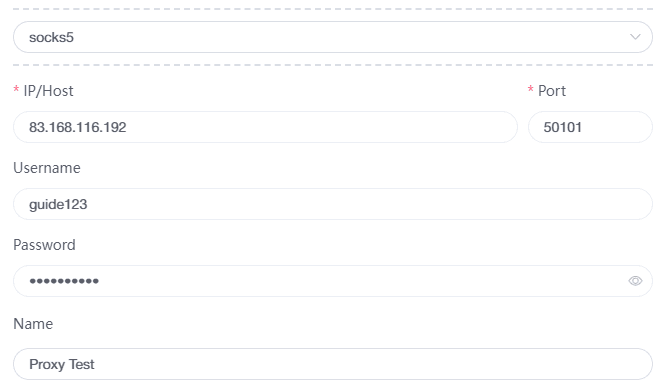
In the window that opens, fill in the main fields (this information can be found on our website node-proxy.com):
• Proxy Type — select the required protocol, for example SOCKS5;
• Proxy Host — specify the server address;
• Proxy Port — enter the port;
• Proxy User / Password — add the authorization data if required;
• Name — assign a name to the proxy so it is easier to find in the list.
Step 3. Test the Connection
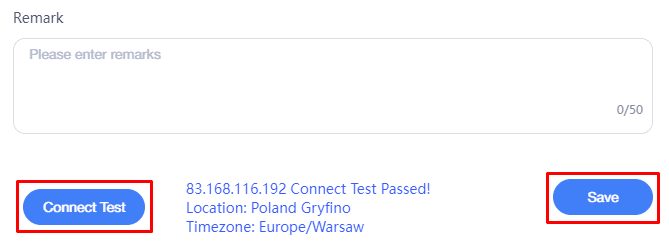
Click Connect Test. The test is needed to make sure the entered data is correct and the server is available.
If the test is successful, click Save. After that, the proxy will appear in the general list and will become available for assignment to profiles.
Option 2. Setting Up a Proxy When Creating a New Profile
This method is convenient if the profile has not yet been created and all parameters need to be specified at once.
Step 1. Create a New Profile
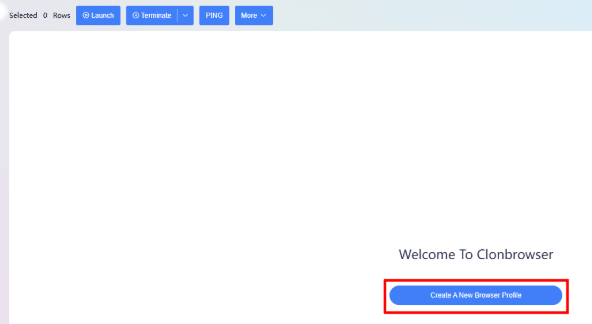
On the main screen, click Create a New Browser Profile.
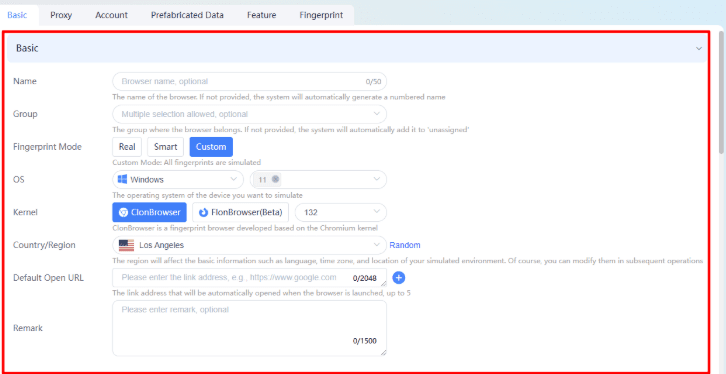
Step 2. Fill In the Main Profile Settings
In the creation window, specify:
• Name — the profile name;
• Browser — the browser engine type;
• OS — the operating system.
It is better to select the operating system that matches the one installed on the computer.
Step 3. Go to the Proxy Block
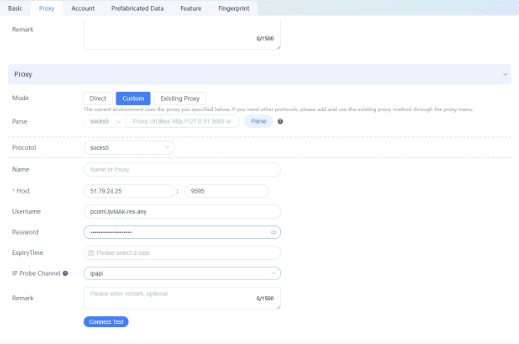
Open the Proxy section.
If manual entry is used, fill in the following fields:
• proxy type;
• server address;
• port;
• username and password.
Step 4. Run the Test
Click Connect Test and wait for the result. Saving the profile without testing the connection is not recommended.
Step 5. Save the Profile
After a successful check, click Create Browser. The new profile will appear in the general list.
How to Assign a Proxy to an Existing Profile
If the profile has already been created, the proxy can be connected separately.
Step 1. Open the Profile List
Go to the Browser tab.
Step 2. Select the Required Profile
Find the profile for which you need to change or assign a proxy.
Step 3. Open the Connection Settings
Click Set Proxy.
Step 4. Select a Proxy From the List
In the pop-up window, specify the required proxy and confirm the action by clicking Confirm.
How to Check the Result
After completing the setup, launch the profile using the Launch button. This will allow you to verify that the profile opens with the specified connection settings.
What Is Important to Consider
Before saving, it is always worth running Connect Test. This helps immediately identify errors in the address, port, or authorization data.
Conclusion
Proxy setup in ClonBrowser follows the standard workflow: adding the connection, checking the parameters, saving, and assigning it to profiles. A proxy can be assigned either at the stage of creating a new profile or later through the list of already created profiles.