How to Set Up a Residential Proxy in Genlogin
 ·August 8, 2026·7 min read
What Genlogin Is
Genlogin is an anti-detect browser designed for working with multiple accounts on a single device. The program allows users to create separate browser profiles with unique environment parameters: IP address, user-agent, system language, time zone, and other characteristics that websites use to identify users.
The browser is focused on tasks that require the separation of working environments and management of a large number of accounts. It is used in digital marketing, traffic arbitrage, SMM, e-commerce, SEO, and web task automation.
Among the key features of Genlogin:
• creating and managing multiple profiles;
• configuring the browser fingerprint;
• connecting proxies;
• automating actions;
• team collaboration;
• support for different browser engines.
Genlogin is available for Windows and macOS. The free plan allows the use of a limited number of profiles, while advanced features are available in paid plans.
Residential IPs for Antidetect Browsers
Build isolated browser profiles with real-user IP addresses.
Why Connect Proxies in Genlogin
Even when using an anti-detect browser, websites still analyze the user’s IP address. If multiple accounts operate from the same IP, this may lead to restrictions, additional verification checks, or bans.
Proxies make it possible to assign a separate IP to each profile. As a result, browser sessions become more independent from one another, and working with multiple accounts becomes more stable and predictable.
In Genlogin, you can:
• connect proxies individually;
• import proxy lists in bulk;
• use HTTP, HTTPS, and SOCKS5;
• test the connection before launching a profile.
Installing and Preparing Genlogin
Before configuring proxies, the browser itself must be prepared.
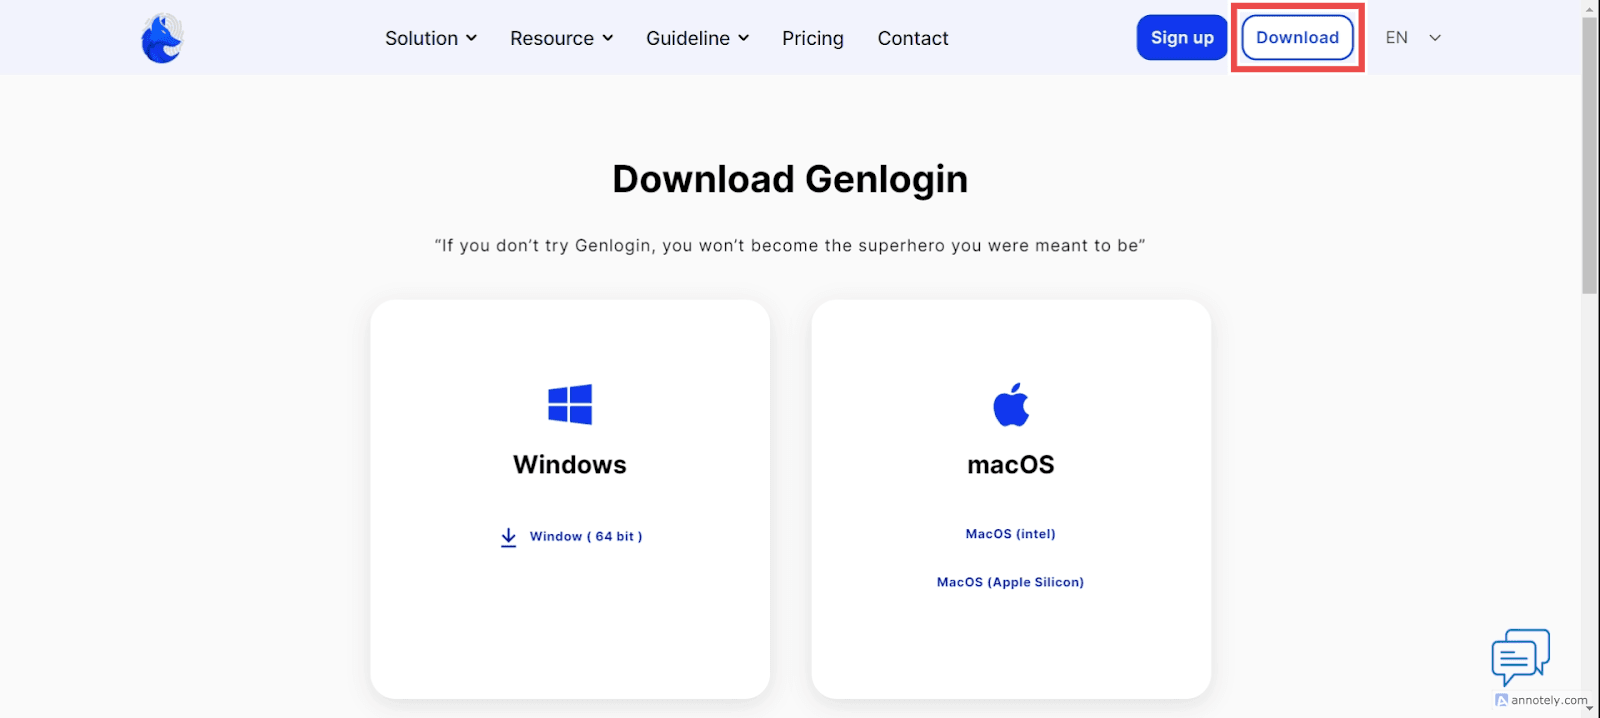
Download Genlogin from the official website and install the program on your computer. After launching it, you will need to create an account and sign in.
For stable operation, it is recommended to use:
• Windows 10 or newer, or macOS;
• at least 8 GB of RAM;
• a modern multi-core processor.
How to Add a Single Proxy in Genlogin
This method is suitable if you need to manually connect a proxy to a separate profile.
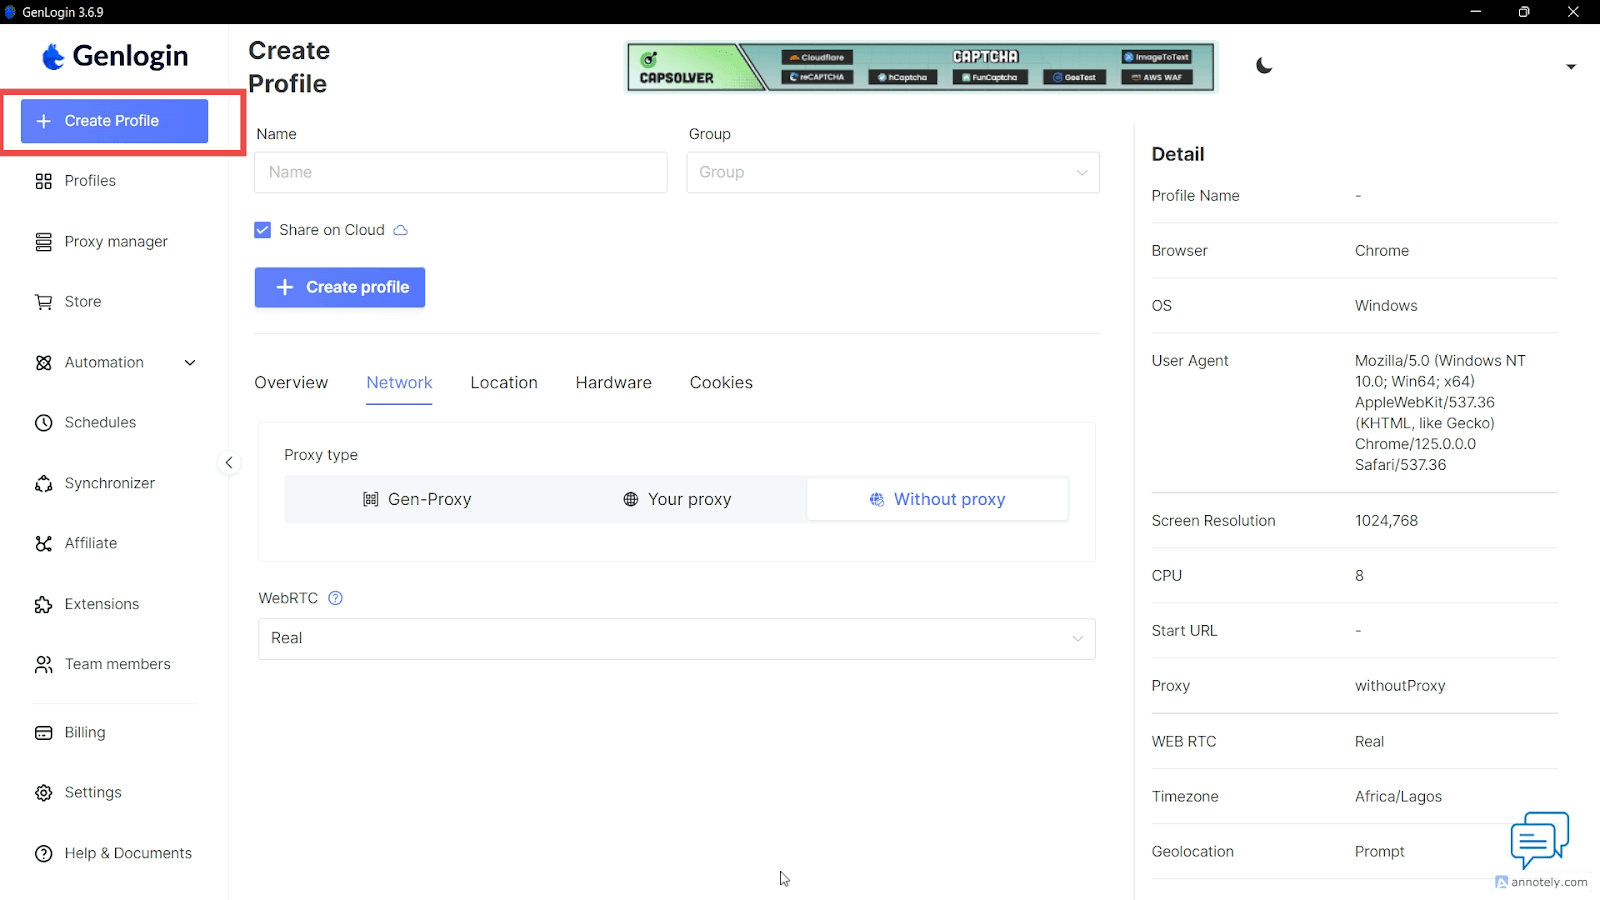
Step 1. Creating a Profile
In the browser interface, open the Create Profile section. Specify the profile name and basic parameters.
Step 2. Opening Proxy Settings
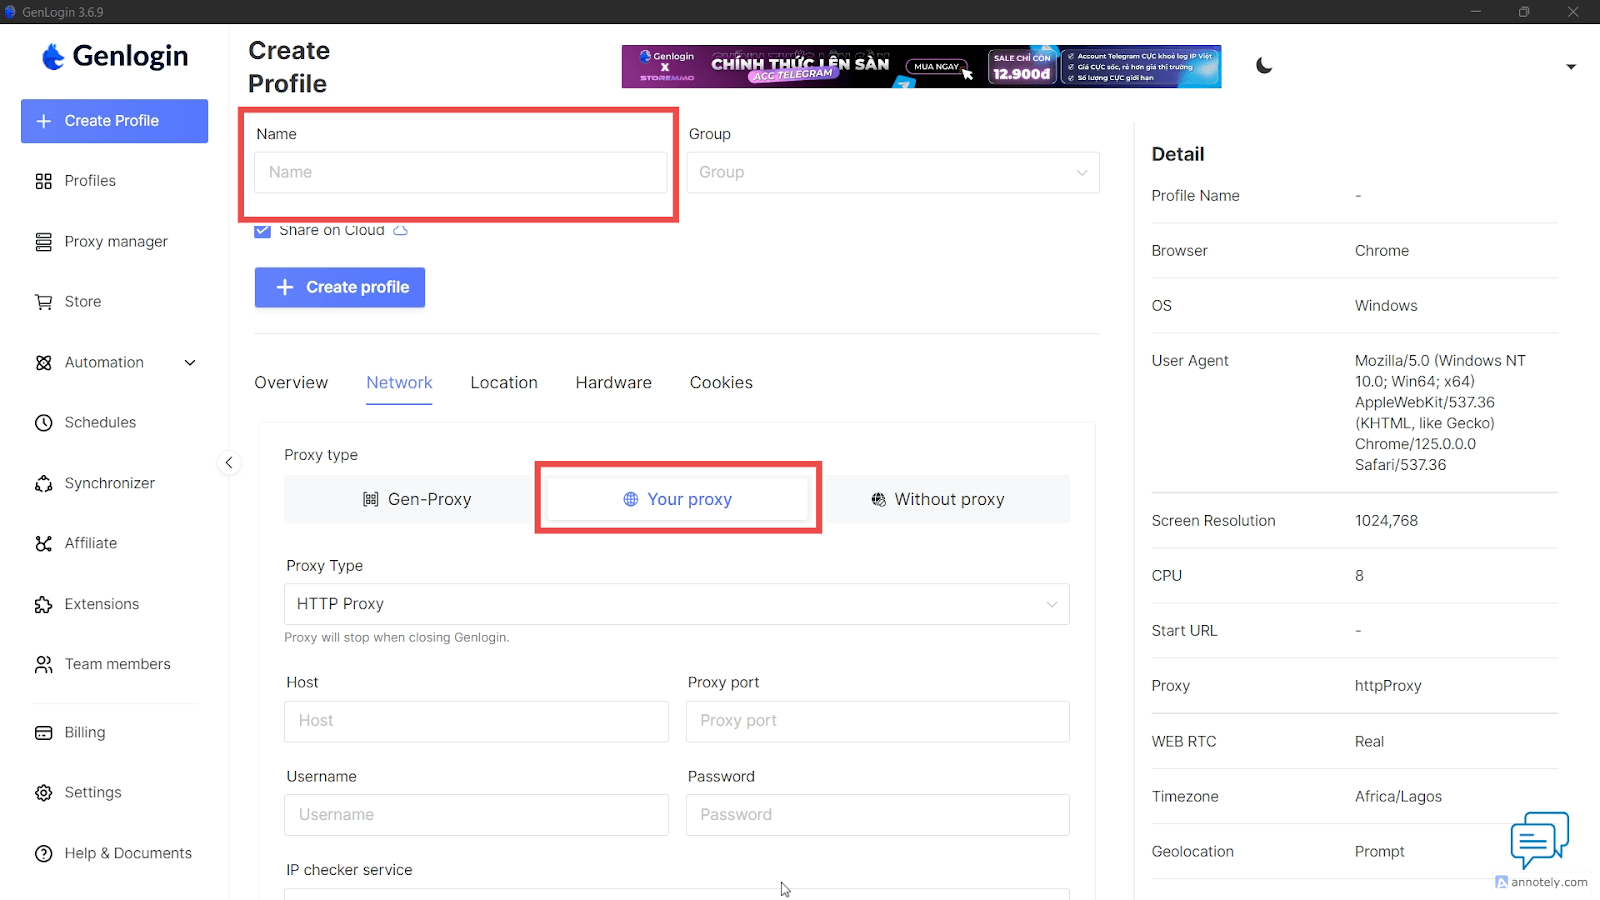
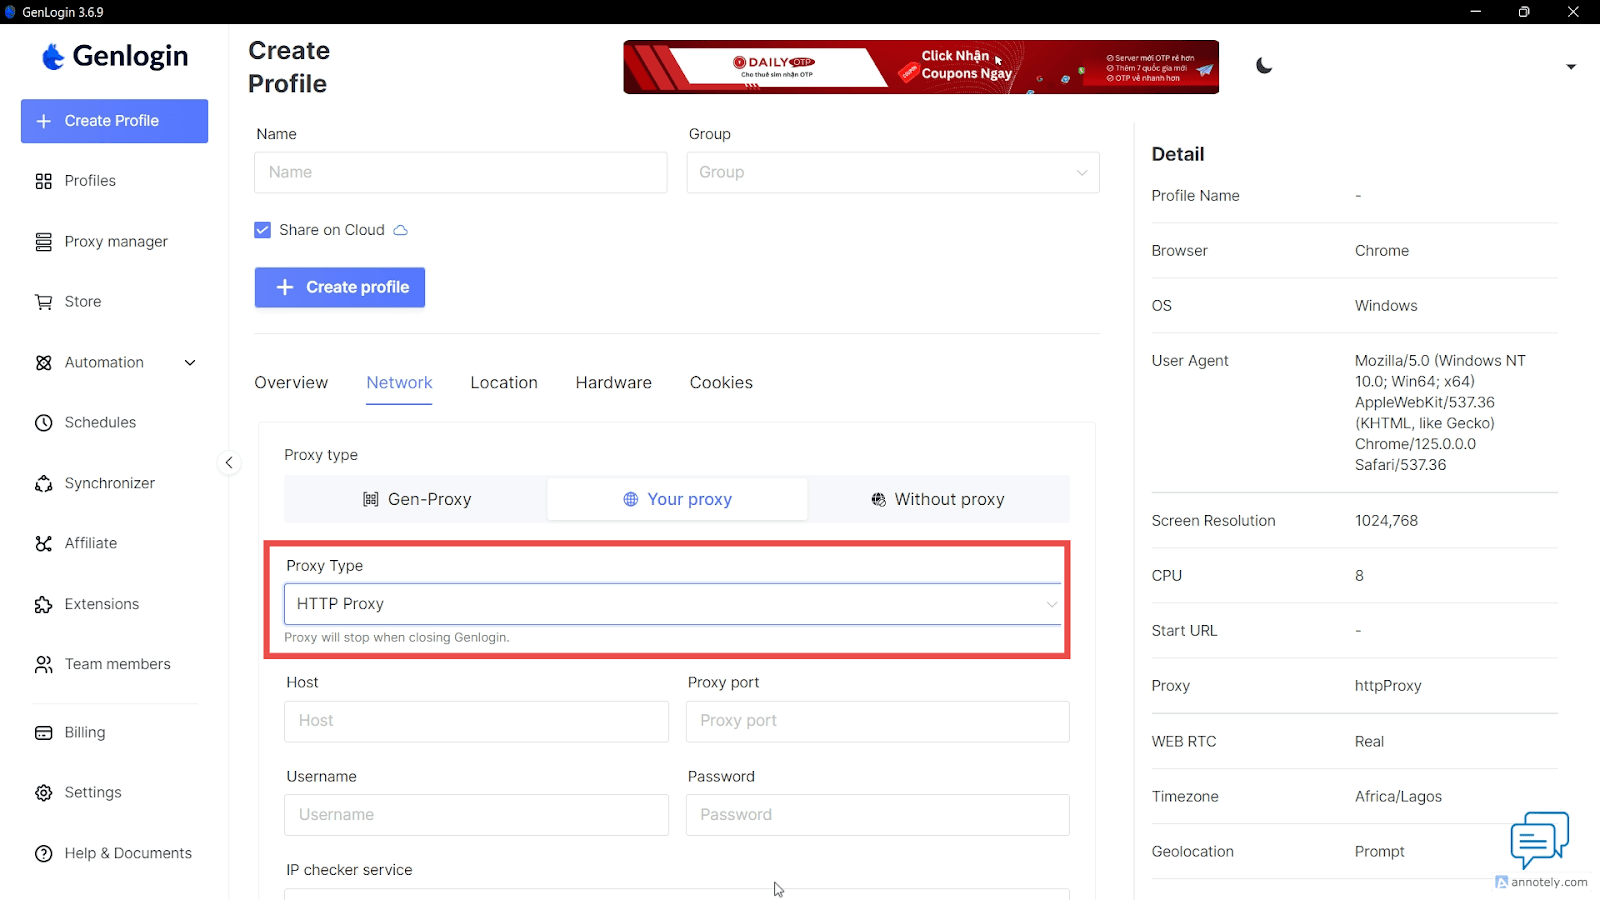
In the profile settings, open the network section and select the option to connect your own proxy — Your Proxy.
After that, a form for entering connection parameters will appear.
Step 3. Entering Proxy Data
Fill in the following fields:
• Host or IP;
• Port;
• Username;
• Password;
• connection type — HTTP or SOCKS5.
If a rotating proxy is used, the provider’s gateway domain name is usually specified instead of an IP address.
Step 4. Checking the Connection
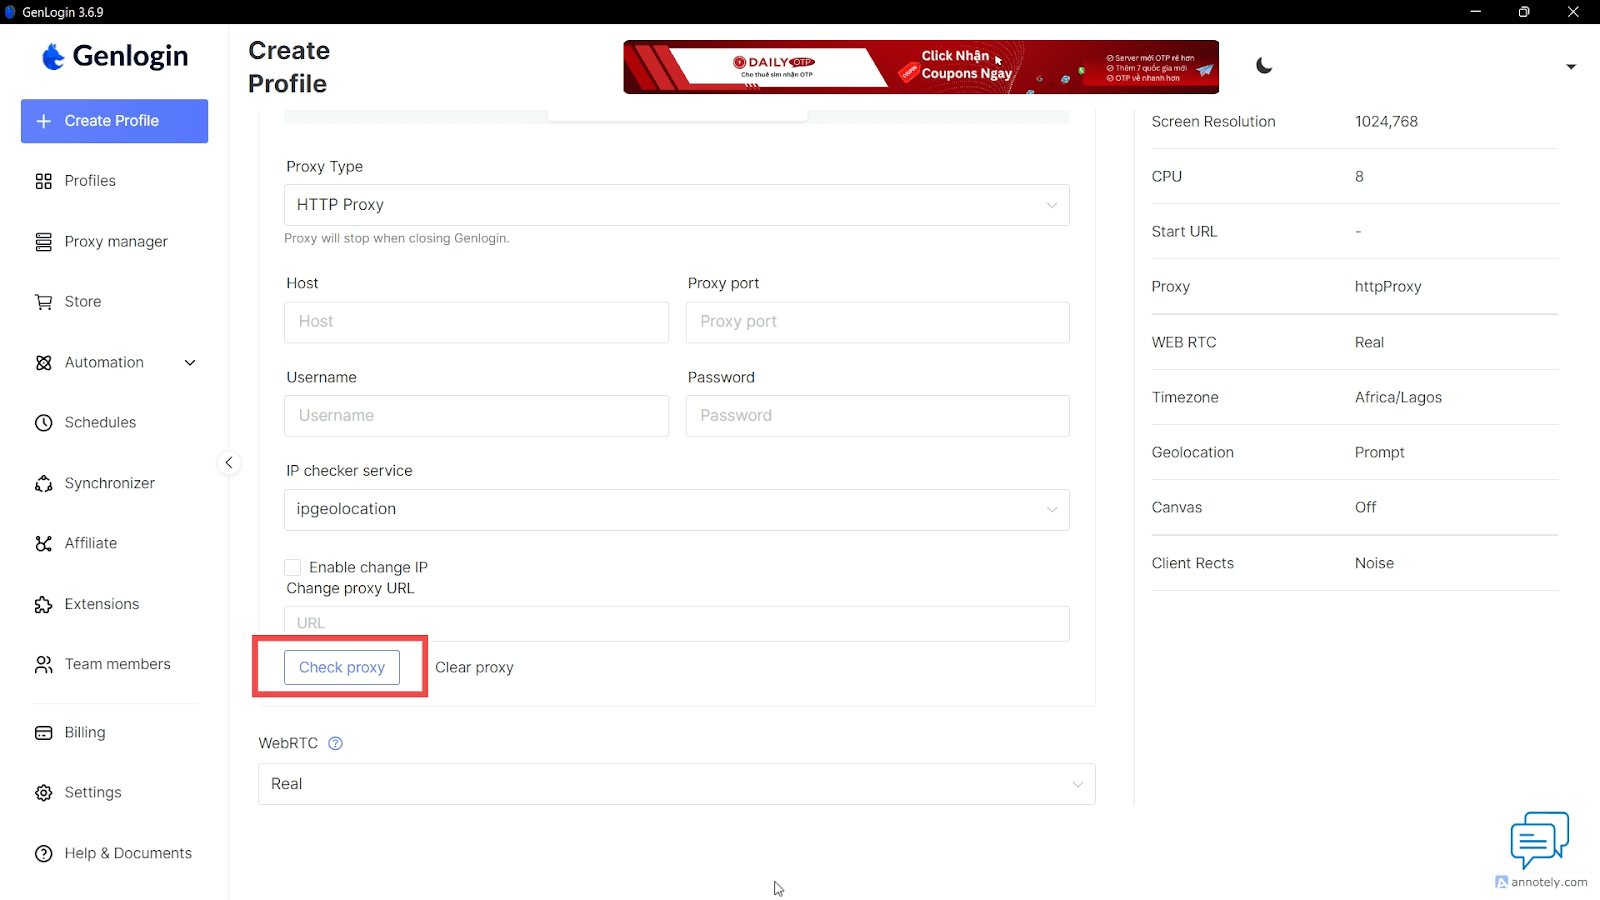
After entering the data, click Check Proxy. Genlogin will verify the connection availability and configuration correctness.
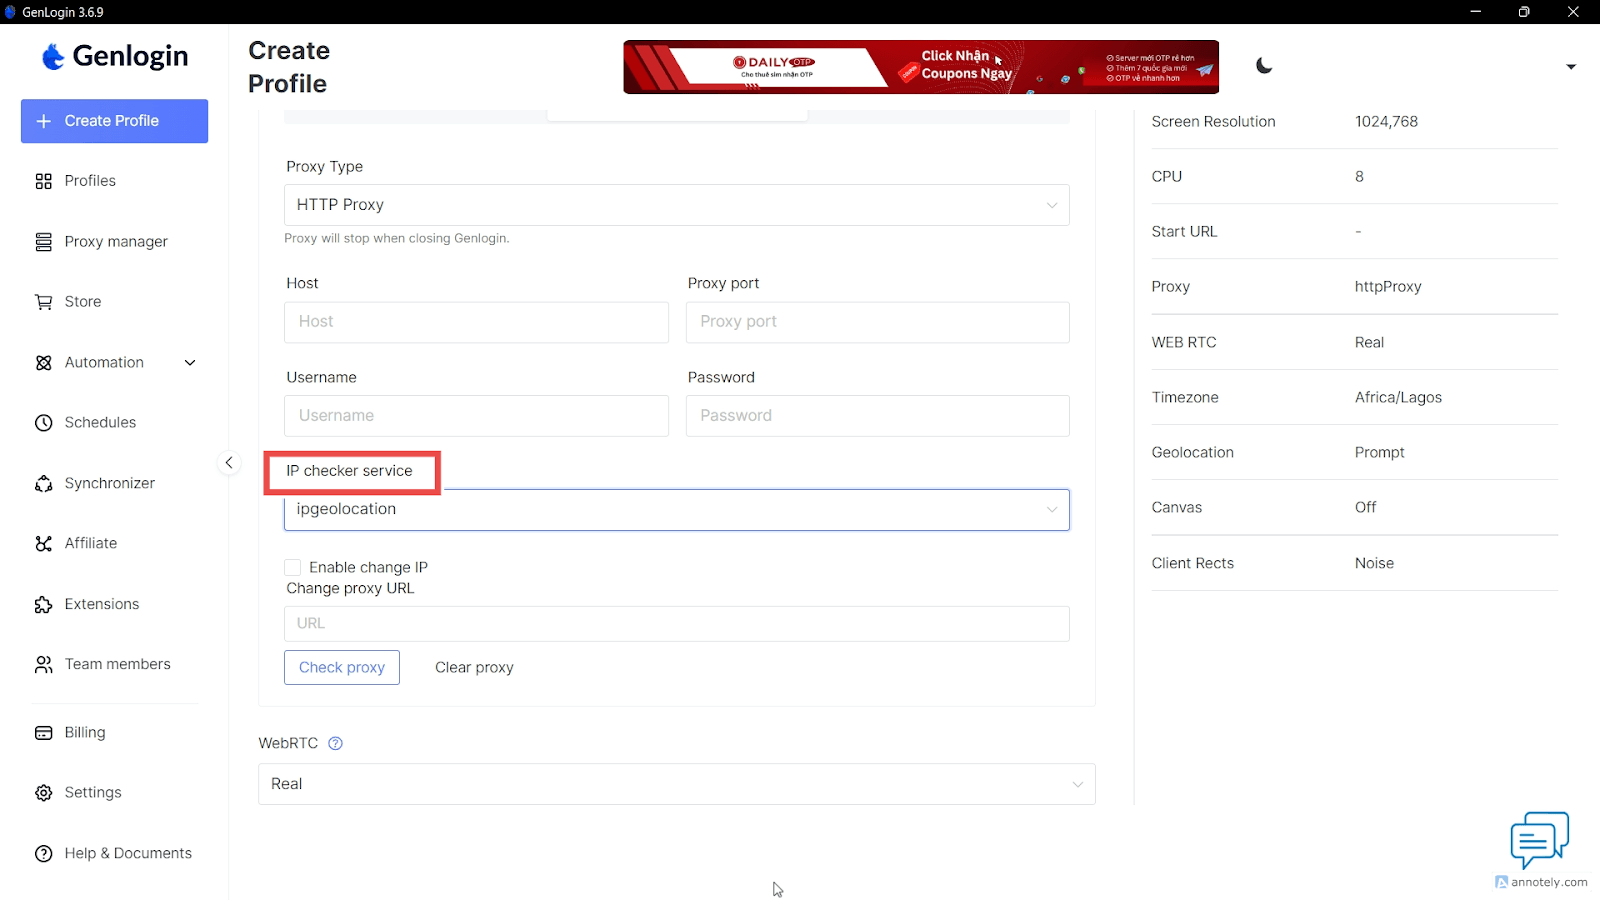
If the built-in check works incorrectly, you can change the IP verification service in the settings.
Step 5. Saving the Profile
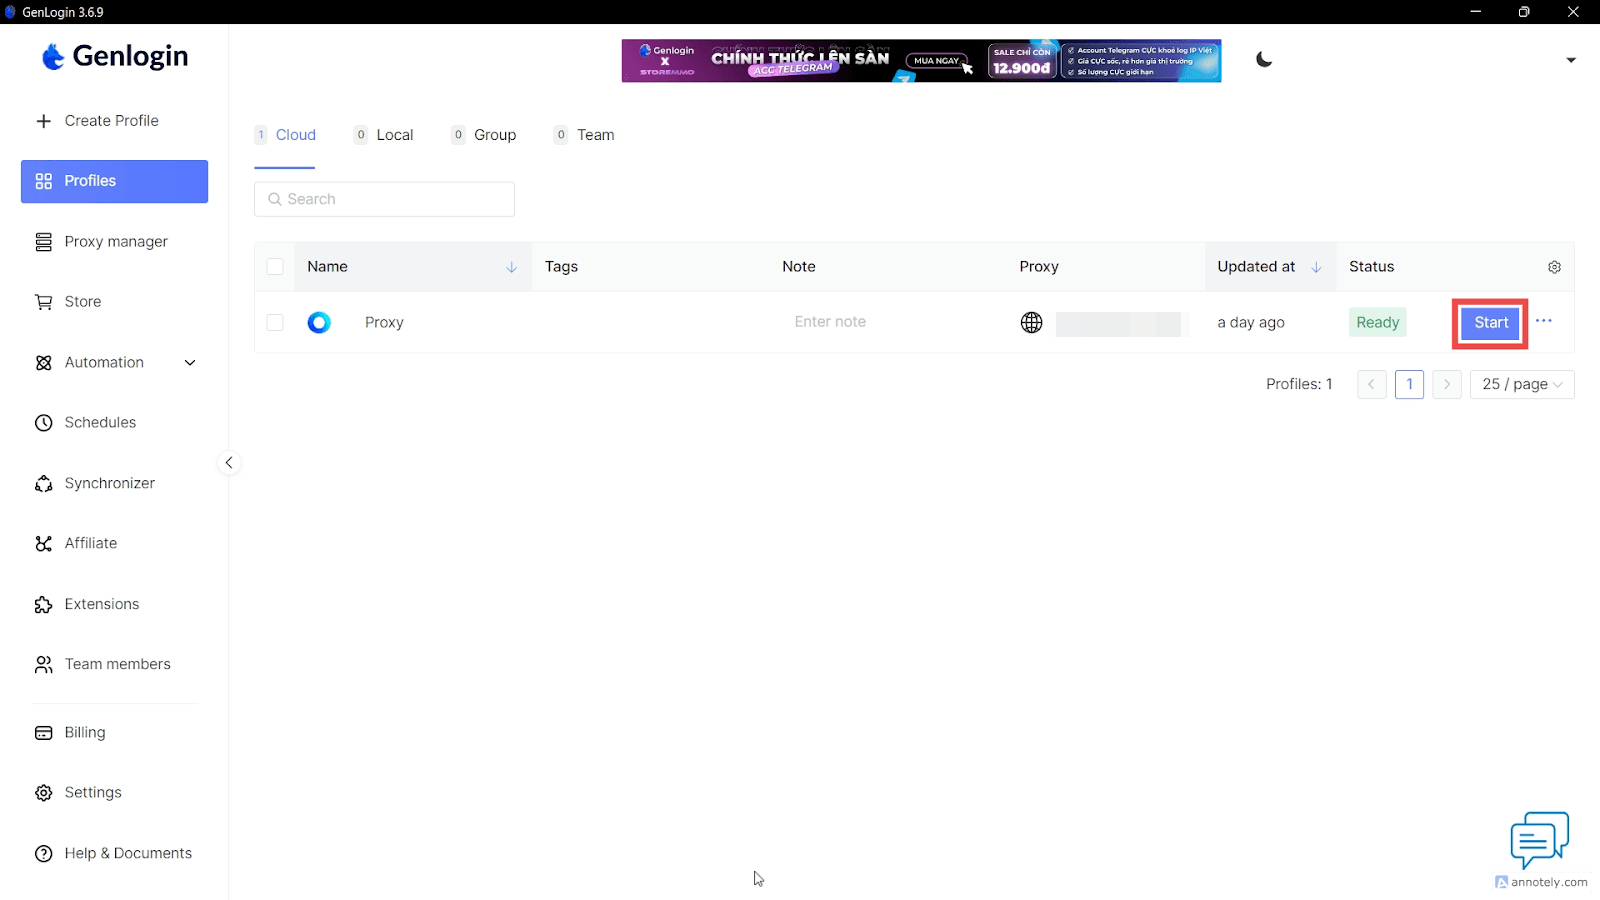
After successful verification, save the profile using the Create Profile button. The new profile will appear in the general list and will be ready to launch.
How to Import a Proxy List
When working with a large number of profiles, it is more convenient to use bulk proxy addition through Proxy Manager.
Step 1. Preparing the List
The proxy list can be prepared in TXT or CSV format. The lines usually look like this:
http://login:password@IP:PORT
or
socks5://IP:PORT:login:password
Genlogin supports bulk import of up to 100 proxies at the same time.
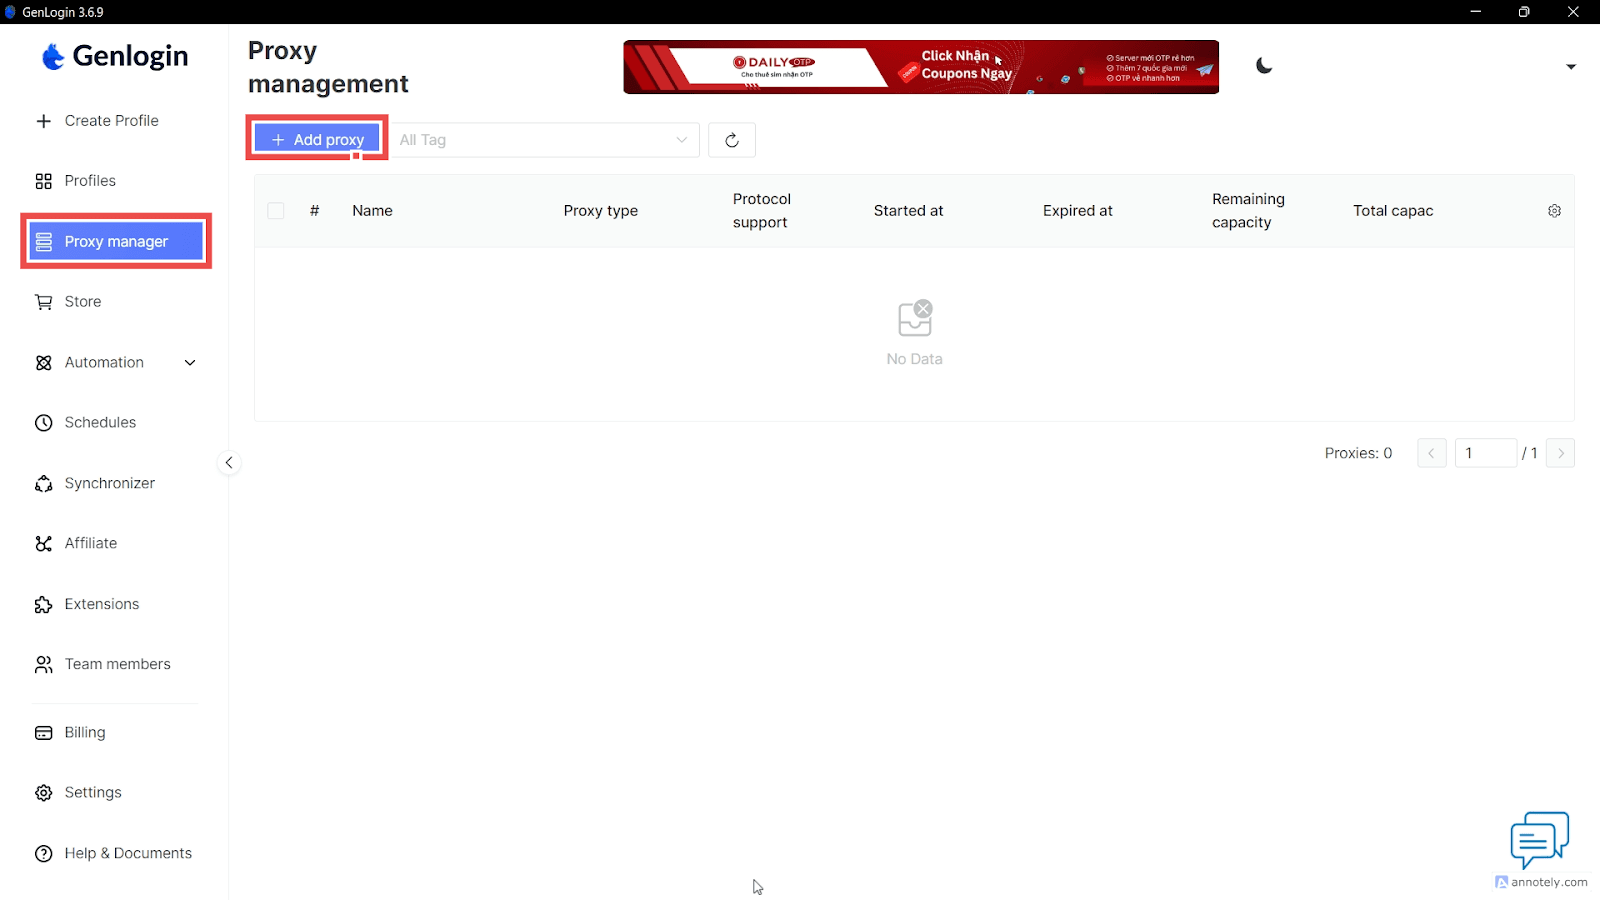
Step 2. Opening Proxy Manager
In the browser sidebar menu, open the Proxy Manager section and click Add Proxy.
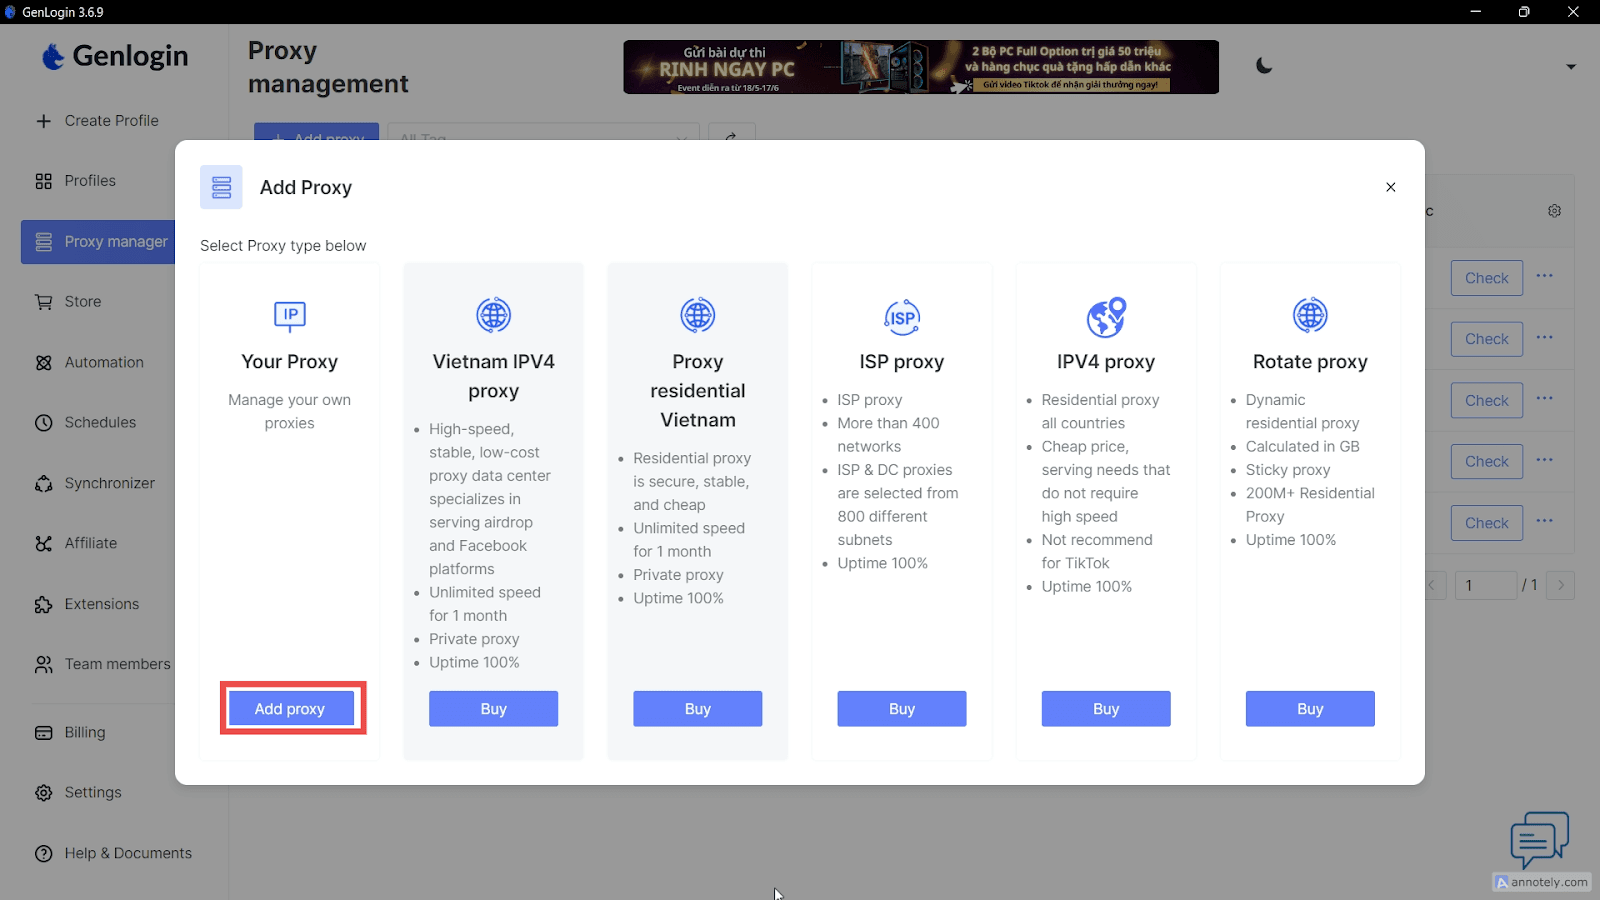
Step 3. Adding the List
Select the bulk addition option and paste the proxy list into the text field.
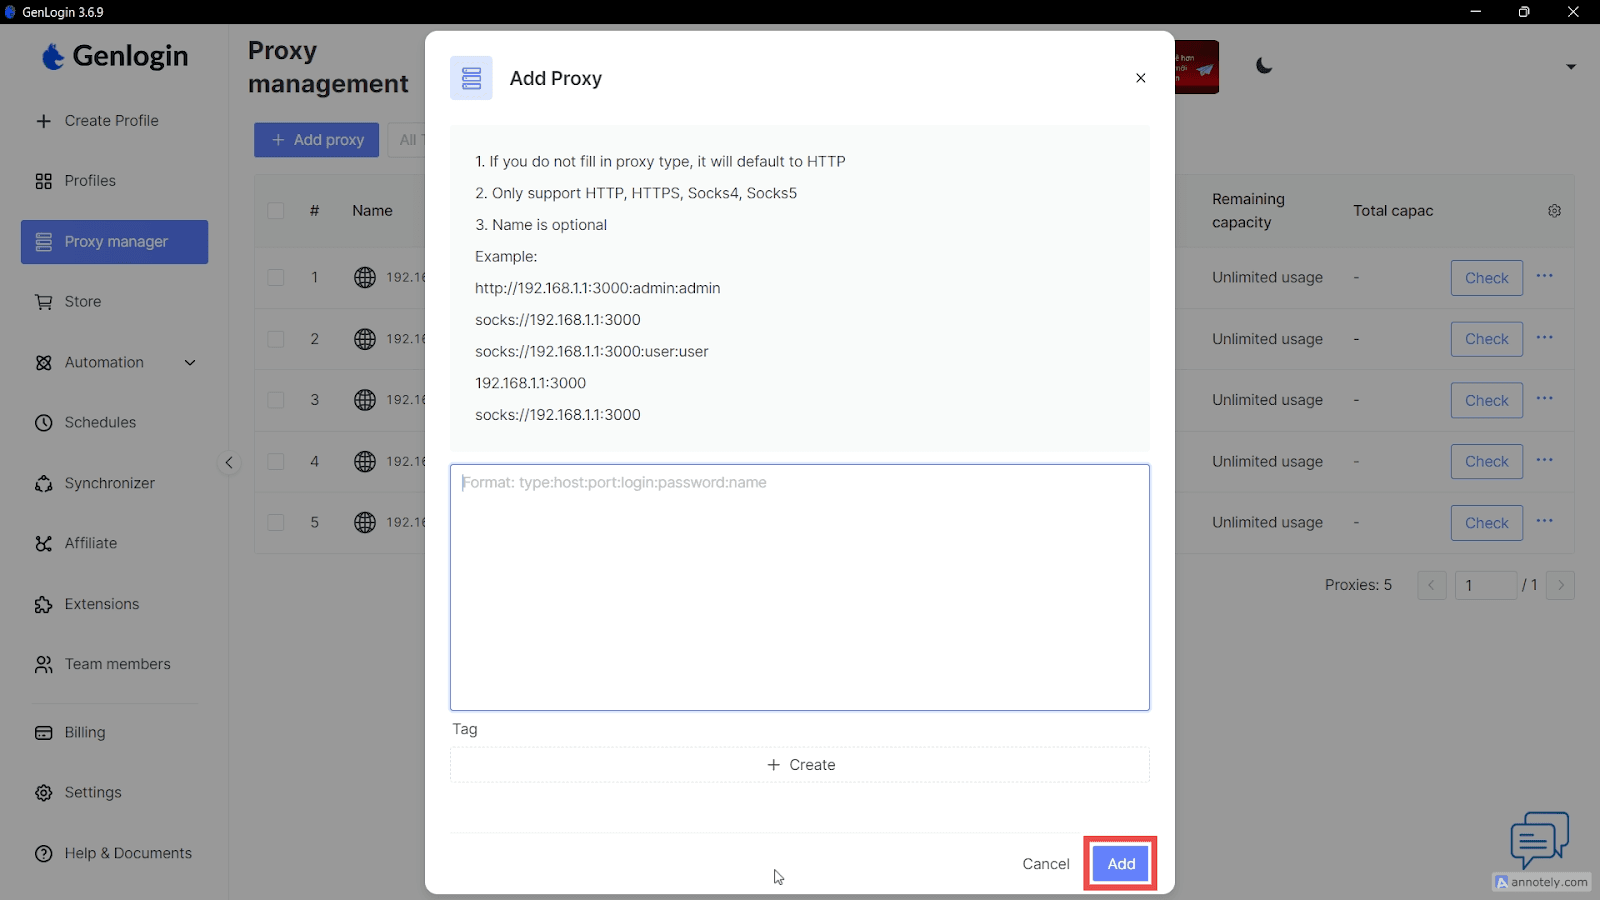
After insertion, Genlogin will automatically recognize the format and populate the proxy table.
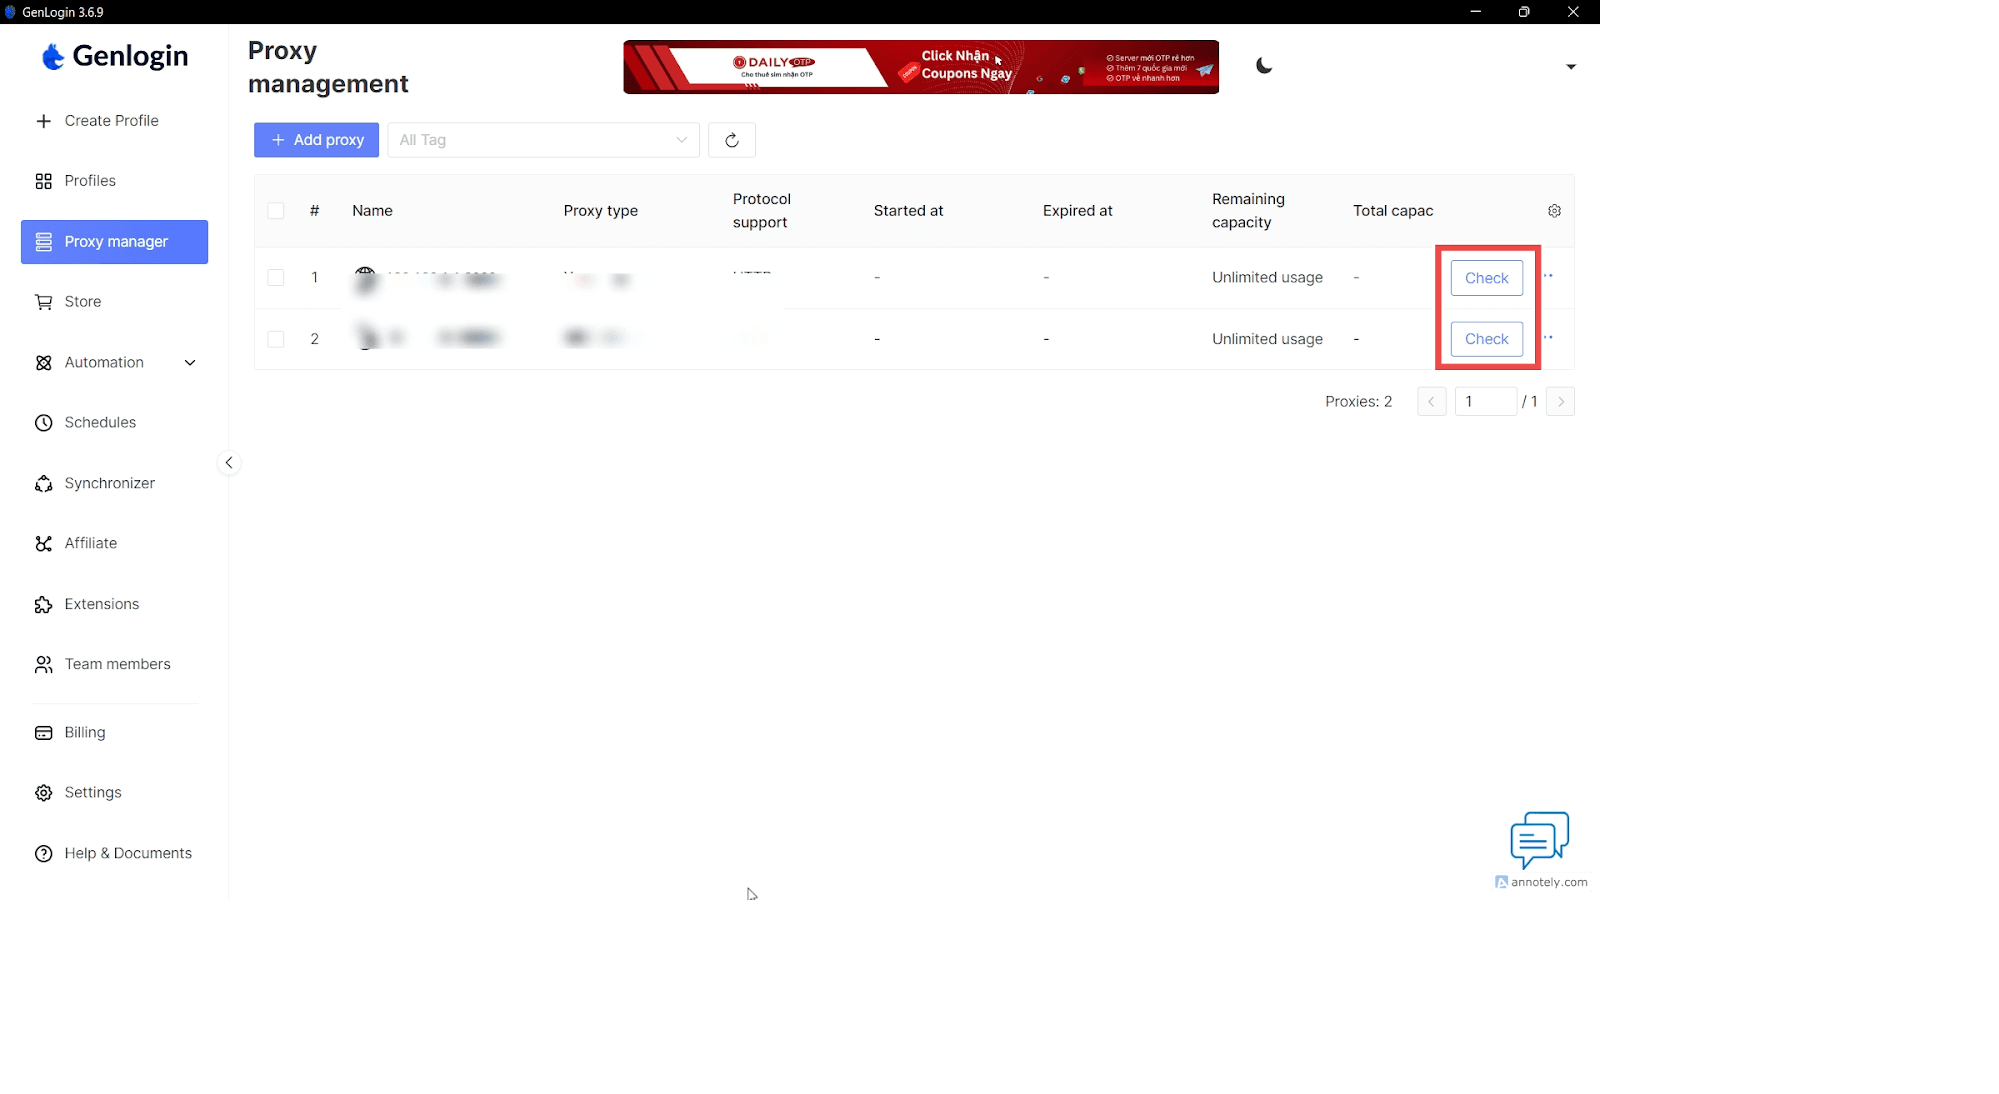
Step 4. Checking Proxies
Click Check to test the availability of all connections.
If individual proxies contain authorization errors or an incorrect format, the browser will display a notification.
How to Assign a Proxy to a Profile
After adding a proxy, it must be assigned to a specific profile.
To do this:
1. Create a new profile.
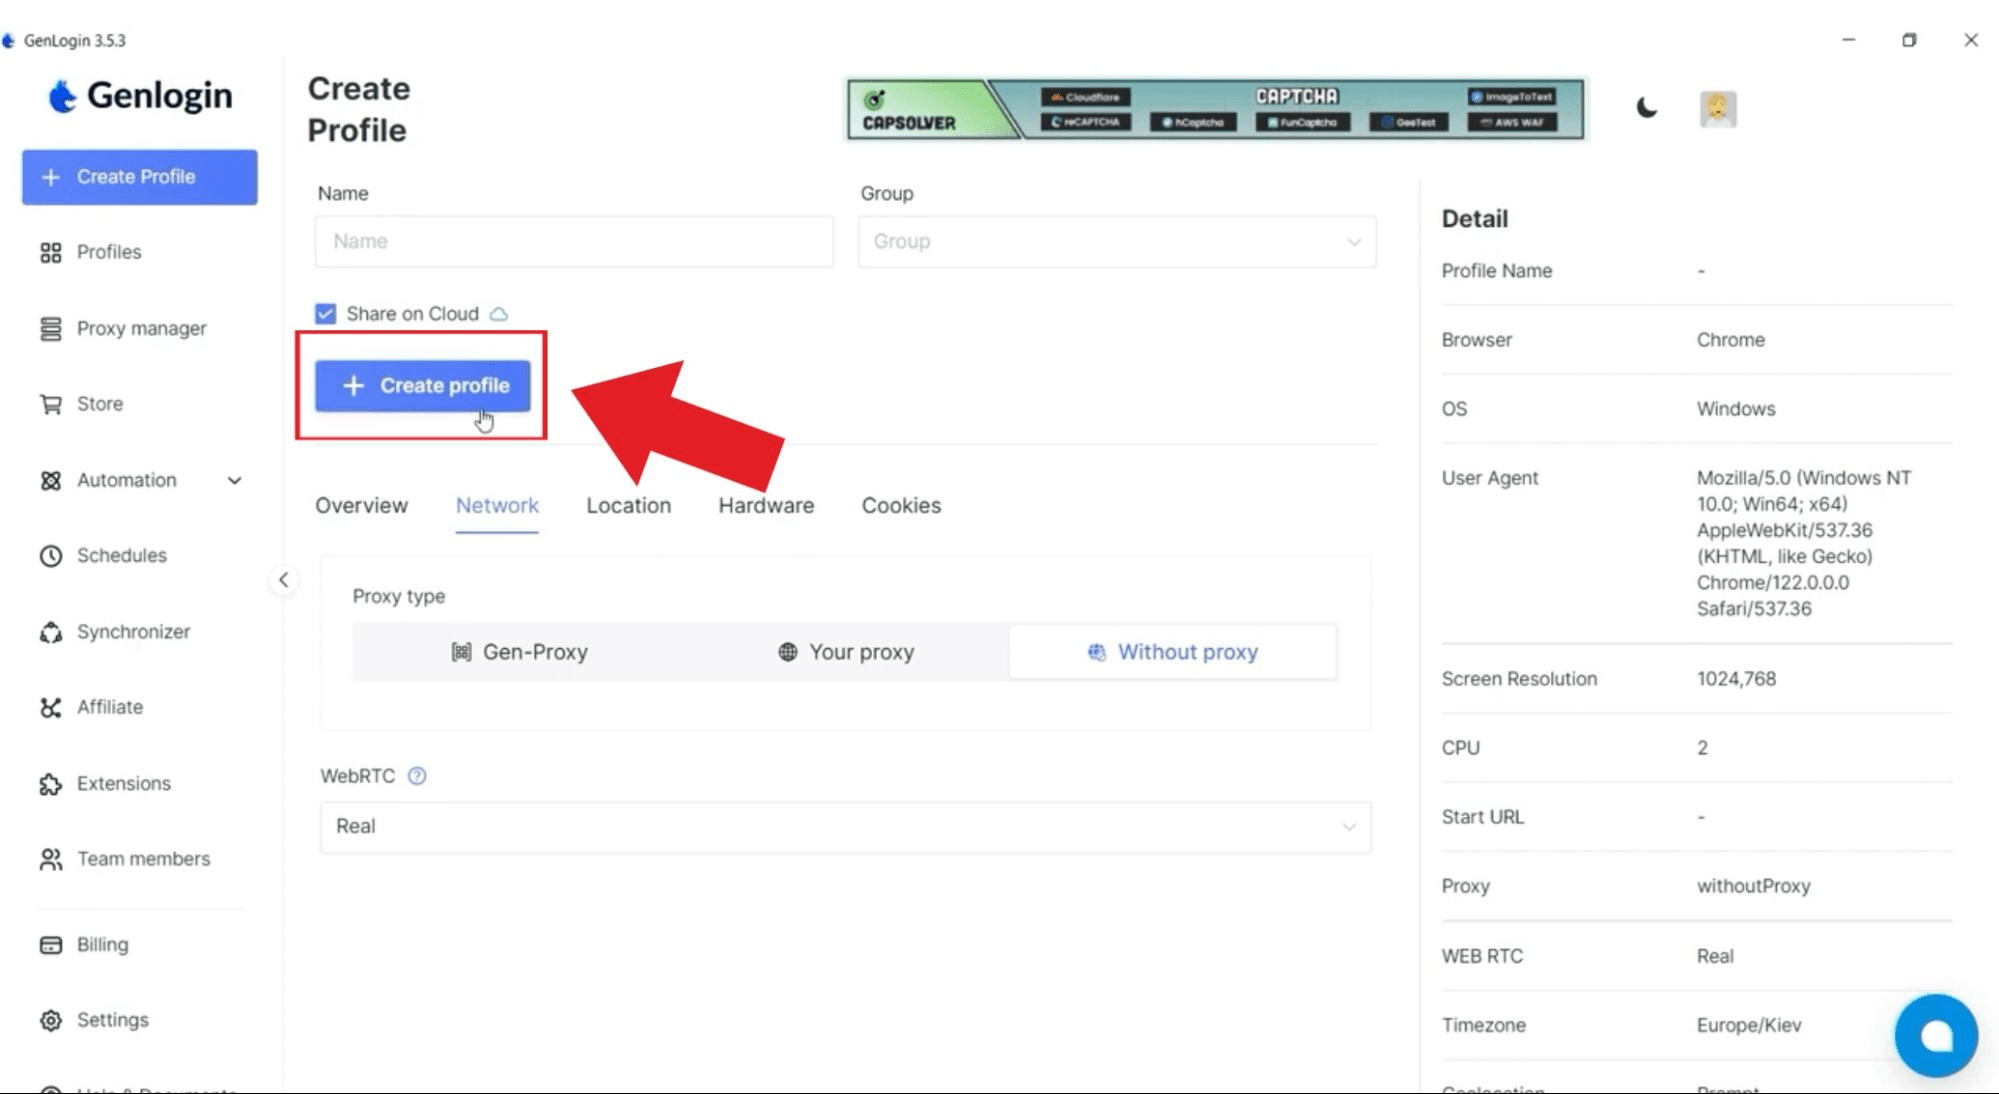
2. Go to the network section.
3. Select a previously added proxy from the list.
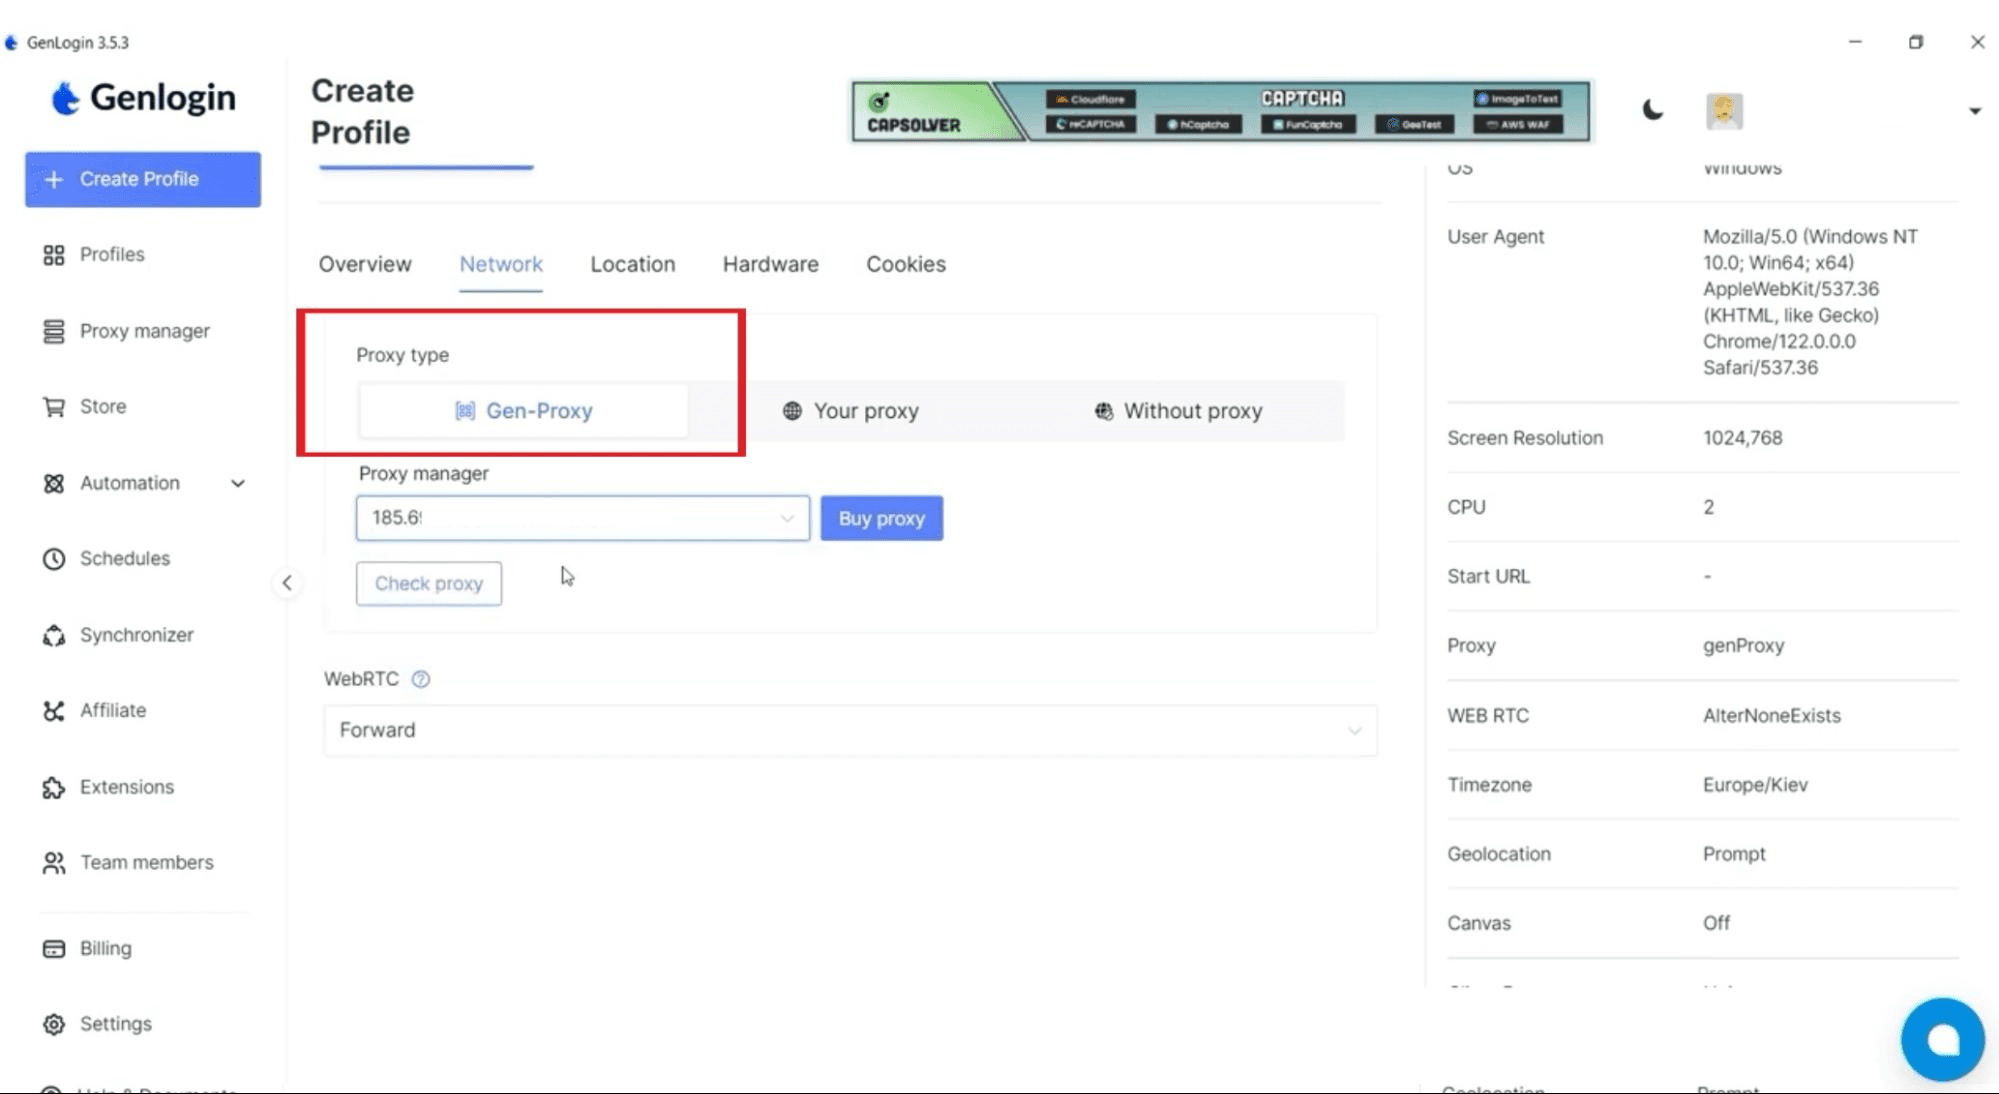
4. Save the changes.
After launching the profile, the browser will automatically use the selected connection.
Features of Working with Proxies in Genlogin
Before launching profiles in bulk, it is worth considering several nuances:
• it is preferable to assign a separate proxy to each account;
• mixing different proxy types within one project may cause instability;
• when importing in bulk, it is important to follow the line formatting correctly;
• the “@” and “:” characters inside additional fields may sometimes cause processing errors;
• free proxies often work unstably and are more likely to encounter restrictions.
Additional Features of Genlogin
In addition to proxy support, Genlogin offers a set of tools for managing browser environments:
• action automation without programming;
• multithreaded operation;
• profile synchronization;
• collaborative teamwork;
• built-in session management tools.
The browser interface is divided into several main sections:
• Profiles;
• Proxy Manager;
• Automation;
• Store;
• Settings;
• Help.
Advantages and Limitations of Genlogin
Advantages
• flexible profile configuration;
• support for large-scale account management;
• bulk proxy management;
• automation of routine actions;
• convenient organization of team collaboration.
Limitations
• no version for Linux or mobile devices;
• the interface is not available in all languages;
• beginners may need time to learn the settings;
• the free plan is limited by the number of profiles.
Conclusion
Genlogin combines profile management tools, browser fingerprint configuration, and proxy support within a single interface. The browser is suitable for working with a large number of accounts, automating actions, and separating browser environments.
For stable operation, it is important to configure proxies correctly and assign a separate connection to each profile. The built-in Proxy Manager allows users both to manually connect individual proxies and to bulk import ready-made lists, which is especially convenient when working with dozens of accounts simultaneously.