Residential Proxy Connection in AntBrowser
 ·August 15, 2026·5 min read
How AntBrowser Works
AntBrowser is used to launch separate browser profiles with independent environment parameters. Each profile stores its own session data: cookies, browsing history, local cache, and browser settings. When reopened, the system restores the previous working state together with active tabs.
Within a profile, you can separately configure:
• IP address;
• time zone;
• browser language;
• screen resolution;
• User-Agent;
• WebRTC parameters;
• digital fingerprint characteristics.
The browser supports both local operation on a single device and shared profile usage within a team.
Build the Right Setup
Antidetect browser for profiles, residential proxies for connections.
Methods for Adding Proxies
AntBrowser provides two methods for connecting proxy servers:
• import through the internal proxy manager;
• manual addition during profile creation.
Both methods work the same way; only the setup sequence differs.
Uploading Proxies Through the Built-In List
If proxies will be used regularly, it is more convenient to save them first in the browser’s internal section.
How to Add a List:
1. Open the “My Proxy” section.
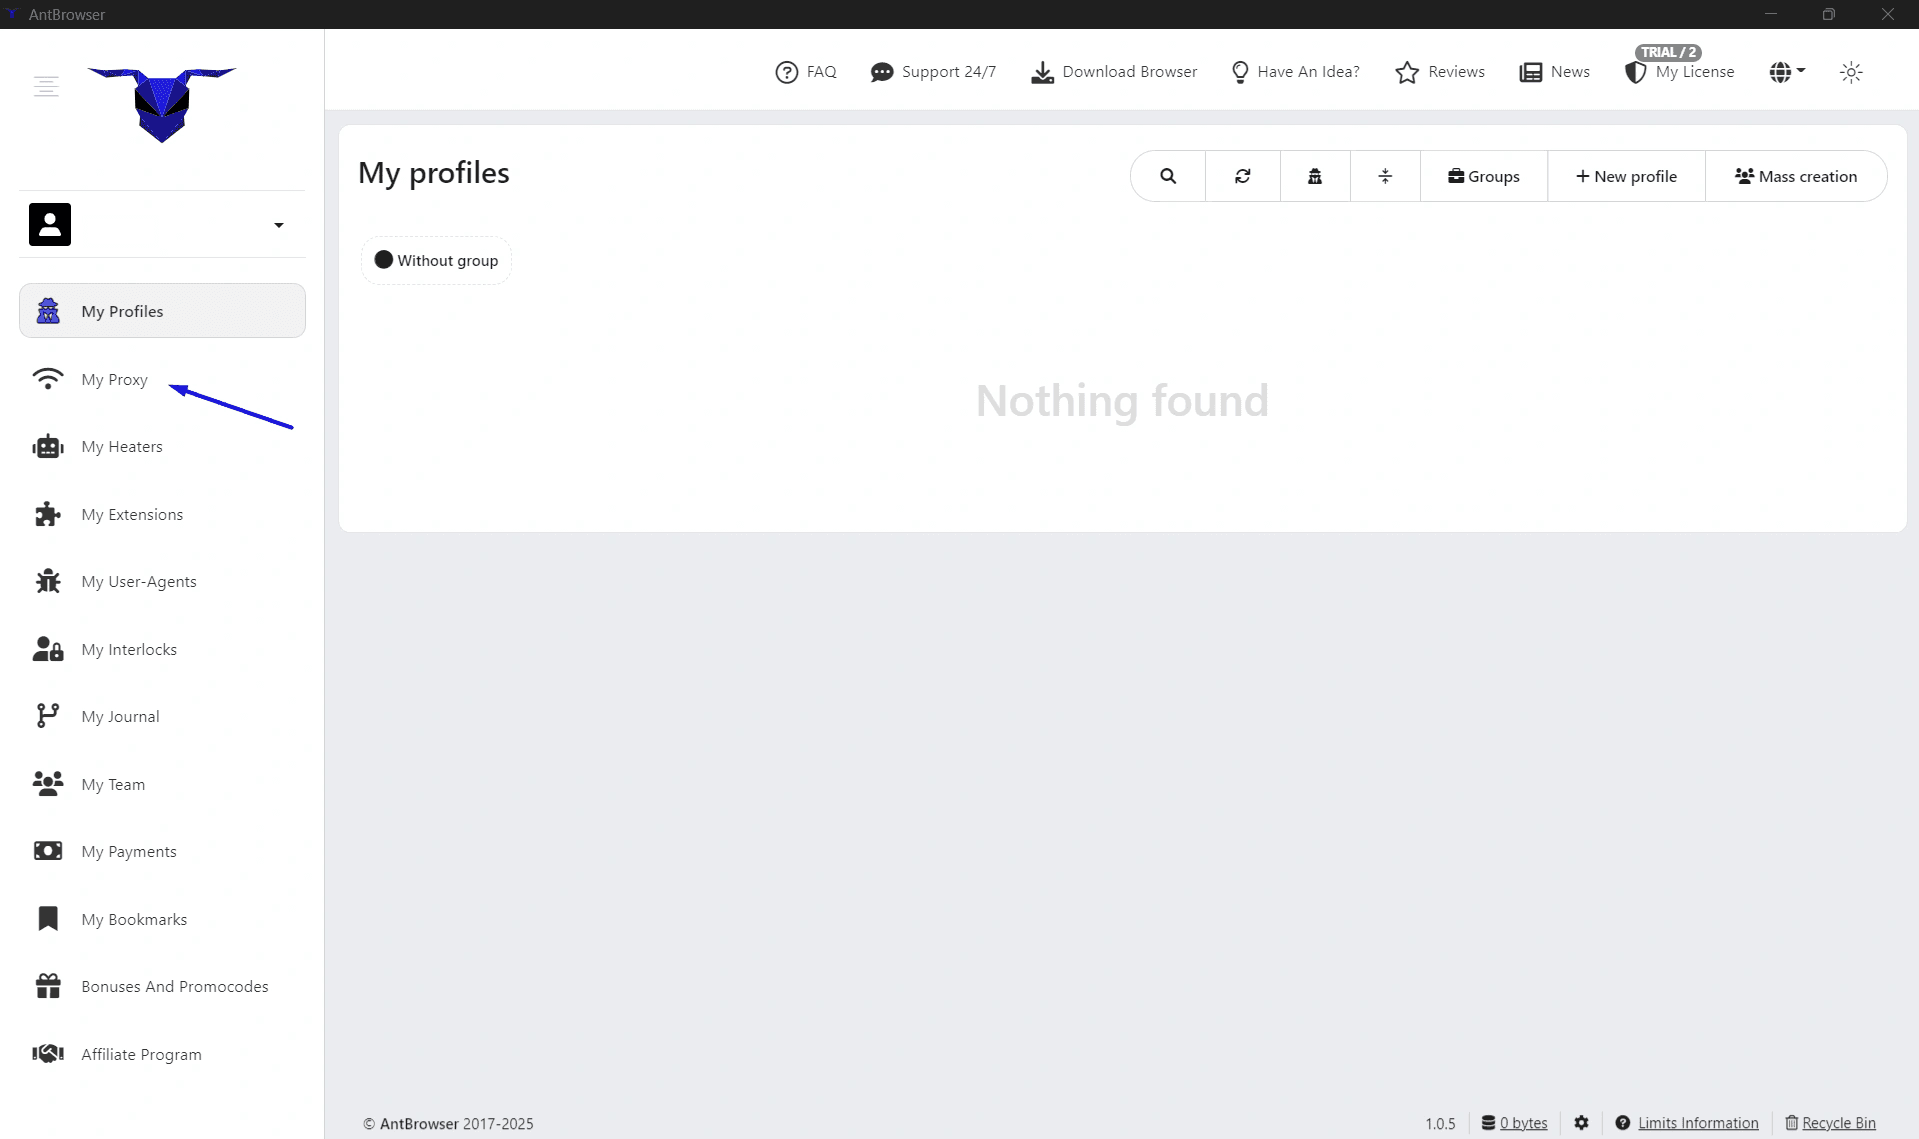
2. Click the “+Add” button to create a new list.
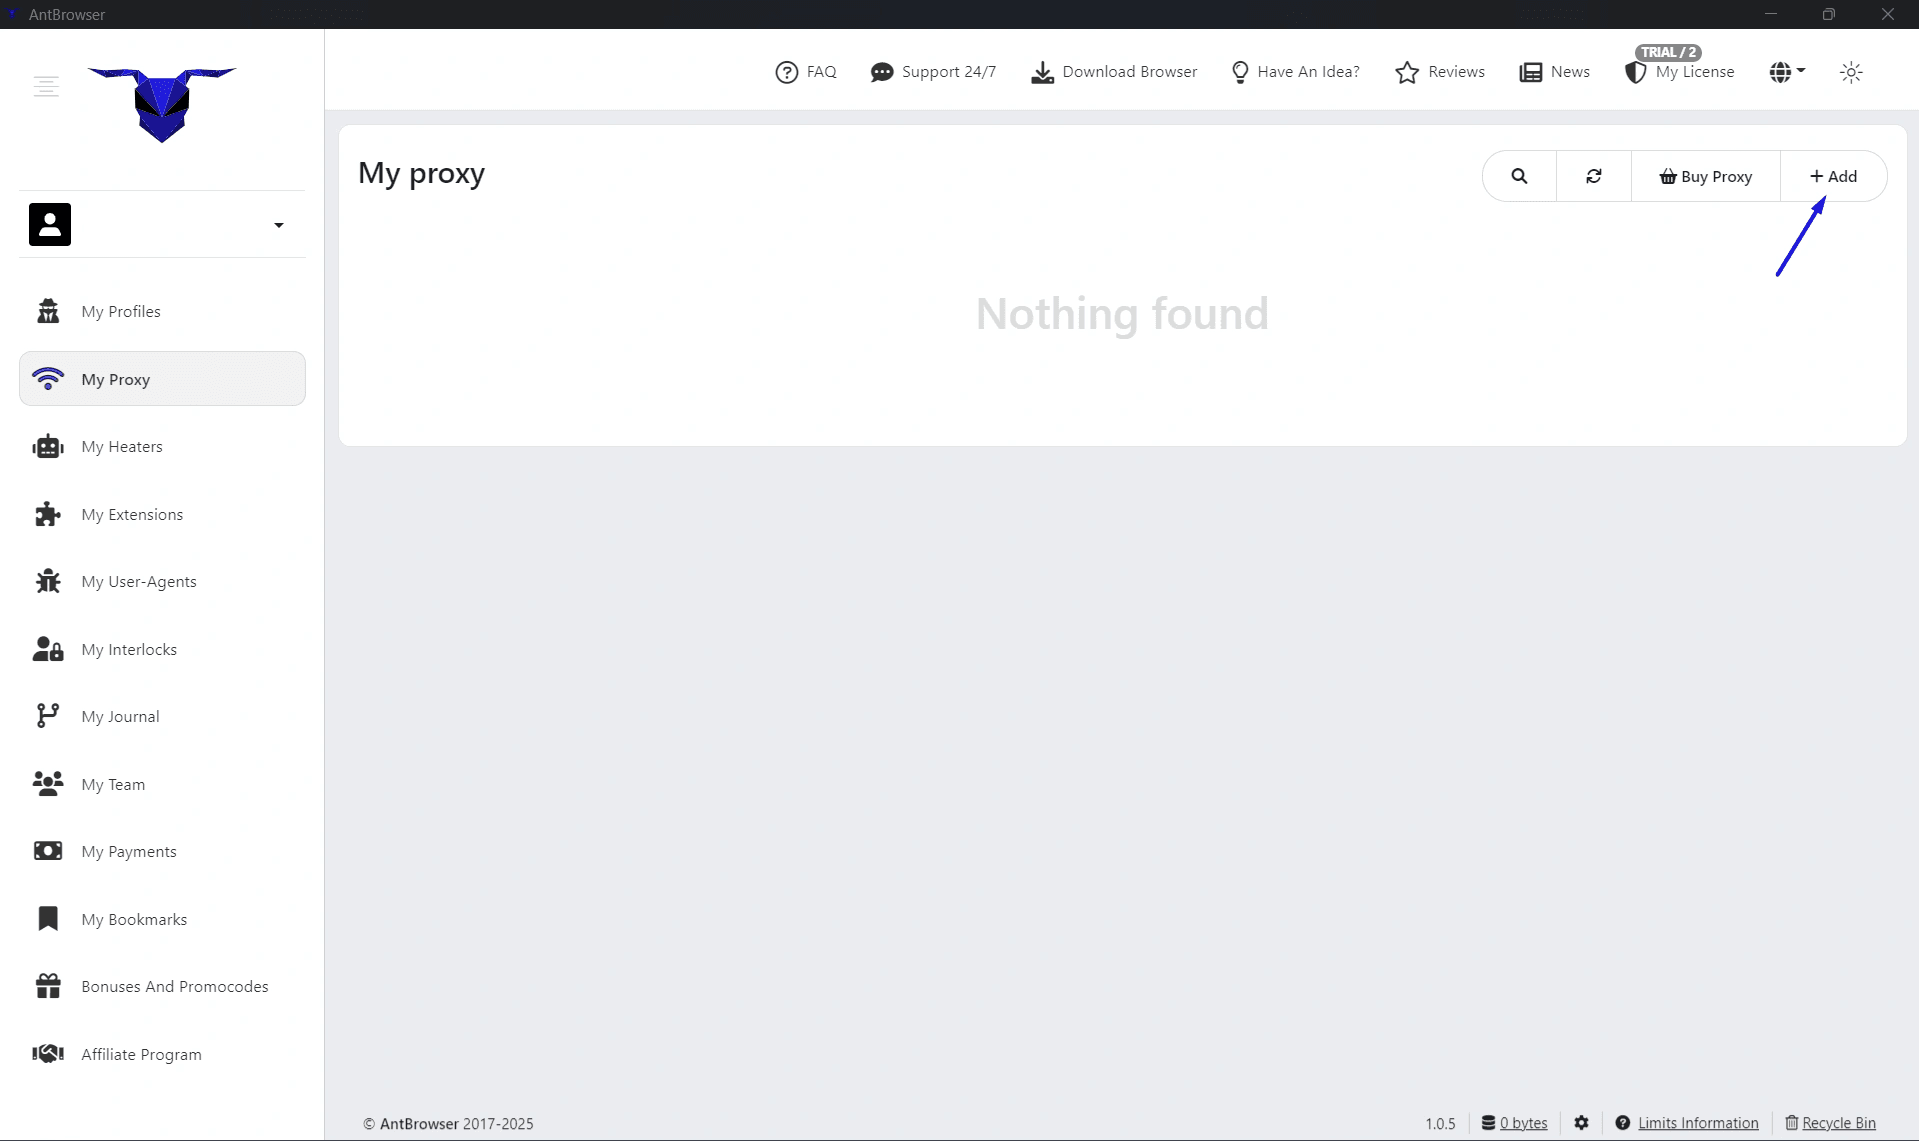
3. Paste the data into the import field.
4. Save the changes.
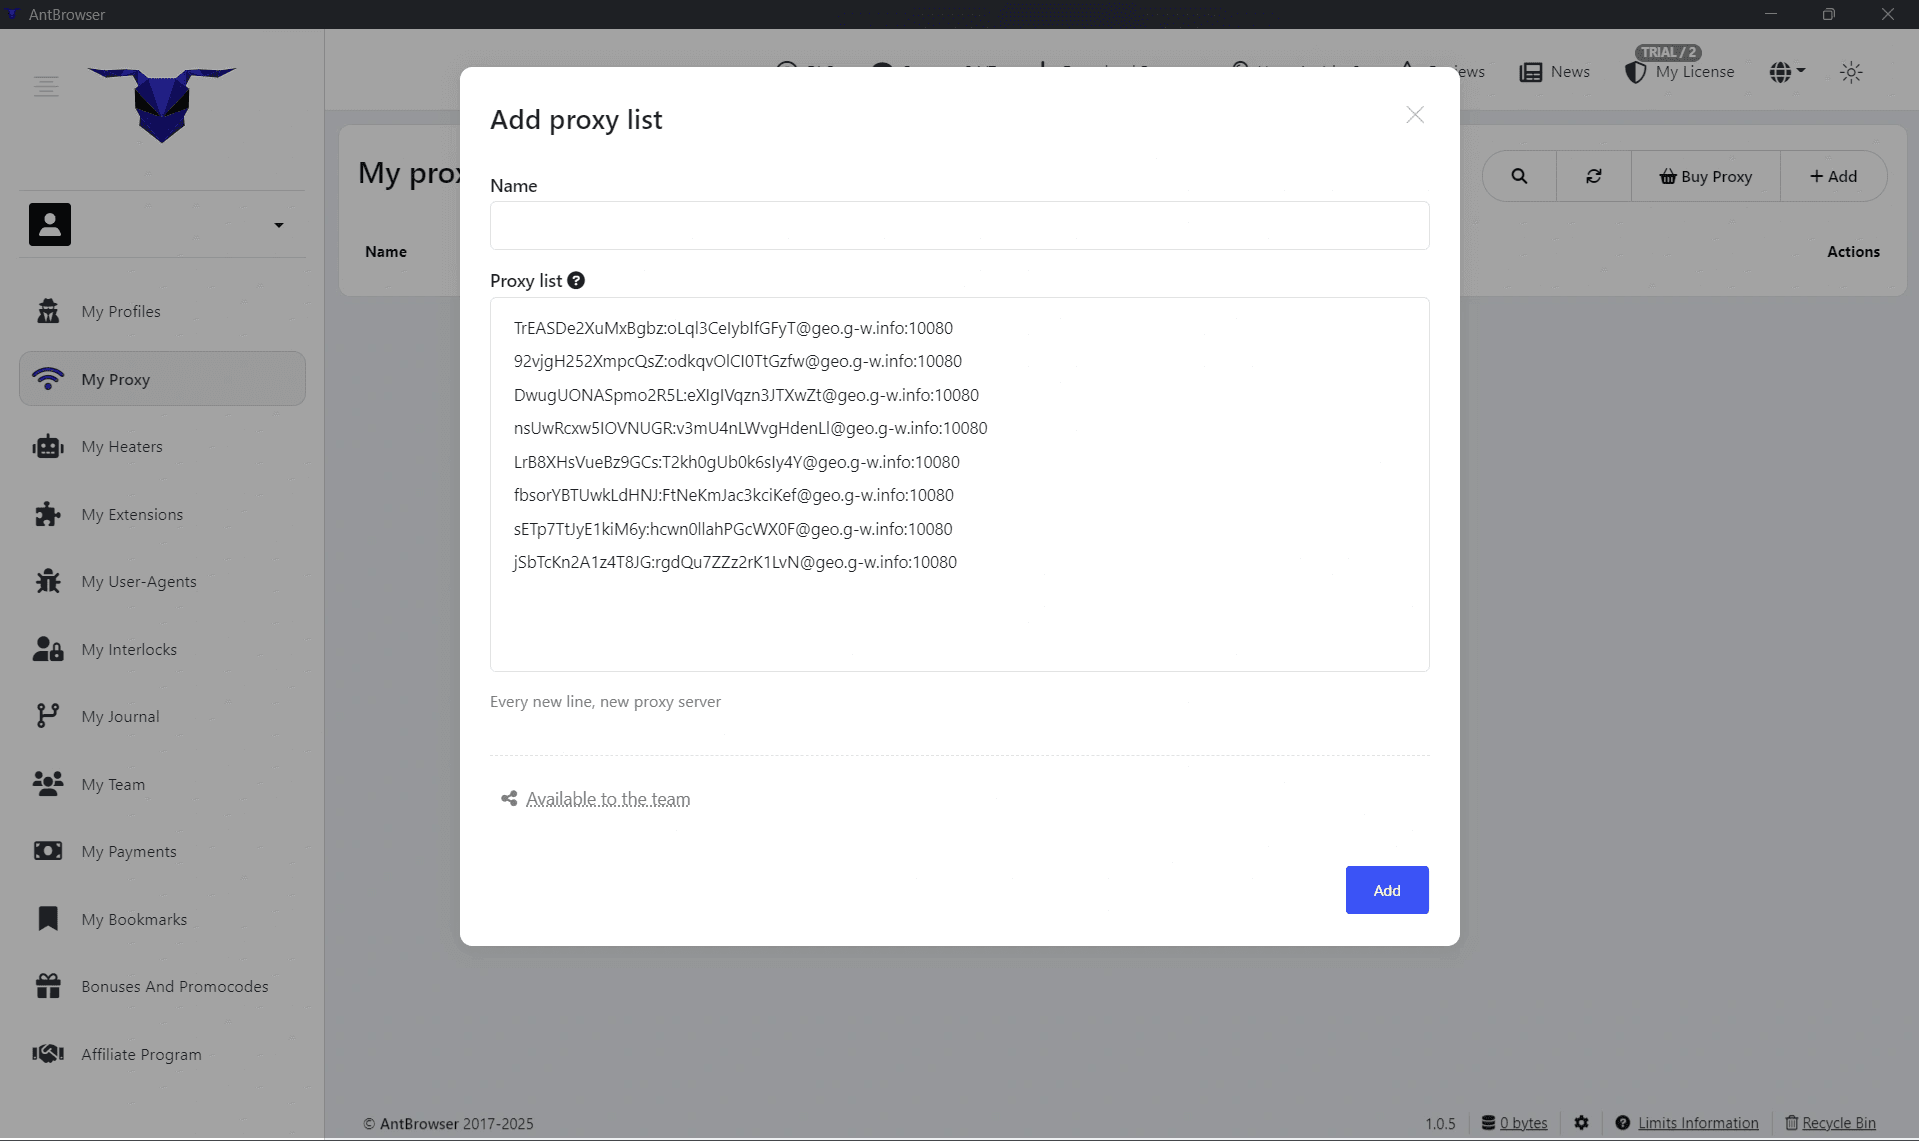
Each line must contain a separate proxy.
Supported formats:
ip:port
or
login:password@ip:port|http
Example:
user65:vtra@47.20.255.200:1699|socks5
Specifying the protocol is optional — the system can detect it automatically.
Proxy data can be found on our website.
After saving, the imported addresses will appear in the general list and will be available when creating profiles.
Setting Up a Profile With a Proxy
To connect a proxy to a new profile:
1. go to the profiles section;
2. click “+New profile”;
3. select the required device type;
4. specify the profile name.
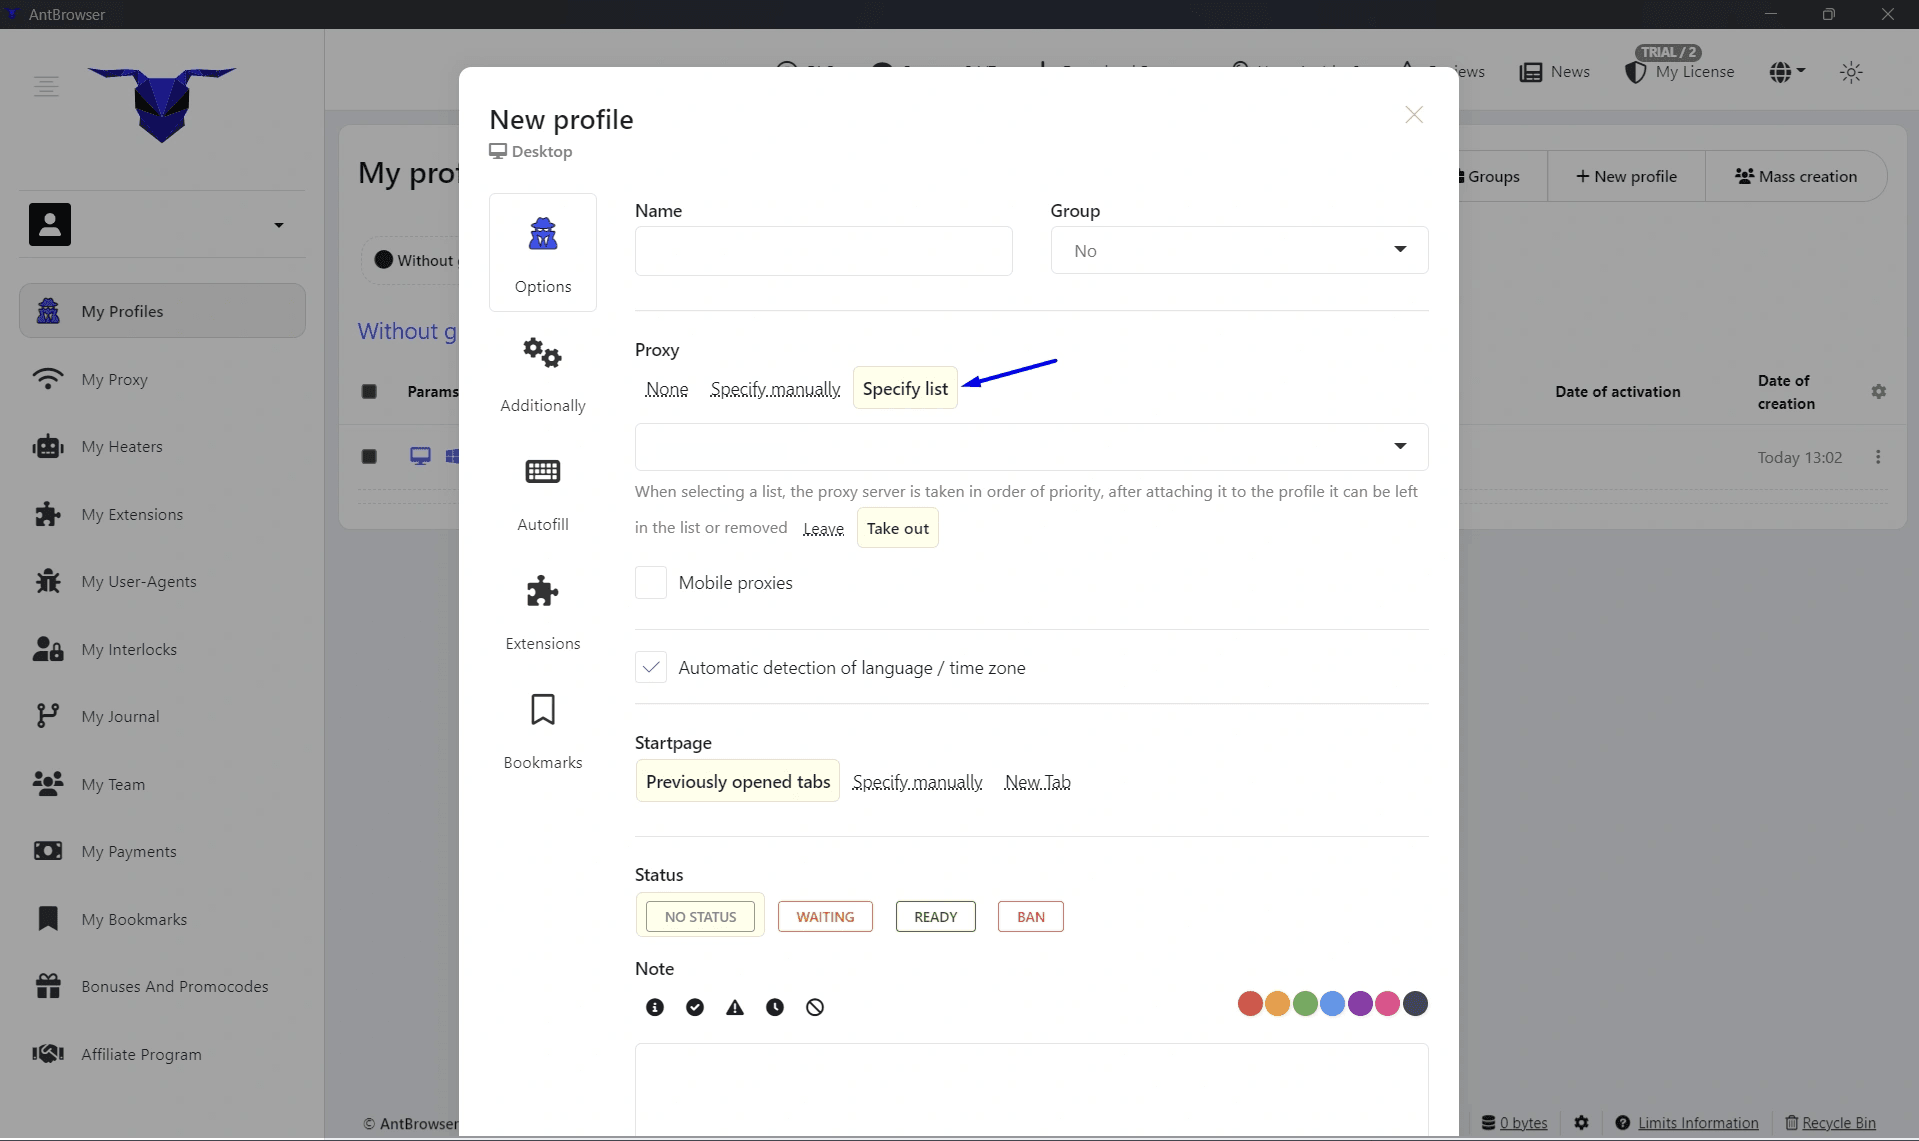
Then open the Proxy block.
Two modes are available here:
• Specify list — selecting a proxy from the saved list;
• Specify manually — entering parameters manually.
For manual entry, the standard format is used:
login:password@ip:port|socks5
or the shortened version:
ip:port
In the “Specify list” section, select the required list from the drop-down menu and save the profile.
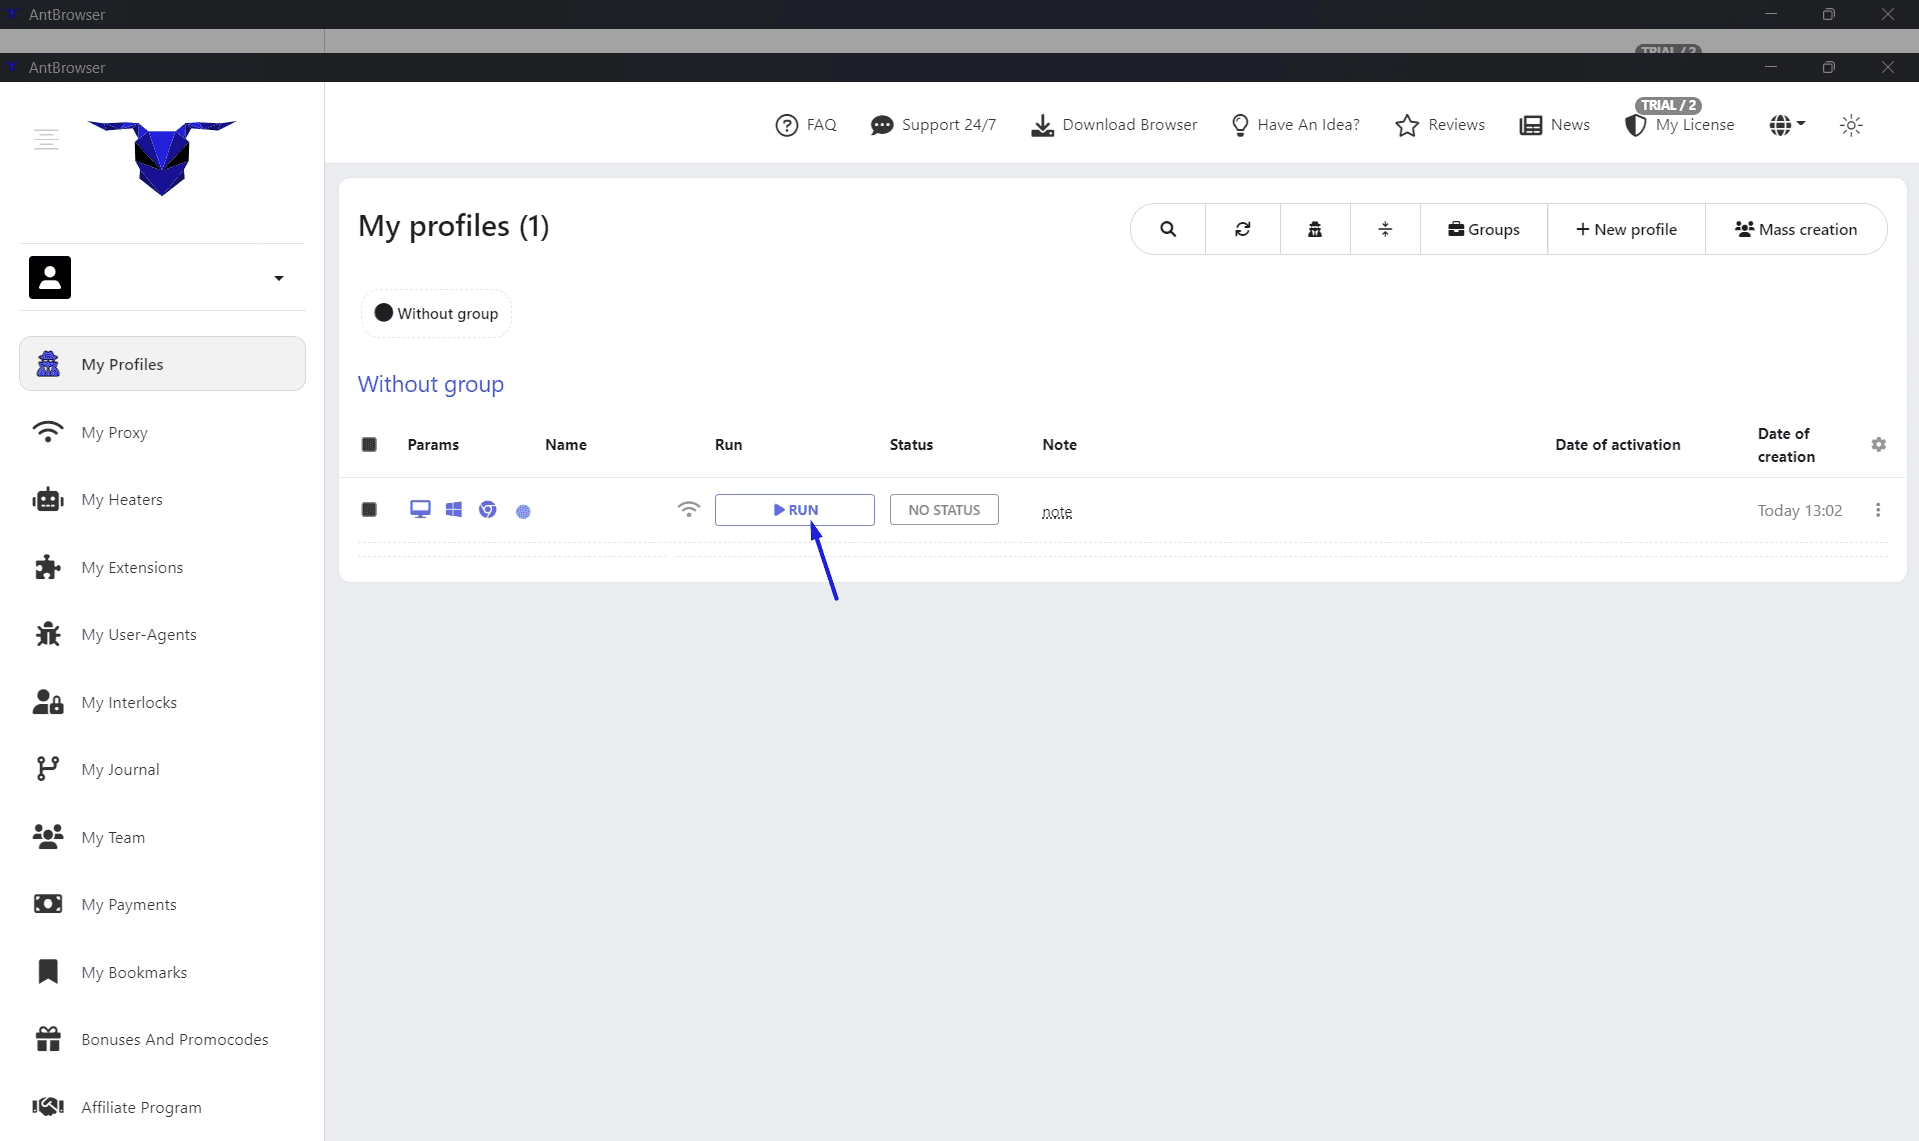
After saving, the profile is ready to launch.
Additional Browser Profile Parameters
In addition to proxy connection, AntBrowser allows separate configuration of browser environment parameters.
Available settings include:
• WebRTC;
• Canvas;
• geolocation;
• system fonts;
• device parameters;
• interface language;
• screen resolution.
A separate section is intended for autofilling authorization data on various services.
Checking the Connection After Launch
After launching the profile, it is recommended to verify that the browser is using the required IP address.
To check:
1. open the profile;
2. go to an IP detection service;
3. compare the displayed address with the parameters of the connected proxy.
If the addresses match, the connection is configured correctly.
Features of AntBrowser
AntBrowser stores profiles locally, so settings and user data remain on the device. This allows operation without mandatory cloud infrastructure and provides separate management for each profile.
The browser’s functionality includes:
• transferring profiles between devices;
• team collaboration;
• configuration synchronization;
• launching mobile and desktop profiles;
• configuring browser fingerprint parameters.
When working with a large number of profiles, increased system load is possible.