How to Set Up and Disable a Residential Proxy in Opera
 ·August 18, 2026·7 min read
Opera uses the system proxy settings, so configuration is done not inside a separate browser module, but through the operating system’s network settings window. There is also a second option — connecting through an extension. Both methods work, but they are suited to different tasks: system configuration affects browser traffic through the general settings, while an extension is convenient when you need quick access to profile switching and manual control.
Give Your Browser More Options
Use residential IPs to access websites from the location you need.
Setting Up a Proxy Through Opera Settings
The most direct method is to open the system proxy settings from the browser interface and manually specify the server address.
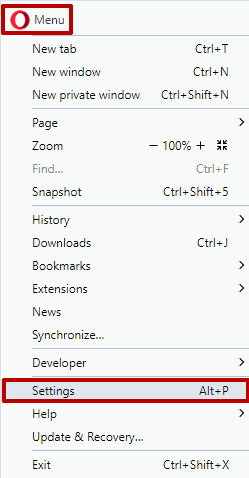
First, open the Opera menu in the upper-left corner and go to the “Settings” section.
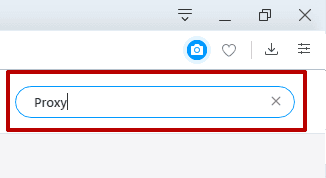
In the settings search bar, enter proxy.
The browser will show the required item — “Open your computer’s proxy server settings.”
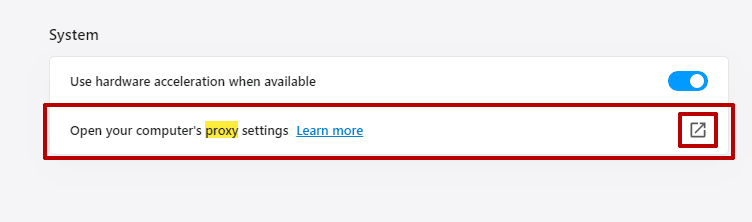
After clicking it, a system window with connection parameters will open.
Next, enable manual proxy setup and activate the use of a proxy server.
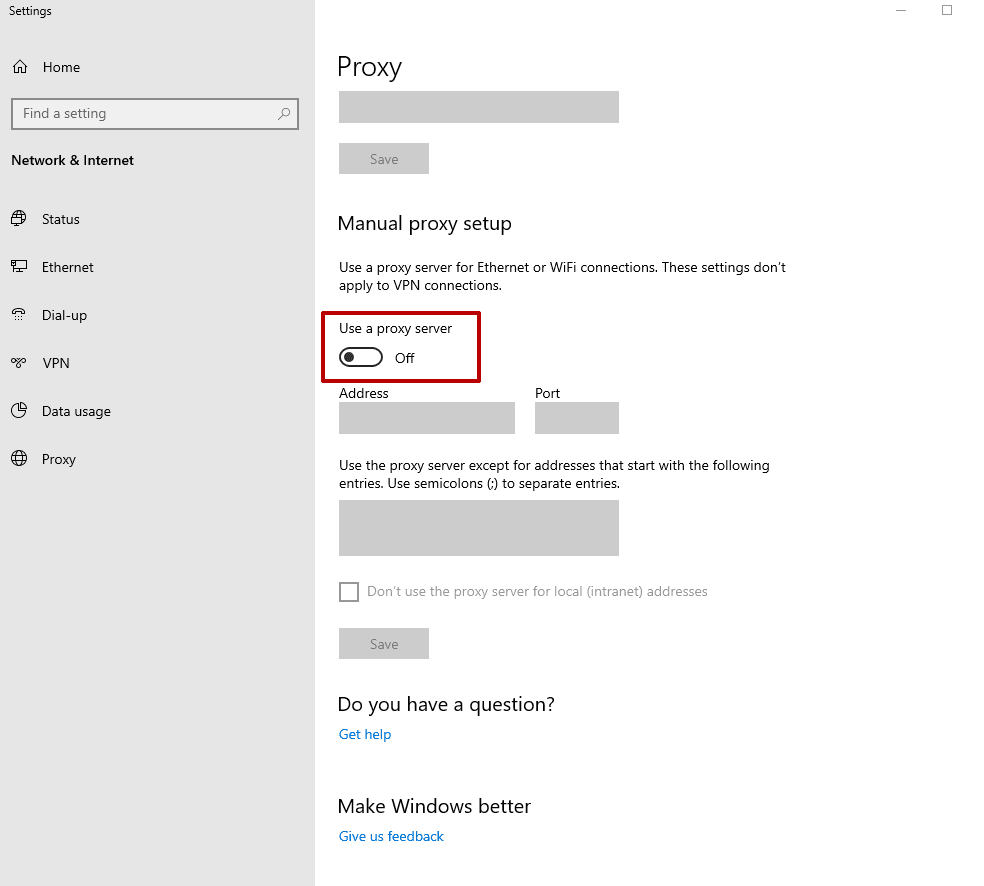
Enter the IP address and port in the appropriate fields. If the server uses username and password authorization, Opera will request these details the first time it accesses the network through the new route (this information can be found on our website node-proxy.com).
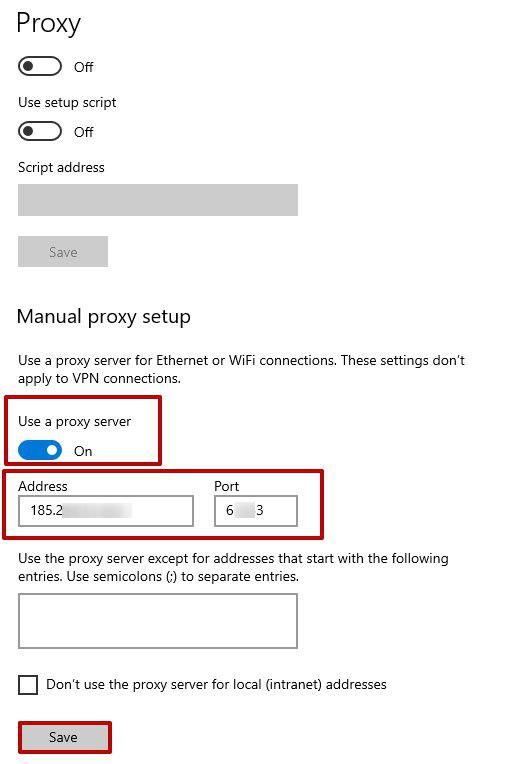
After saving the settings, the browser will begin using the specified proxy.
This method is convenient because it does not require installing additional components and relies on the operating system’s built-in tools. At the same time, it is important to keep in mind that changing the system proxy settings may affect not only Opera, but also other applications that use the same network settings.
Connecting Through an Extension
If you need a more flexible way to manage the connection, you can use the Proxy Switcher & Manager extension. This option is suitable in cases where it is important to switch quickly between configurations without going into the system settings windows.
To do this, open the Opera add-ons store and find the Proxy Switcher & Manager extension.
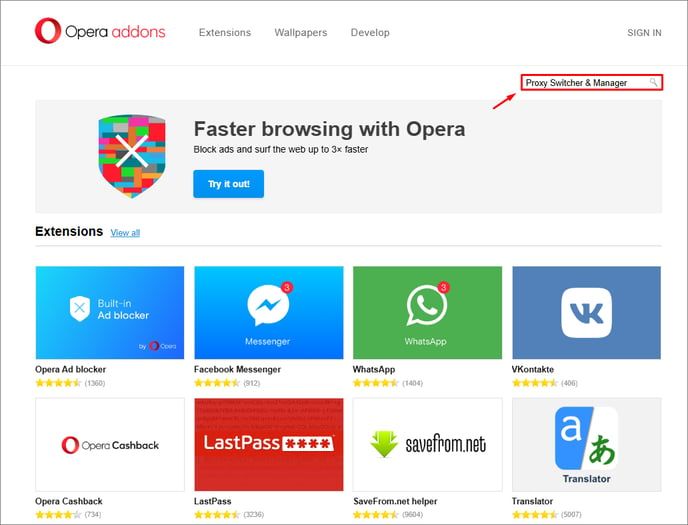
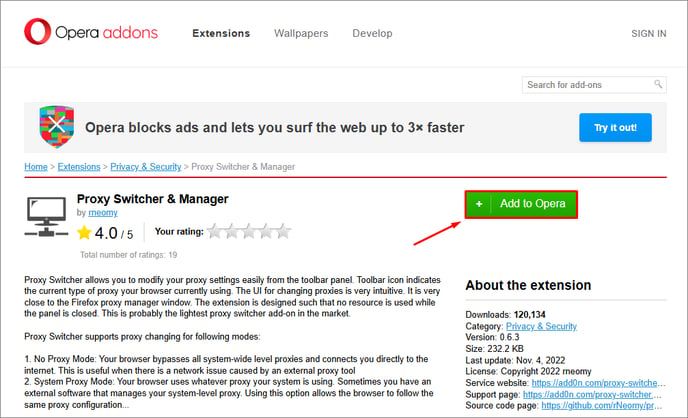
Install it using the “Add to Opera” button.
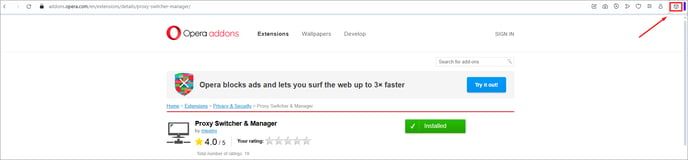
After installation, click the extensions icon in the upper-right part of the browser window and open Proxy Switcher & Manager.
In the extension interface, go to the Manual Proxy tab and fill in the connection parameters: server address, port, and, if necessary, authorization details (this information can be found on our website node-proxy.com).
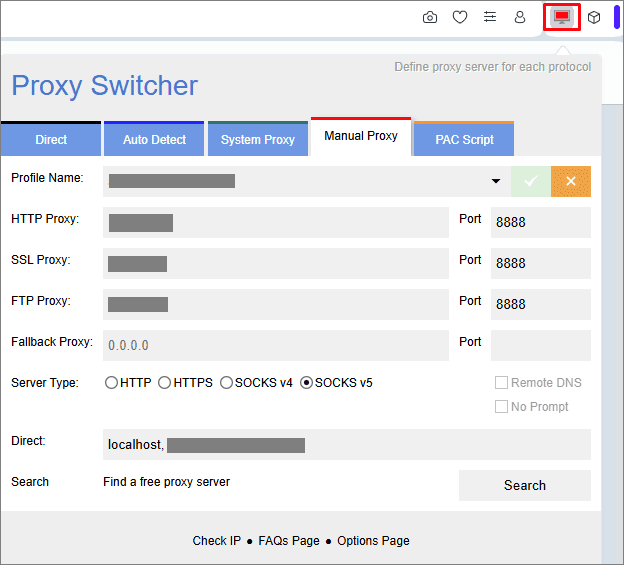
Then save the configuration. After that, the extension will begin using the specified profile for the browser’s operation.
The advantage of this option is that the settings are easily accessible and managed directly from the browser itself. This is especially convenient if you have to change connection parameters regularly or use several servers.
How to Check Whether the Proxy Is Enabled
After configuration, it is worth making sure that Opera is actually working through the specified server. To do this, simply open any IP address checking service and compare the current address with the one that was shown before the settings were changed.
If a new IP is displayed and it matches the parameters of the connected server, the setup has been completed correctly. If the address has not changed, you need to recheck the entered data, the proxy’s availability, and the correctness of the connection method.
When It Is Better to Use System Configuration and When to Use an Extension
The system method is suitable when you need basic, stable configuration without installing additional tools. It is appropriate for infrequent use and standard scenarios where it is enough to specify the IP and port once.
An extension is more convenient in situations where switching speed, storage of multiple profiles, and management of parameters directly from the Opera interface are important. For everyday use, this is often the more practical option, especially if the settings have to be changed regularly.
How to Disable a Proxy in Opera
If the proxy is no longer needed or has started causing problems with access to certain websites, it can be disabled through the same system settings.
Open Opera → Settings, then find the item “Open your computer’s proxy server settings.” In the window that opens, go to the network settings and disable the use of a proxy server. If the system displays the classic connection properties interface, you usually need to go to the “Connections” tab, open “LAN settings”, and clear the checkbox for using a proxy server for the local network. After that, save the changes.
Then restart the browser so that Opera begins working with the updated network parameters. Even if the address and port fields remain filled in, this does not interfere — the main thing is that the option to use a proxy is disabled.
What Is Important to Consider After Configuration
When working through a proxy, it is useful to remember two practical points. First, any errors in the IP address, port, or authorization data will immediately lead to connection problems. Second, if Opera uses the system proxy settings, the changes may also affect other programs on the system.
Therefore, after enabling or disabling the proxy, it is better to check the connection right away, and if websites operate unstably, make sure that exactly the connection mode needed at that moment is active.
Conclusion
Opera has two main ways to connect through a proxy: through the system settings and through an extension. The first option is simpler and does not require additional installations, while the second provides more flexibility in management. For basic configuration, it is enough to open the proxy settings from the browser settings, specify the IP and port, and then check the result through an IP address detection service. If the connection is no longer required, the proxy is disabled through the same system network settings.