Instructions for Setting Up a Residential Proxy in Dolphin{anty}
 ·July 23, 2026·5 min read
Step 1. Open Dolphin{anty} and go to profile creation
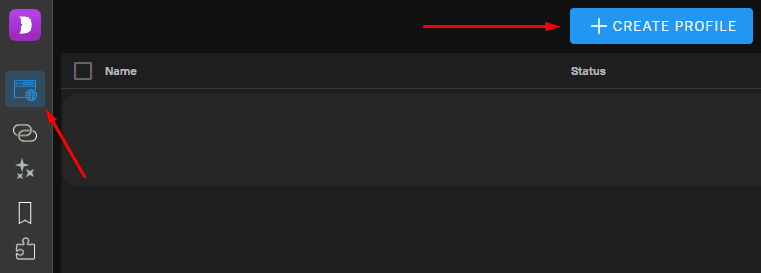
Launch the browser and open the Profiles section. Click the Create Profile button to create a new profile for work.
Access the Internet Through Real Networks
Node Proxy uses residential proxies instead of datacenter IPs.
Step 2. Configure the profile’s digital fingerprint
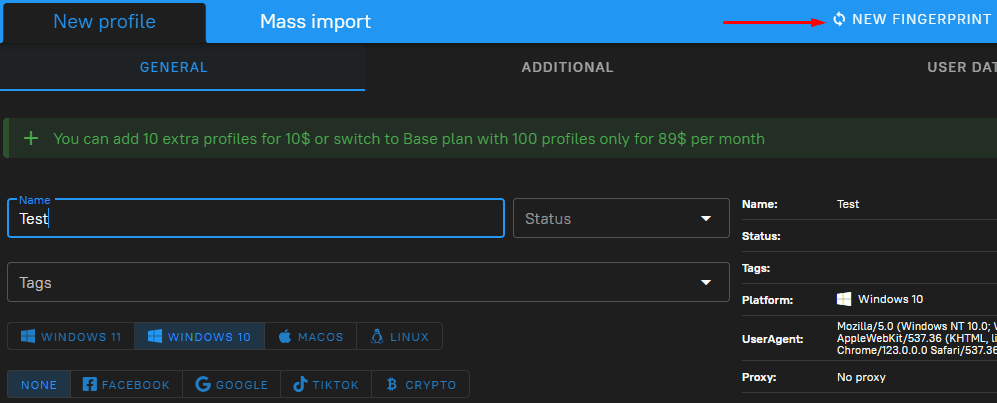
At this stage, you need to set the basic profile parameters. In the creation window, you can immediately fill in the main data and move on to configuring the browser environment.
In the profile creation form, specify the fingerprint parameters. In Dolphin{anty}, this can be done in two ways:
• configure the parameters manually;
• generate a new fingerprint automatically using the New Fingerprint button.
If you need to prepare the profile for launch quickly, automatic generation is usually used. If the exact environment parameters matter, the settings are configured manually.
Step 3. Add a proxy to the profile
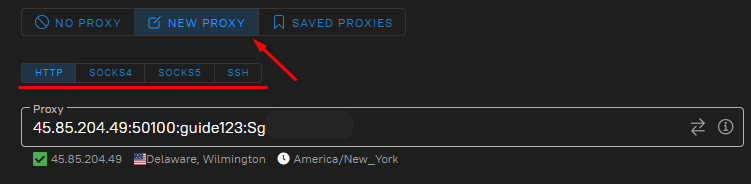
Find the New Proxy block and open the proxy add form. Then:
• select the required protocol;
• enter the proxy address;
• specify the port;
• add the login and password if they are required.
After entering the data, the browser will use these parameters to connect the profile to the network through the selected proxy.
Step 4. Save the profile
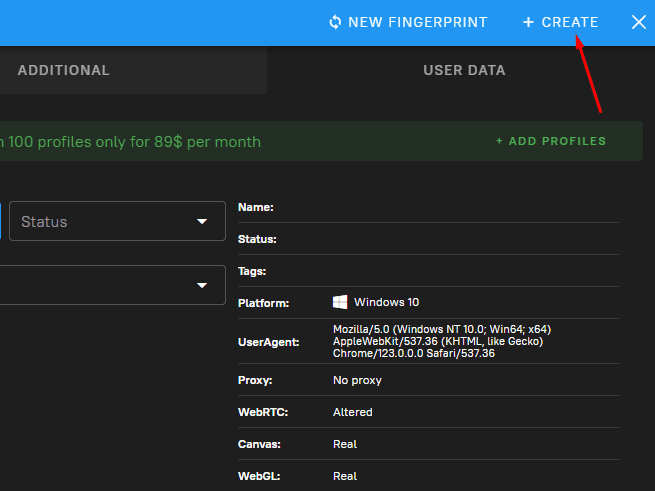
After filling in all the parameters, click Create in the upper-right corner.
The new profile will appear in the general list of profiles.
At this point, the basic setup is complete: the profile has been created, the fingerprint has been configured, and the proxy has been assigned.
Step 5. Launch the profile
In the list of profiles, find the created profile and click Launch. The browser will open it with the parameters that were specified during setup.
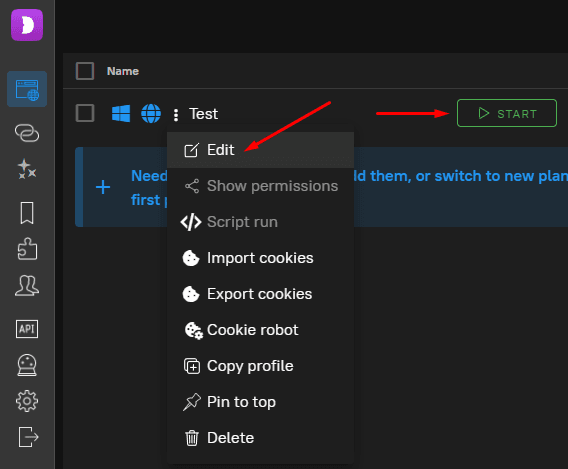
If you later need to change the proxy or other parameters, open the edit menu through the three-dot icon next to the profile name.
Step 6. Import a proxy list if necessary
If you need to work with several proxies at once, it is more convenient to add them as a list rather than one by one. To do this:
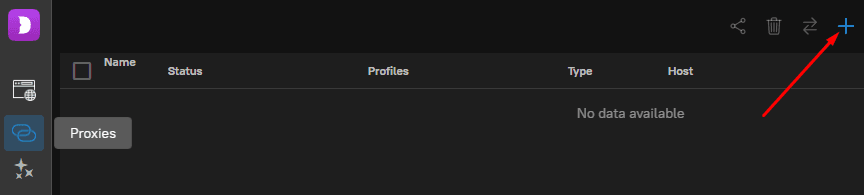
1. Open the Proxy tab in the left panel.
2. Click the + button.
3. Select the appropriate input format.
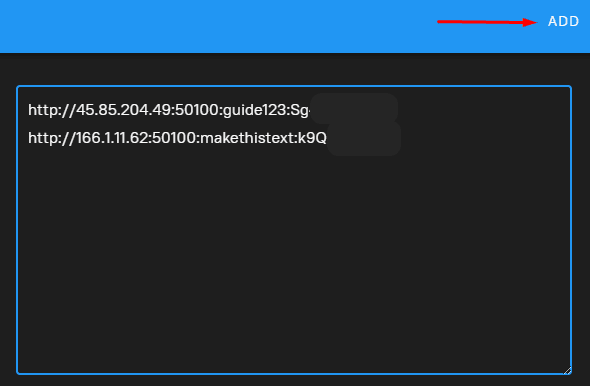
4. Paste the proxy list into the field on the right.
5. Click Add.
After that, all added proxies will appear in the browser’s proxy manager.
Step 7. Assign a proxy from the general list
After importing the proxies, they can be used when creating new profiles or editing existing ones. Instead of entering them manually, it is enough to select the required proxy from the list and assign it to the profile.
This method is convenient if there are many profiles and proxies need to be distributed among them quickly.
Step 8. Check the connection and edit the settings if necessary
Open the Proxy section and select the required proxy from the list. Inside the card, you can:
• check the connection;
• change the parameters;
• add a link for IP rotation;
• rename the proxy for convenience.
This is useful if you need to make sure in advance that the connection is working correctly.
Final result
Setting up a proxy in Dolphin{anty} comes down to a simple sequence:
1. create a profile;
2. configure the fingerprint;
3. add a proxy;
4. save the profile;
5. launch it.
If there are many proxies, it is better to import them into a separate list in advance and then assign them to the required profiles. This approach simplifies the workflow and makes it easier to manage profiles inside the browser more quickly.