Setting Up a Residential Proxy in MuLogin: A Step-by-Step Guide
 ·August 2, 2026·7 min read
MuLogin allows you to create separate browser profiles with independent data storage and network connection settings. Each profile can be assigned its own proxy, and if needed, multiple profiles can be created in bulk at once.
What You Need to Prepare in Advance
Before you begin, you will need:
• MuLogin installed;
• a registered account and access to the program;
• proxy details: IP address, port, username, and password (this information can be found on our website);
• an understanding of which proxy type is being used: HTTP or SOCKS5.
If you plan to create profiles in bulk, you will also need a list of proxies for batch import.
Residential Proxies You Can Rely On
High connection success rates and a wide selection of locations.
Setting Up a Single Proxy for an Individual Profile
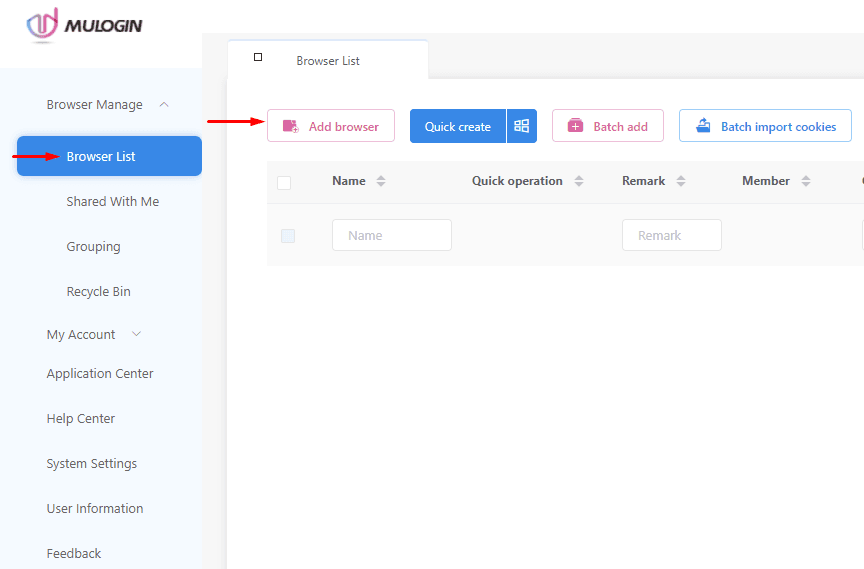
Step 1. Create a new browser profile
Open MuLogin and go to the browser management section. Click Add browser.
After that, the profile creation window will open.
Step 2. Open the Proxy Settings section
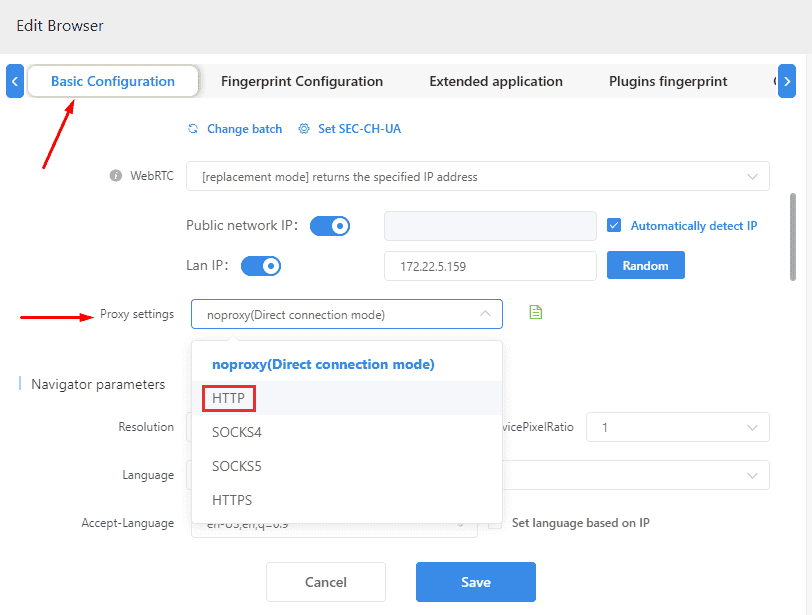
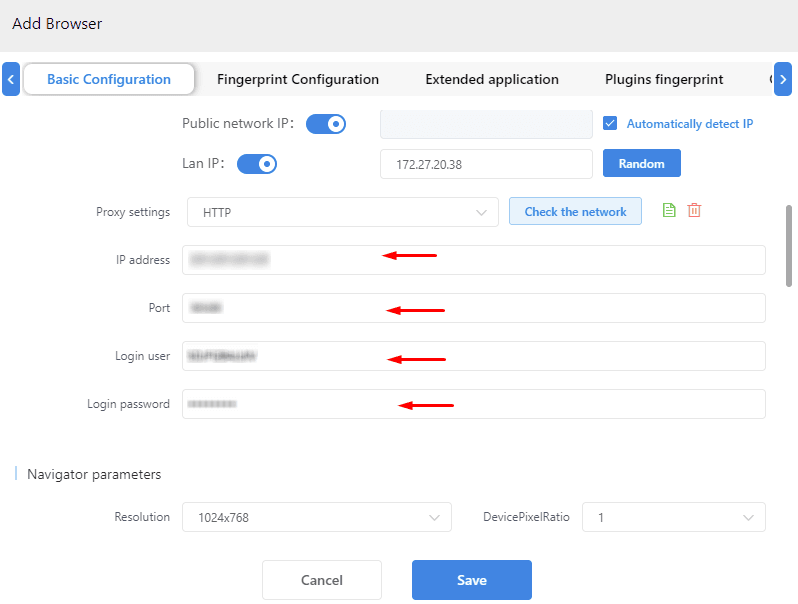
In the Basic Configuration window, locate the Proxy Settings block. This is where the network connection parameters for the current profile are configured.
At this stage, it is important not to confuse the general profile settings with the network settings. The proxy is assigned not to the entire program, but to a specific browser profile.
Step 3. Enter the proxy parameters
In the configuration form, enter:
• the connection name, if the field is available;
• the proxy IP address;
• the port;
• the username;
• the password.
Also select the proxy type.
The data must be entered without errors. An incorrect port, address format, or credentials will prevent the profile from establishing a connection.
Step 4. Check the connection
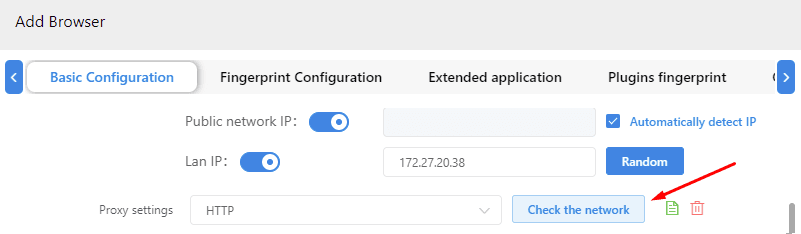
After entering the parameters, click Check the Network.
This function checks whether the profile can access the network through the specified proxy. If the check is successful, the connection is configured correctly. If not, you need to recheck the IP, port, proxy type, and authentication details.
Step 5. Save the profile
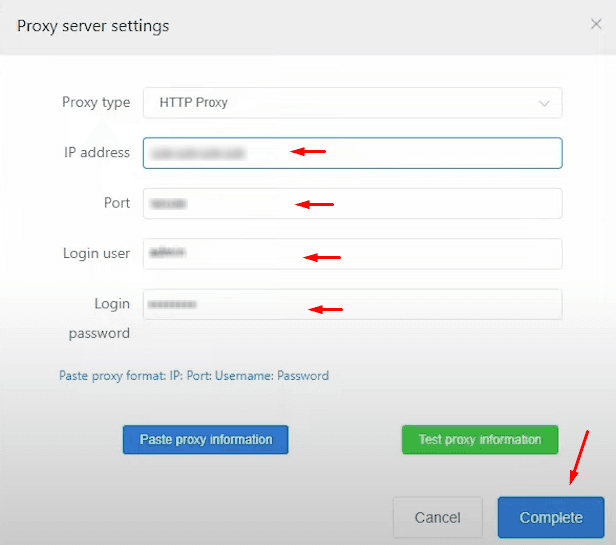
After a successful check, save the profile settings by clicking Complete.
At this stage, the profile is already linked to the specified proxy and is ready to launch.
Step 6. Launch the profile
Return to the browser list and launch the created profile. MuLogin will open a separate browser environment with the specified connection settings.
Batch Setup of Multiple Proxies
If you need to create several profiles at once, it is more convenient to use batch mode.
Step 1. Prepare the proxy list
First, collect the proxies that will be used for the profiles in text format.
It is important to check in advance that each entry contains the full set of data: address, port, and, if necessary, credentials.
Step 2. Open Batch add
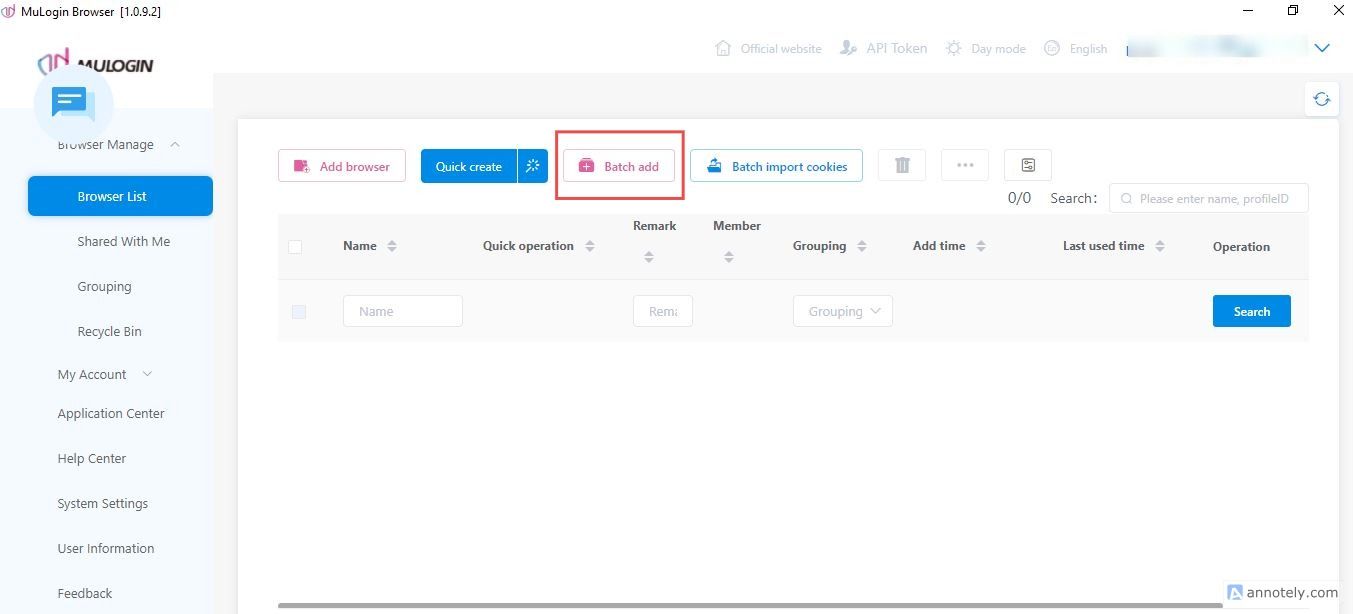
In the MuLogin interface, go to the profile management section and click Batch add.
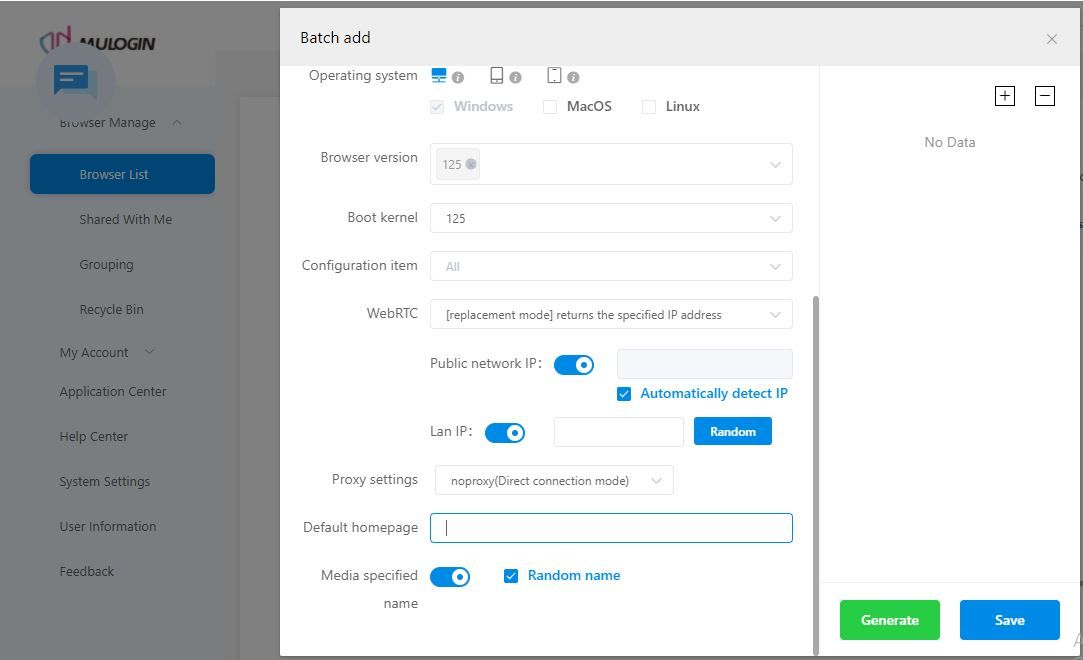
Step 3. Set the common profile parameters
In the batch creation form, configure the common parameters for the future profiles. These may include the basic browser environment settings, name templates, and other settings that MuLogin allows you to apply to the entire group at once.
Step 4. Go to Proxy Settings
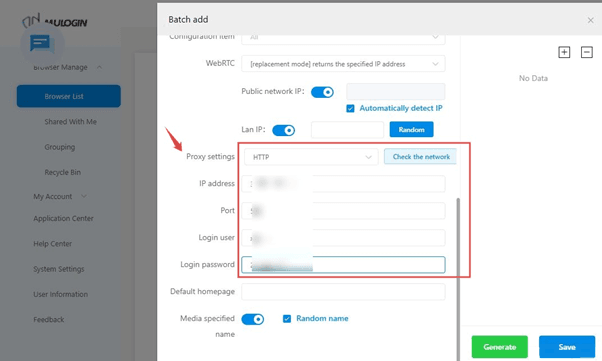
Open the Proxy settings section inside the batch setup window.
At this stage, you need to select the proxy type and upload or paste the data for multiple connections.
Specify the connection type being used:
• HTTP, if the proxy works over the HTTP scheme;
• SOCKS5, if this protocol is used.
An incorrectly selected type will cause failures even if the IP and port are correct.
Step 5. Assign proxies to profiles
After the list is uploaded, MuLogin will distribute the proxies among the profiles being created. If generation via API is used, separate IPs for each profile can be obtained automatically.
As a result, each profile in the batch will be created with its own network connection.
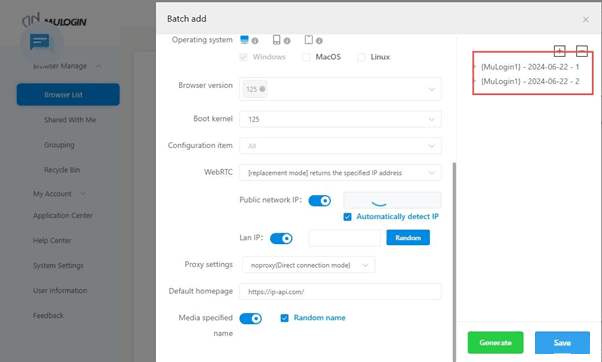
Step 6. Generate the profiles
Click Generate, if this step is предусмотрен by the interface. After that, MuLogin will generate the list of future profiles.
They are usually displayed on the right side of the window, where you can review the final configuration before saving.
Step 7. Save and launch the profiles
Click Save to complete the batch creation. After saving, the profiles will appear in the general list and will be ready to launch.
What to Check After Setup
After creating a profile or a group of profiles, it is worth making sure of the following:
• the proxy passes the built-in network check;
• each profile has its own assigned connection;
• the profiles launch without errors;
• the network settings are not mixed up between profiles;
• the correct proxy type has been selected.
If a profile does not launch or cannot access the network, the cause is most often related to one of four errors: an incorrect IP, an incorrect port, the wrong proxy type, or an error in the username and password.
Conclusion
In MuLogin, the proxy is configured at the level of an individual browser profile. The basic scheme is always the same: a profile is created, the Proxy Settings section is opened, the connection parameters are entered, the network is checked, and then the configuration is saved. To work with multiple profiles, Batch add is used, where the same actions are performed for the entire group at once.