How to Set Up a Residential Proxy on Android Using V2BOX
 ·July 31, 2026·3 min read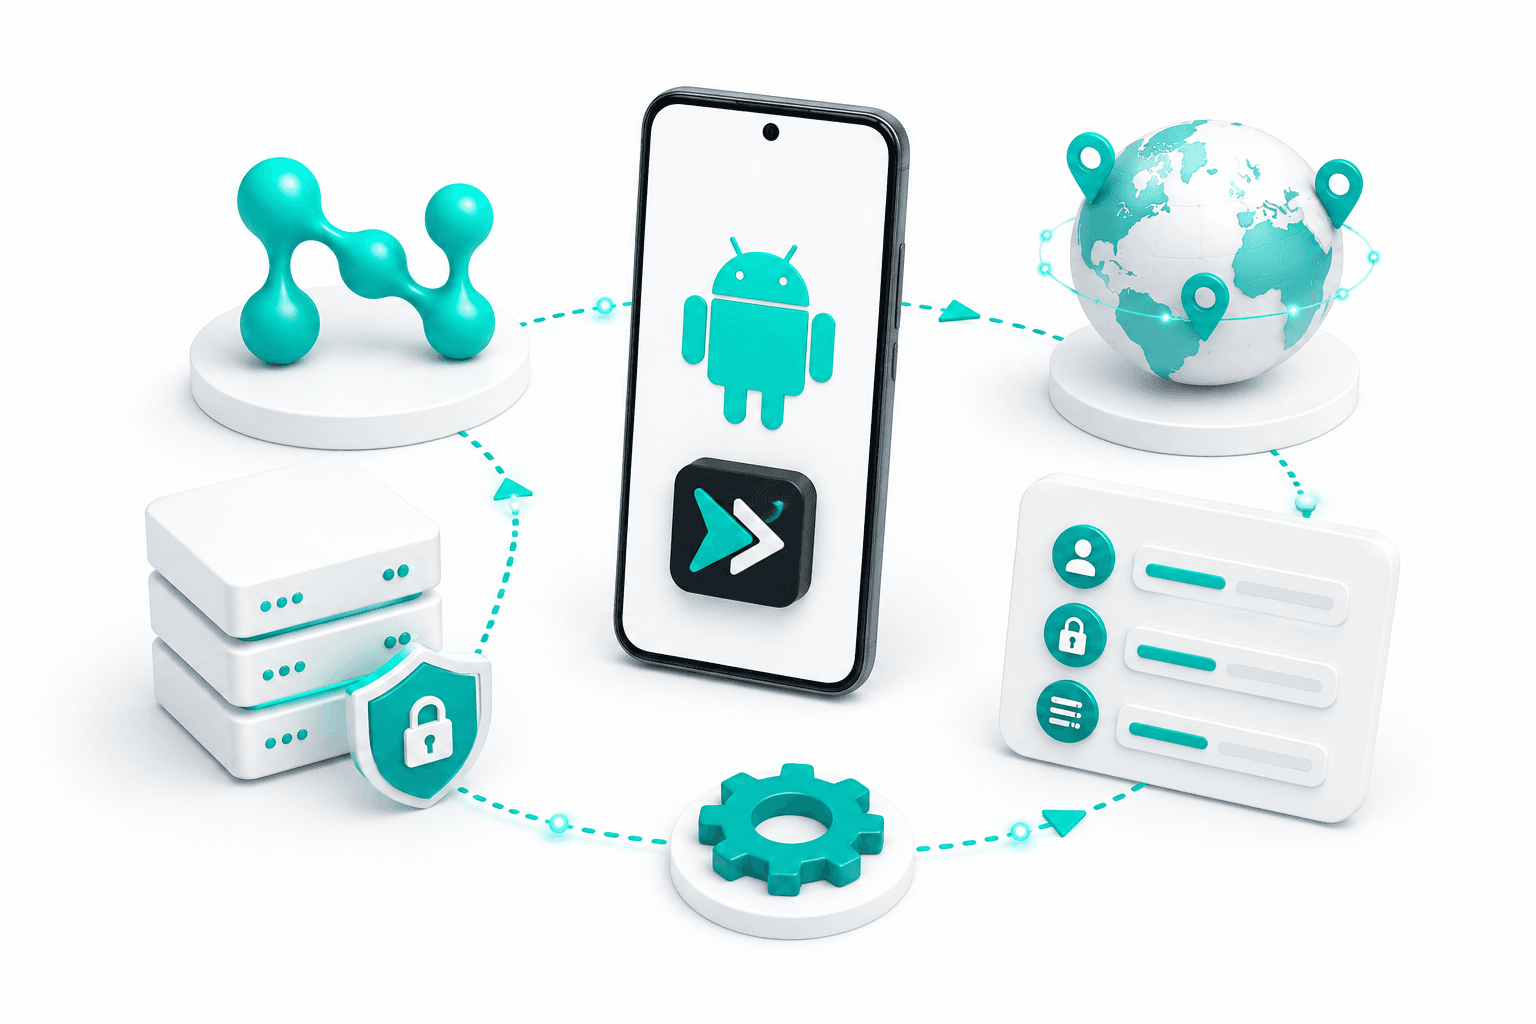
What V2BOX Is Used For
V2BOX is an application for iOS and Android that functions as a proxy client. It supports a range of network protocols and encryption methods, allowing you to establish a secure connection between your device and remote servers.
Its primary purpose is to transmit data using encrypted protocols, which can be useful when working on networks with an insufficient level of security, such as public Wi-Fi hotspots. The application does not require creating an account or signing in.
Supported protocols include Shadowsocks, V2Ray (VMess, VLESS), Trojan, SSH, Hysteria, Hysteria2, WireGuard, DNSTT, SOCKS, and others.
The application allows you to import server configurations via V2Ray/Xray subscriptions or add them manually.
Looking for Residental Proxies?
Trusted residential IPs, a vast GEO coverage network, pay-as-you-go traffic pricing, and a high connection success rate.
Setting Up a Residential Proxy in V2BOX
1. Install the Application
Download V2BOX from Google Play
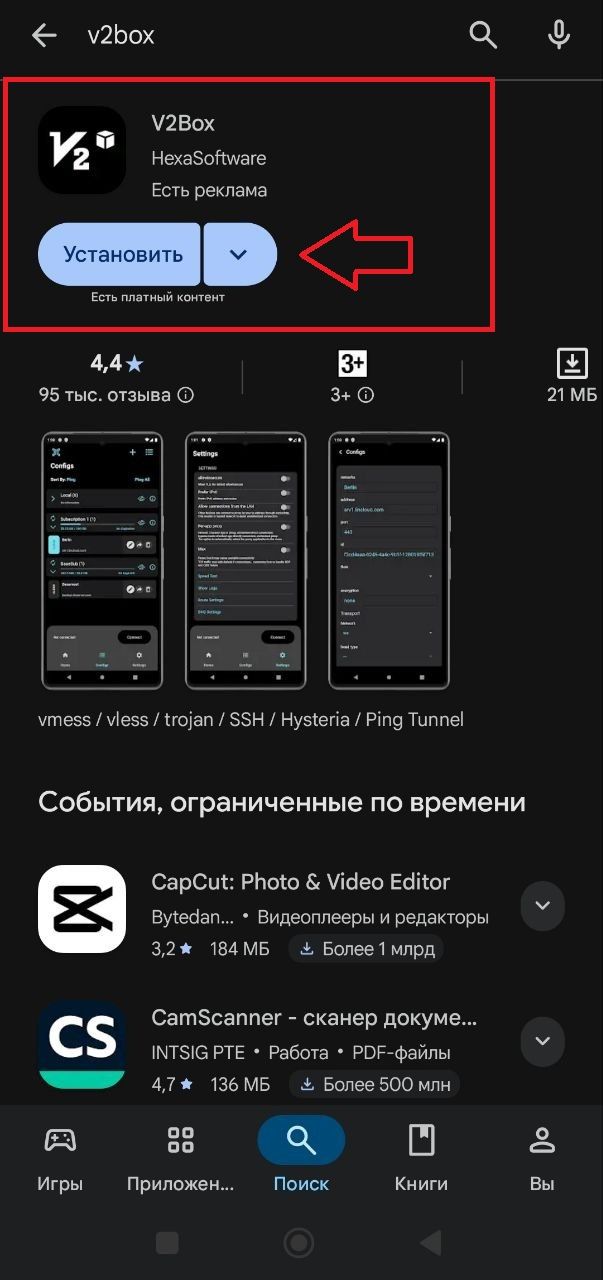
After installation, launch the application.
2. Add a Manual Configuration
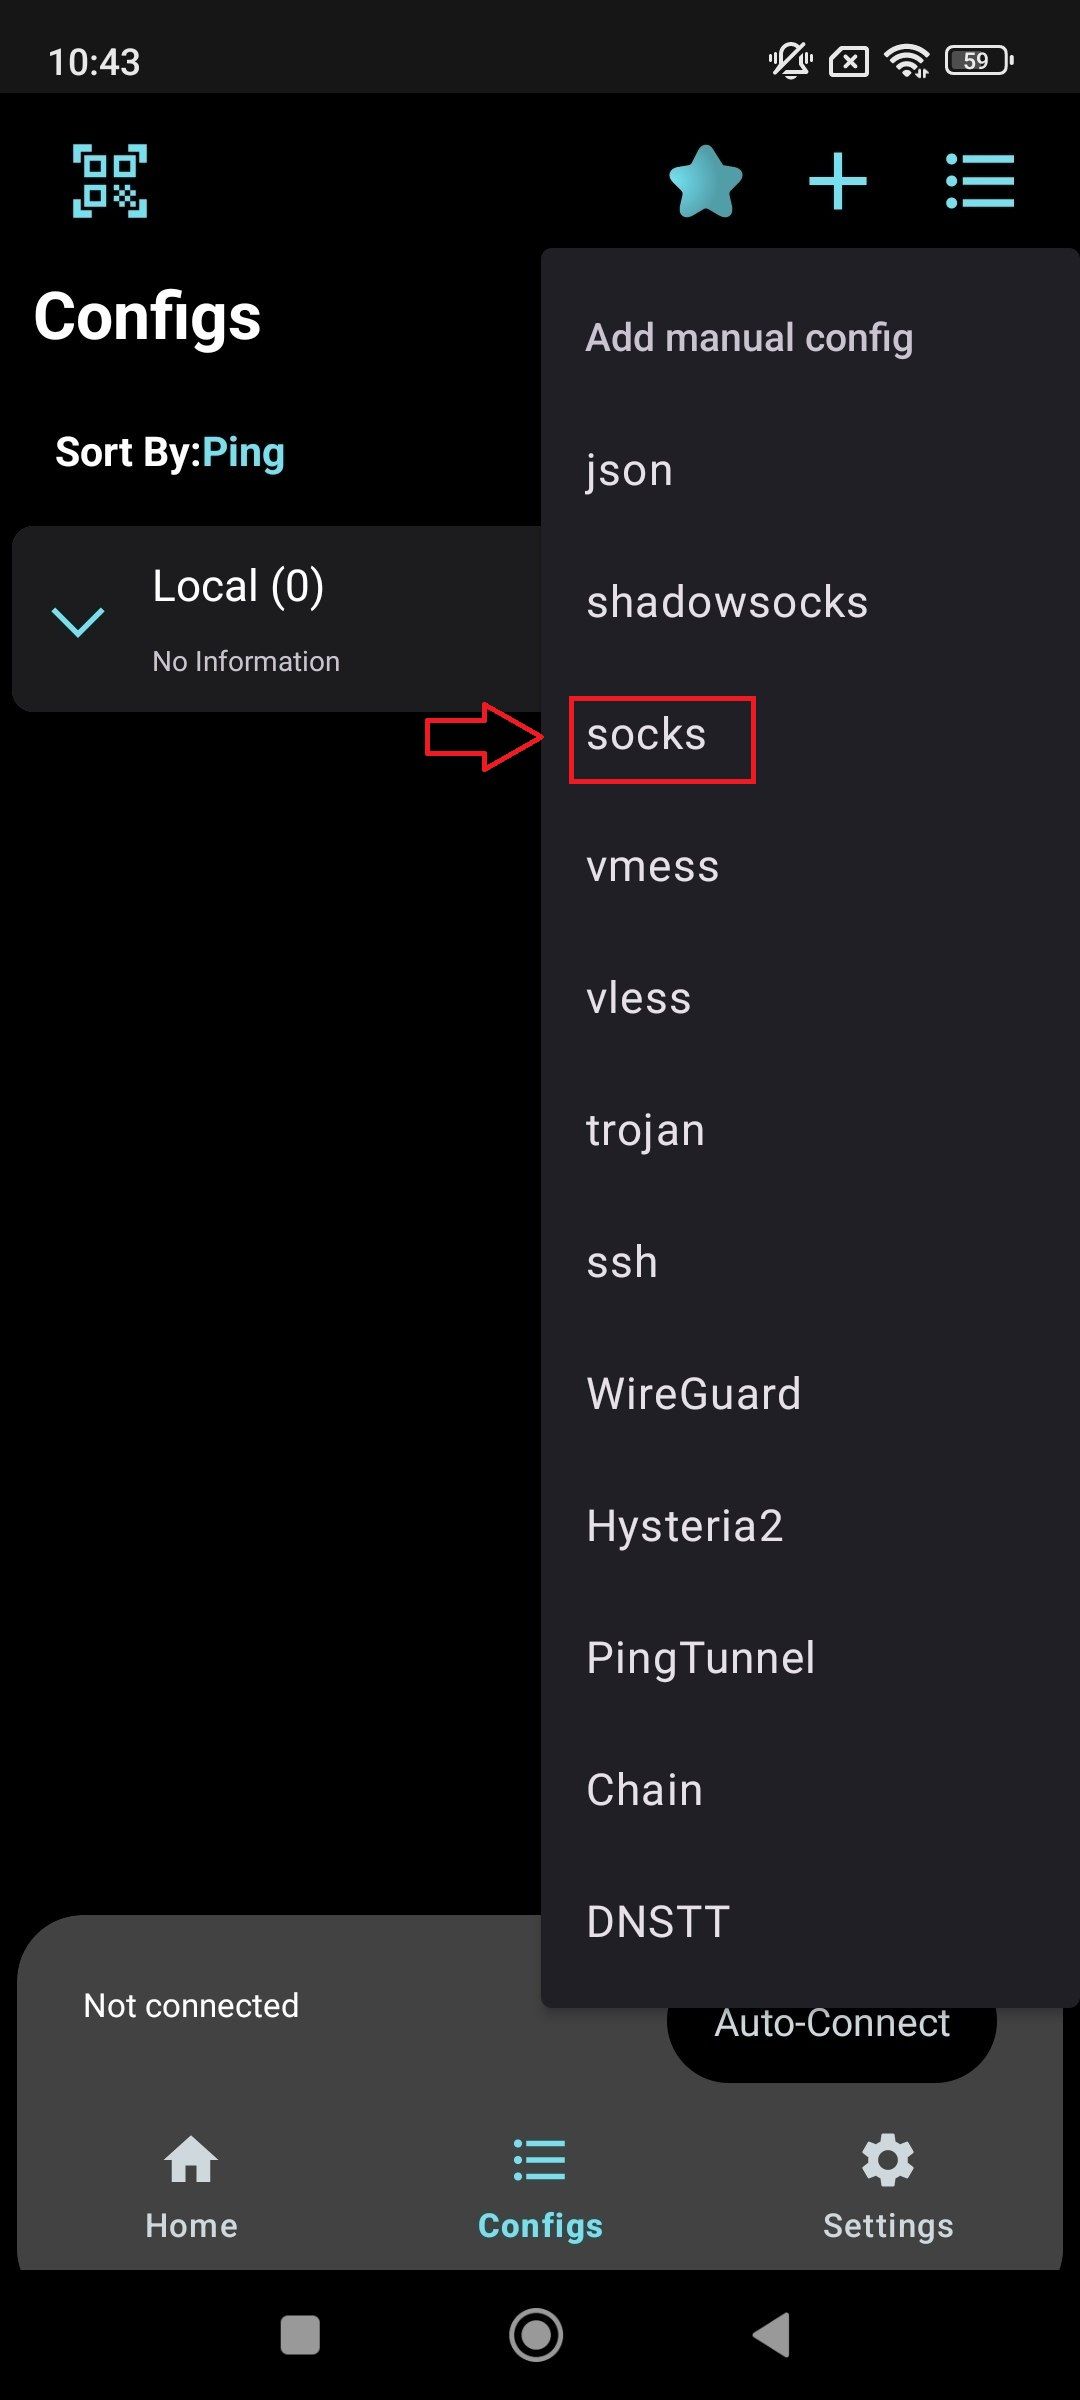
Go to the Configs tab.
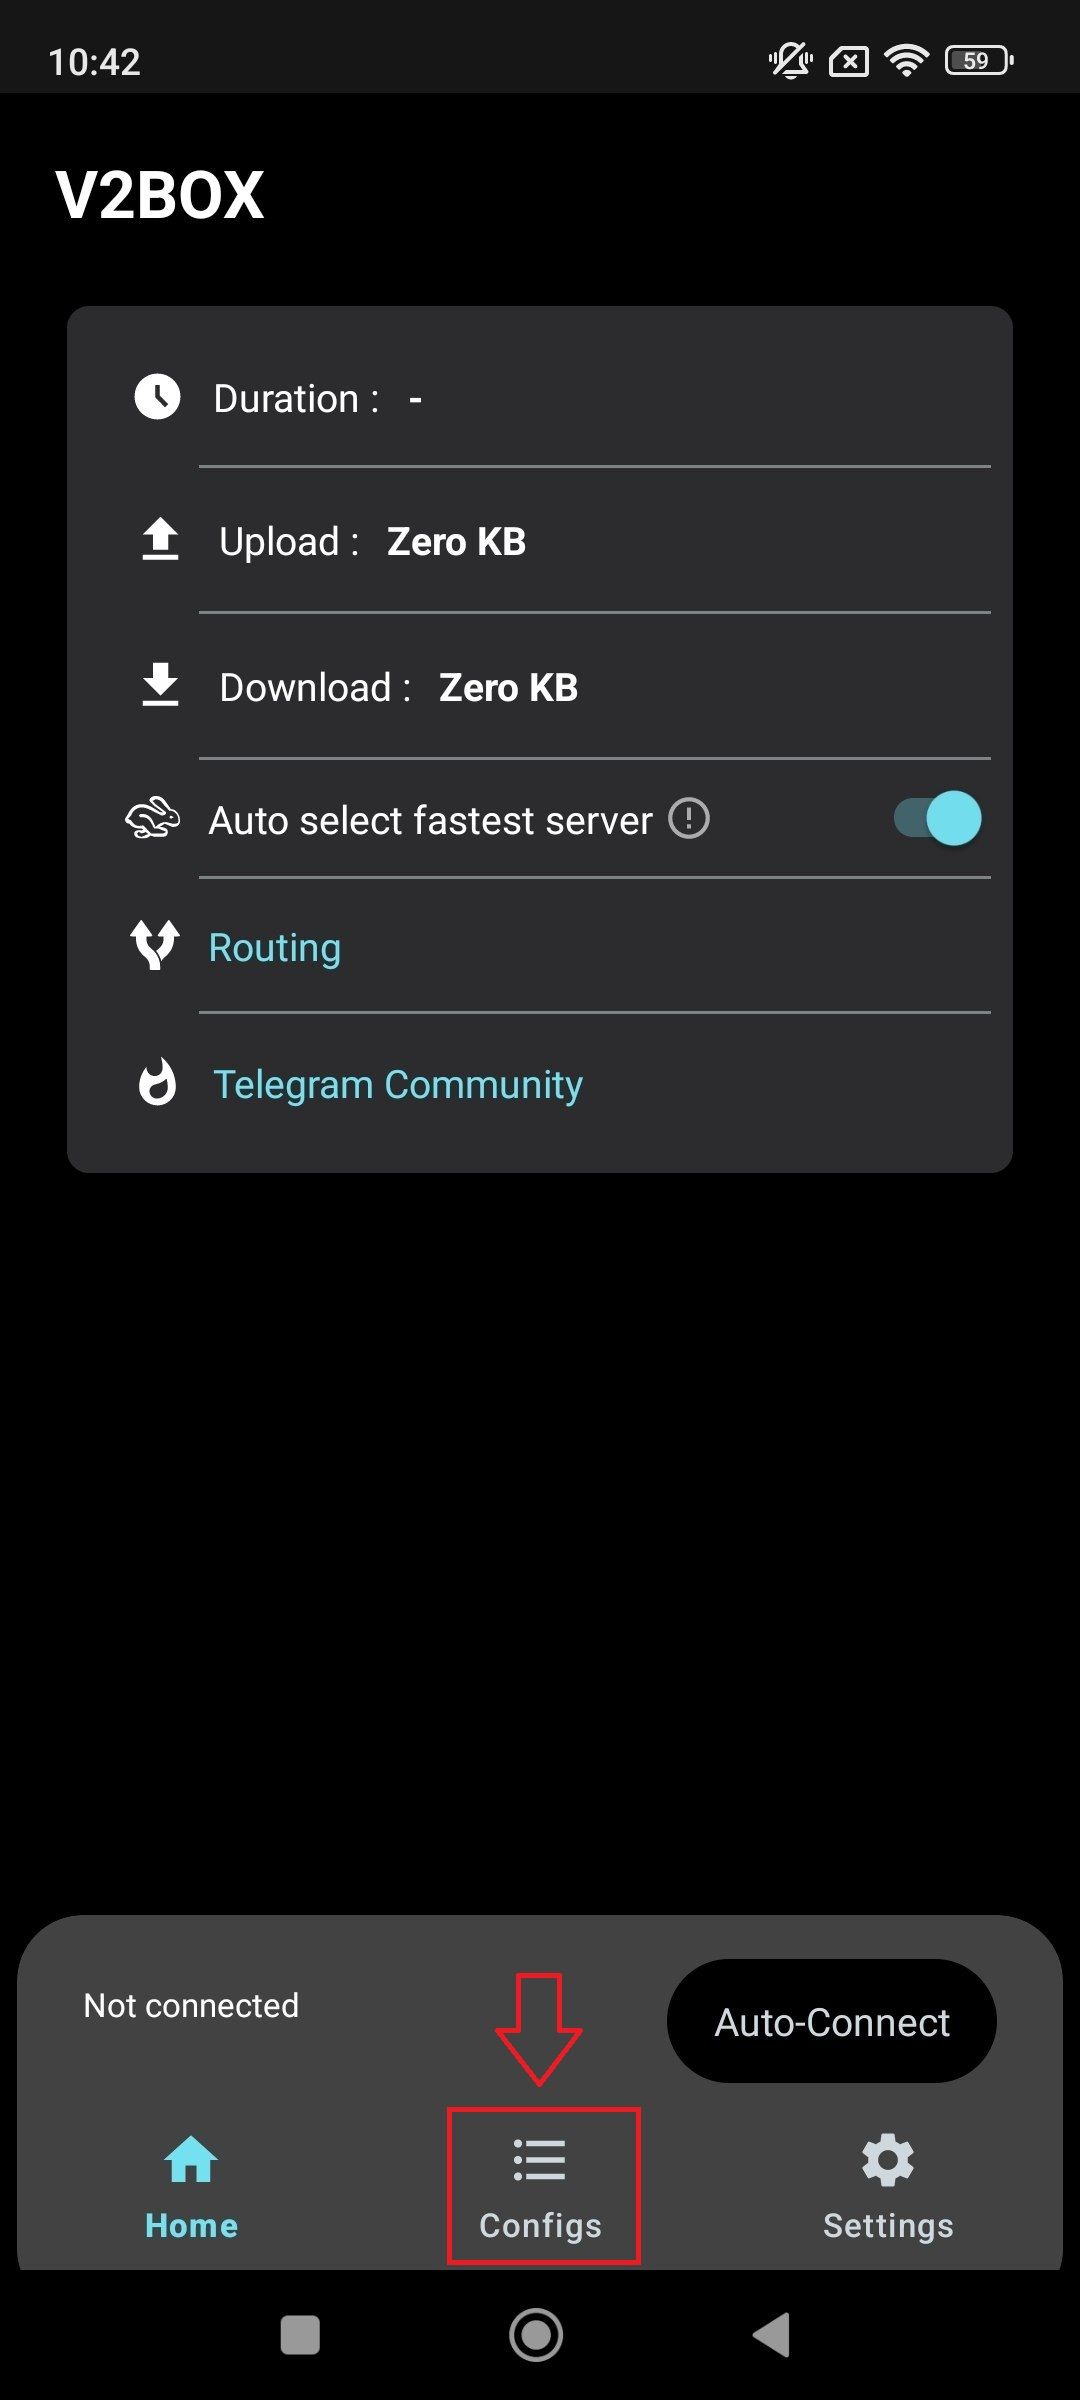
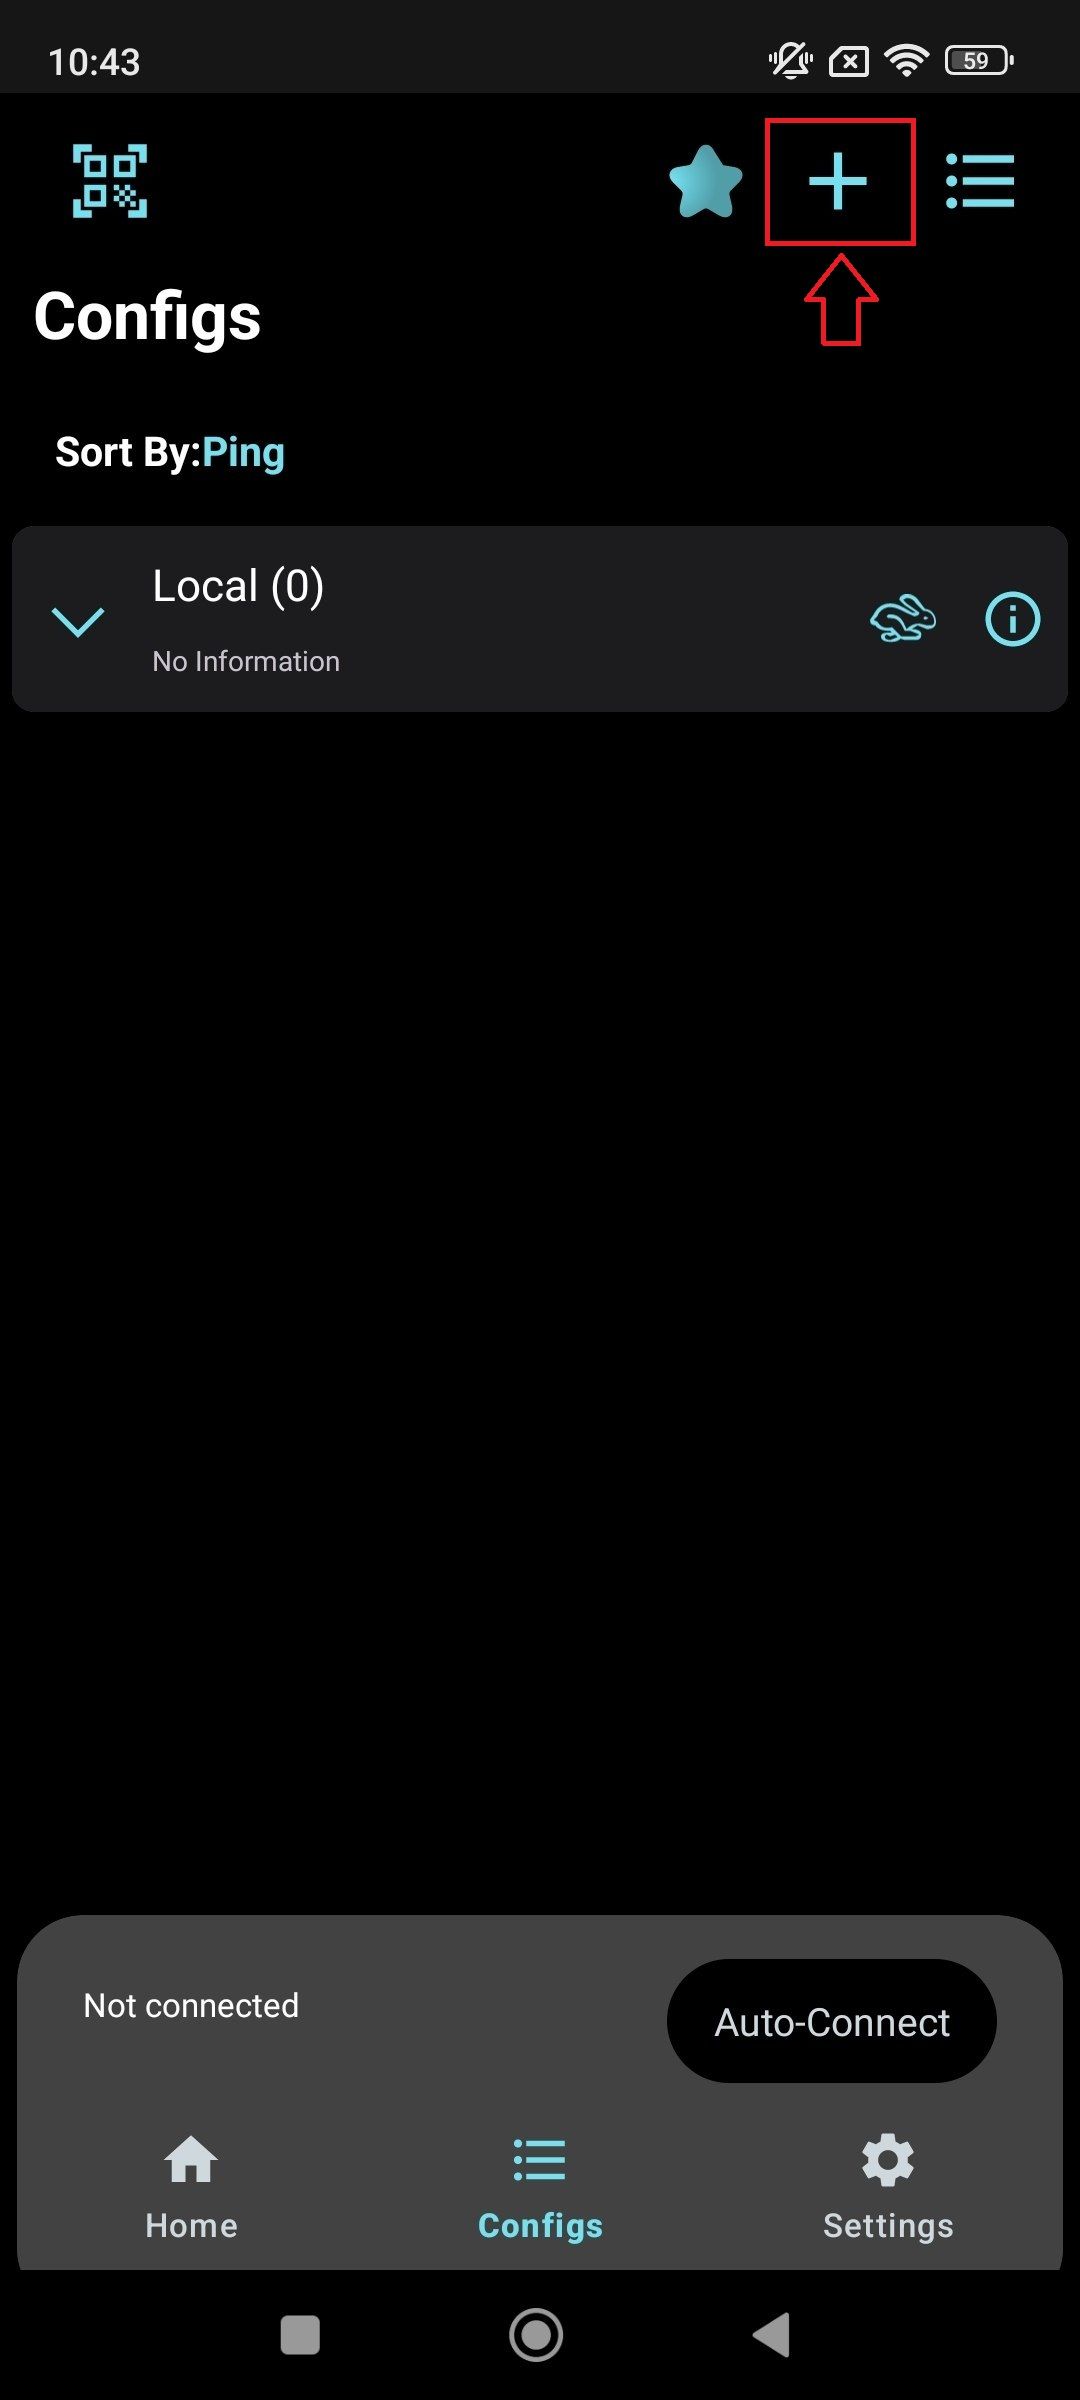
On the Configs tab, tap the turquoise + icon.
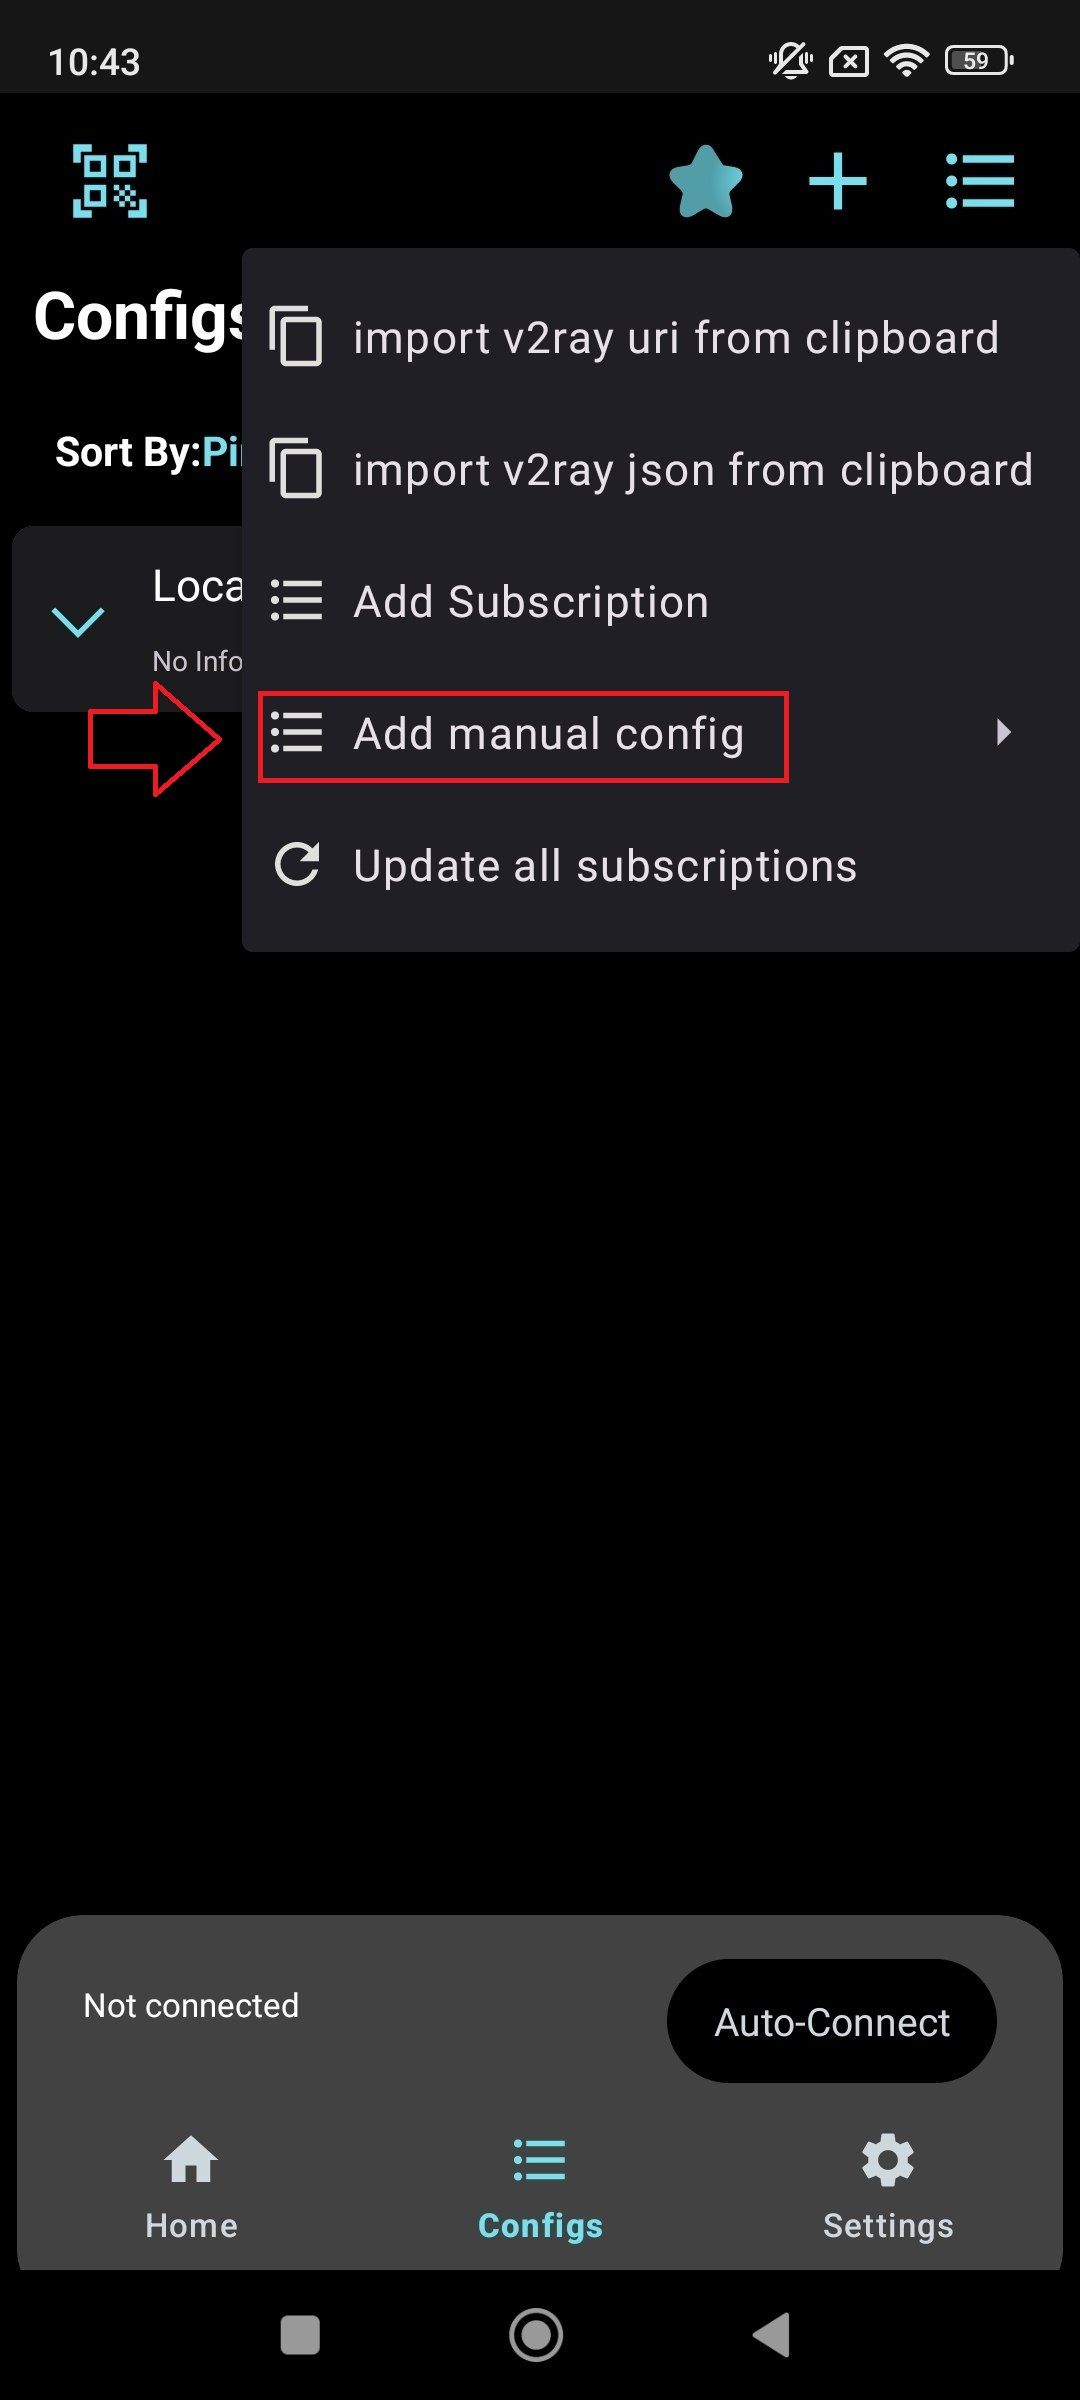
Tap Add Manual Config.
Select the SOCKS format.
3. Create a Node Proxy Proxy List
Go to the Node Proxy website, sign in, or create a new account.
In your account, click +Create.
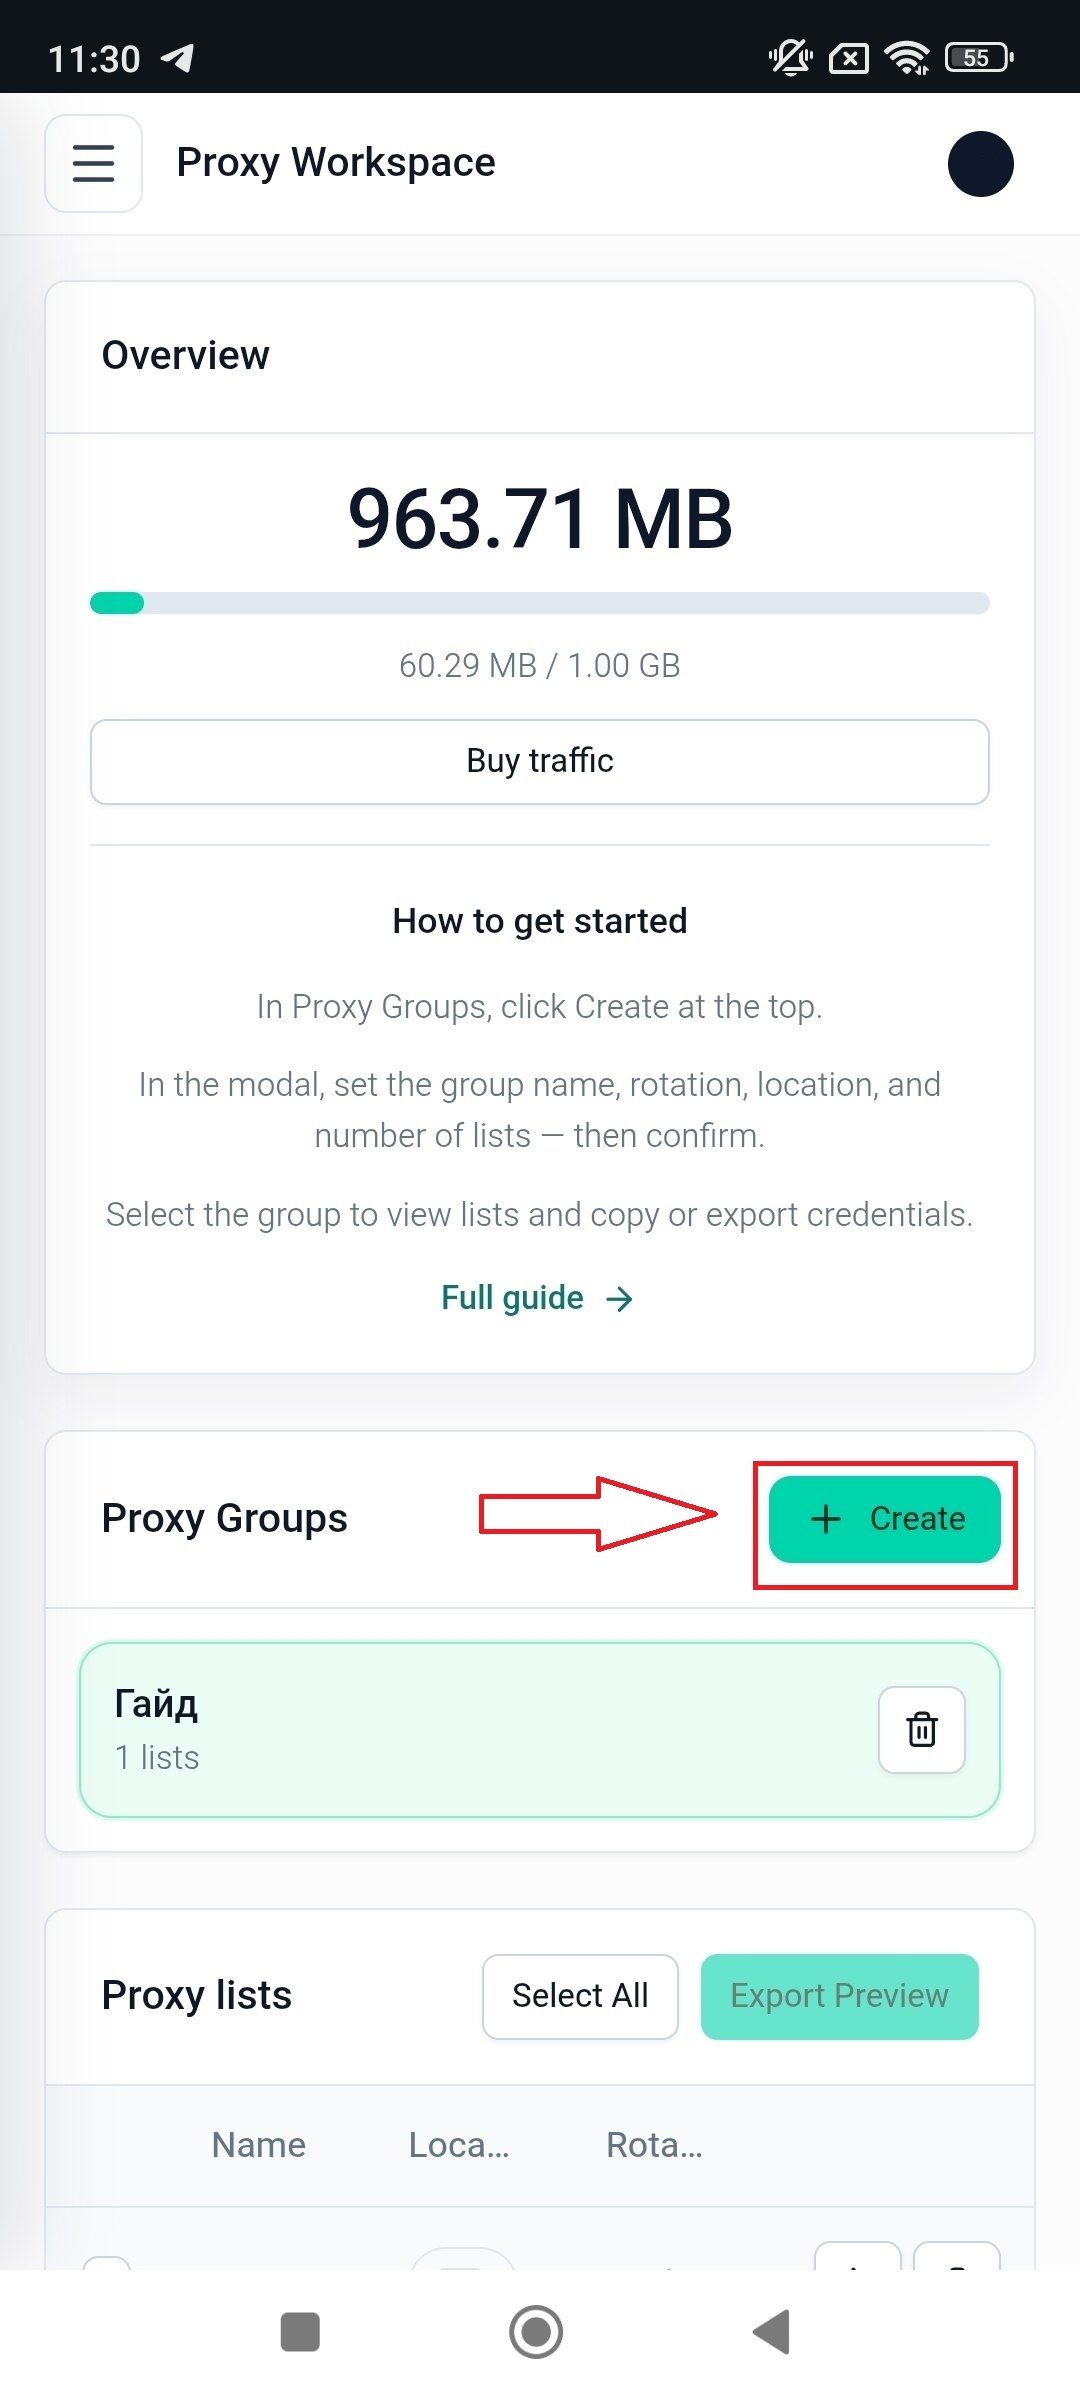
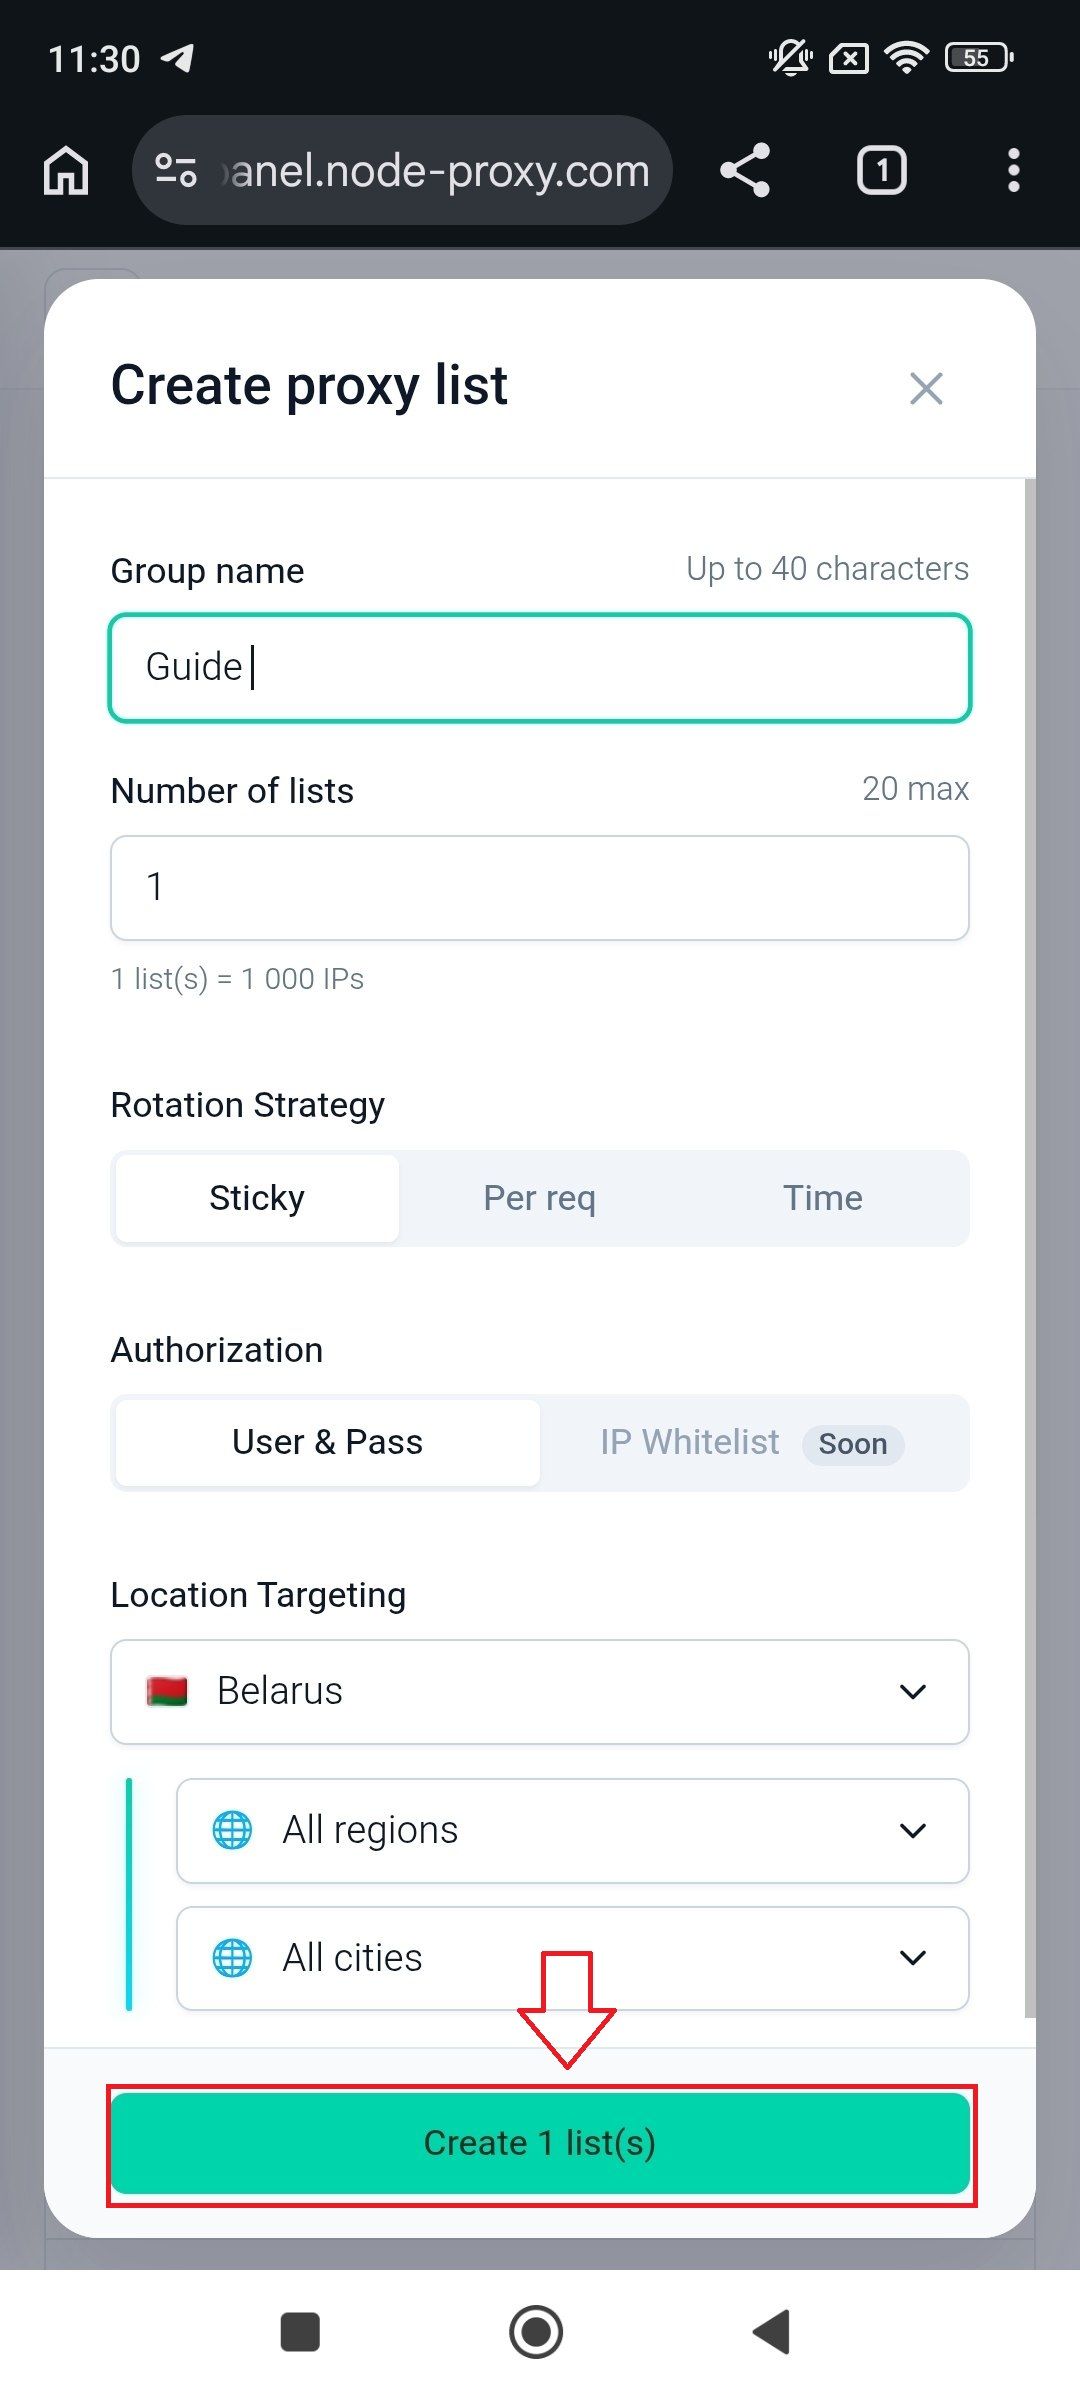
Specify all the required settings and save them by clicking Create 1 List(s).
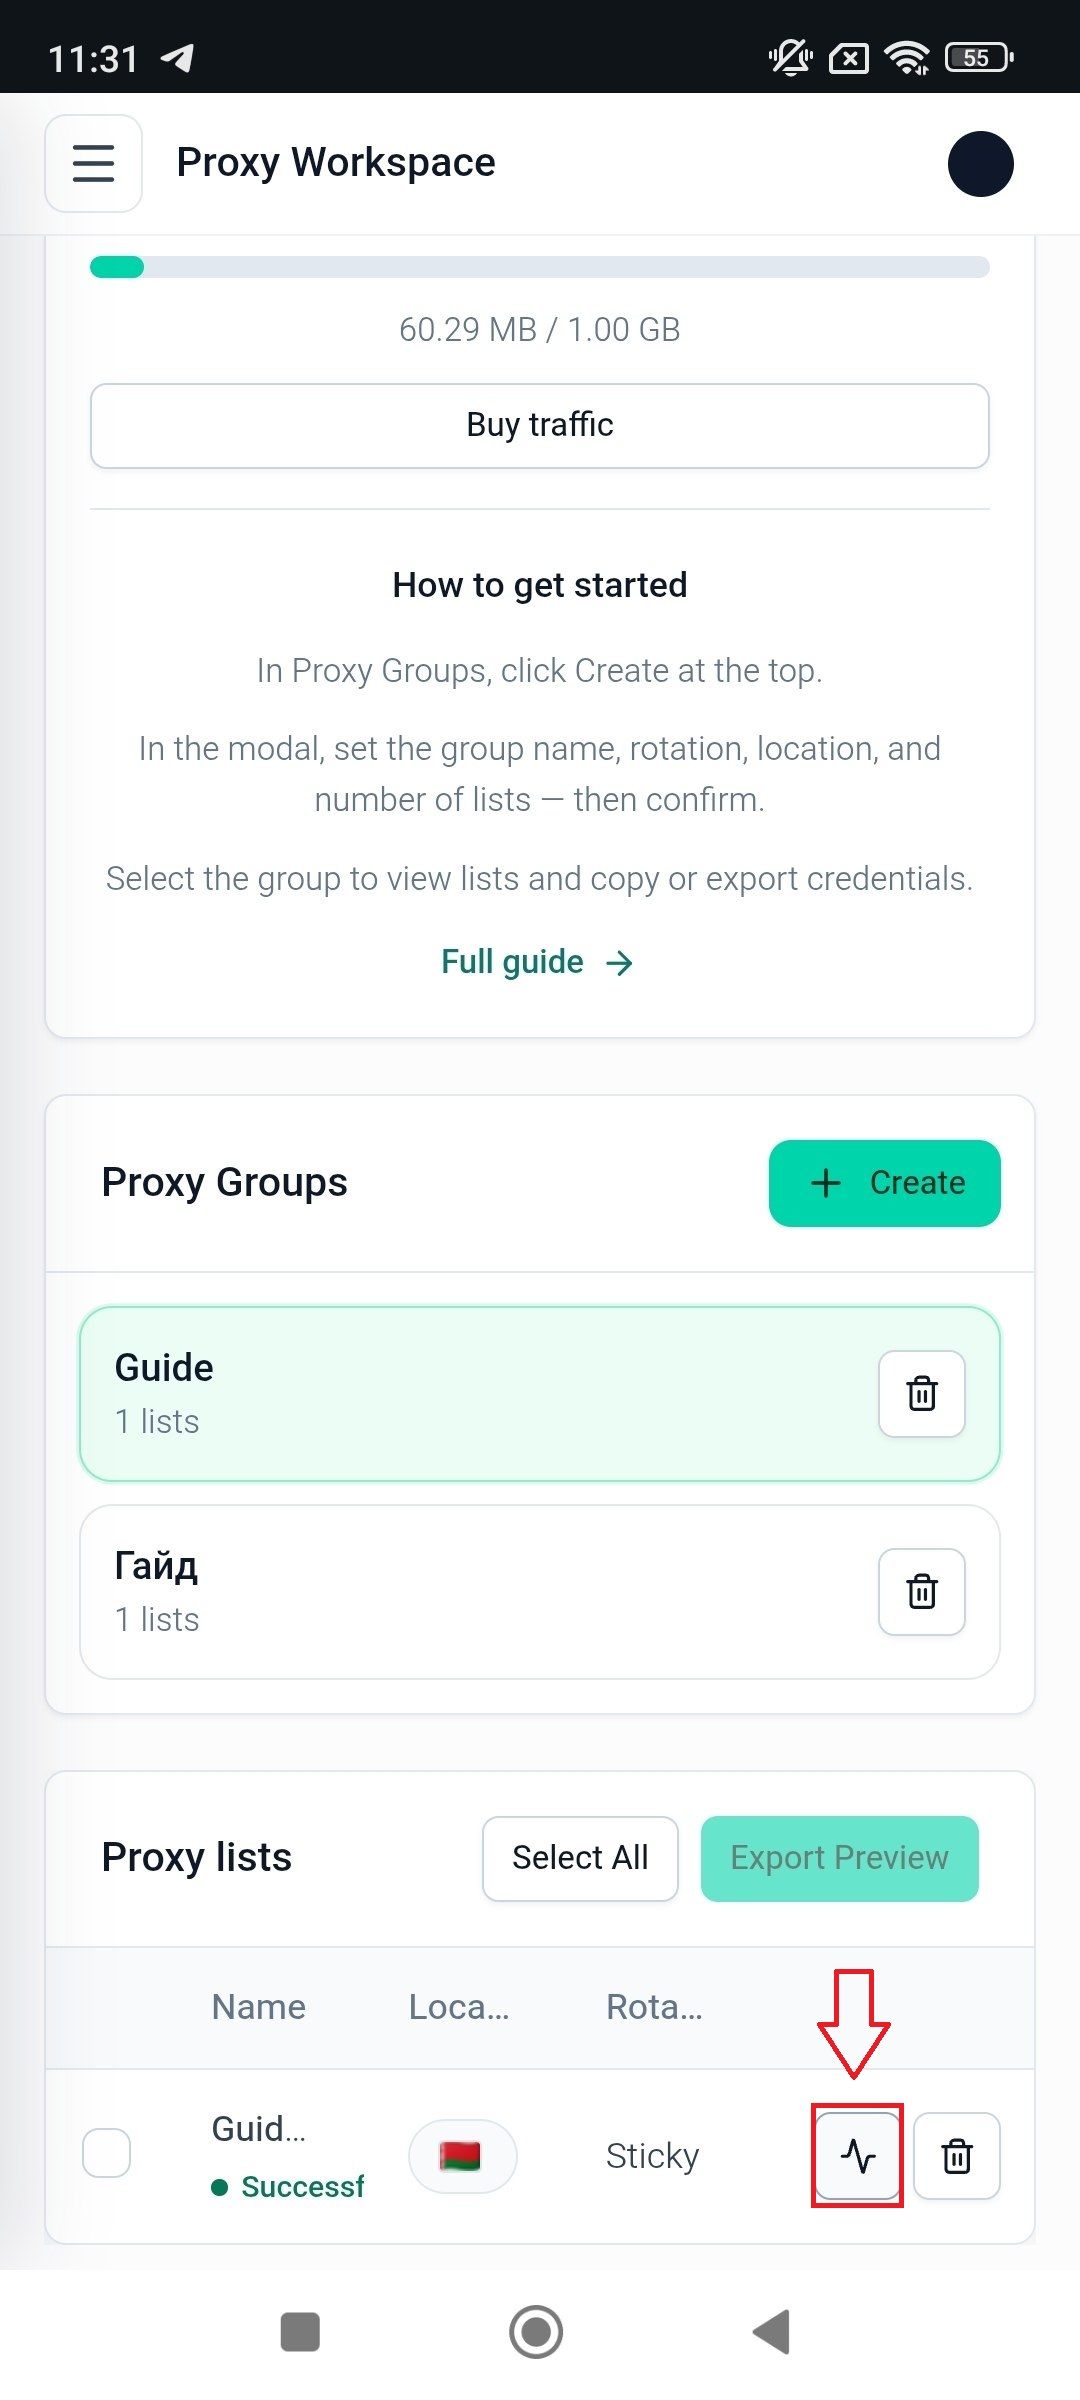
In the Proxy Groups section, select the proxy group and click Check a Random Proxy from the List. A randomly selected proxy from the list will be tested. If the result is Successful, the proxy list is ready to use.
Click the proxy list to copy or save its details. (In the window that opens, you can also edit the proxy protocol and format.)
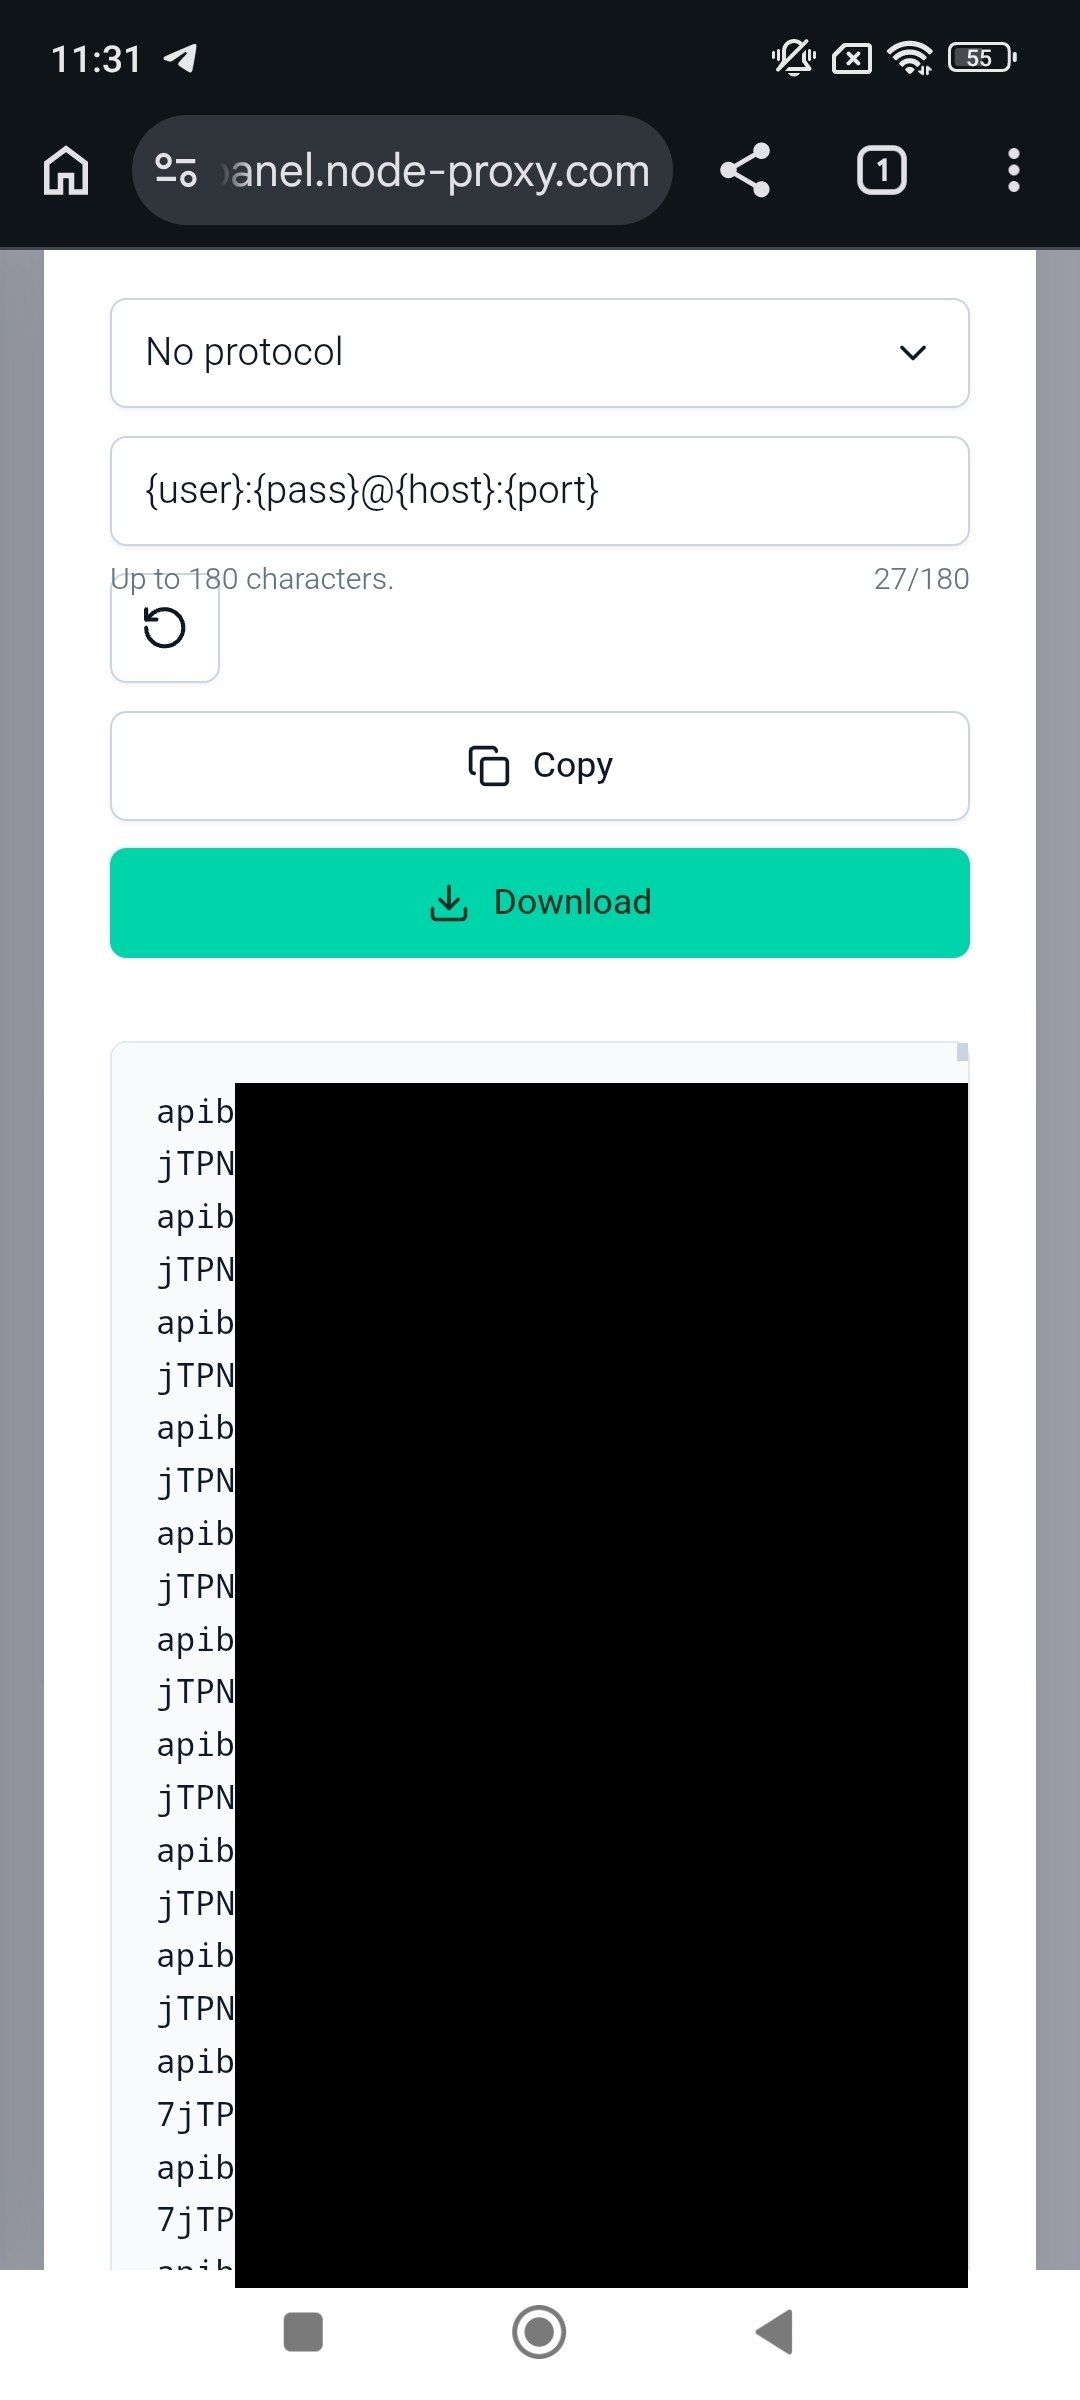
4. Enter the Proxy Connection Parameters
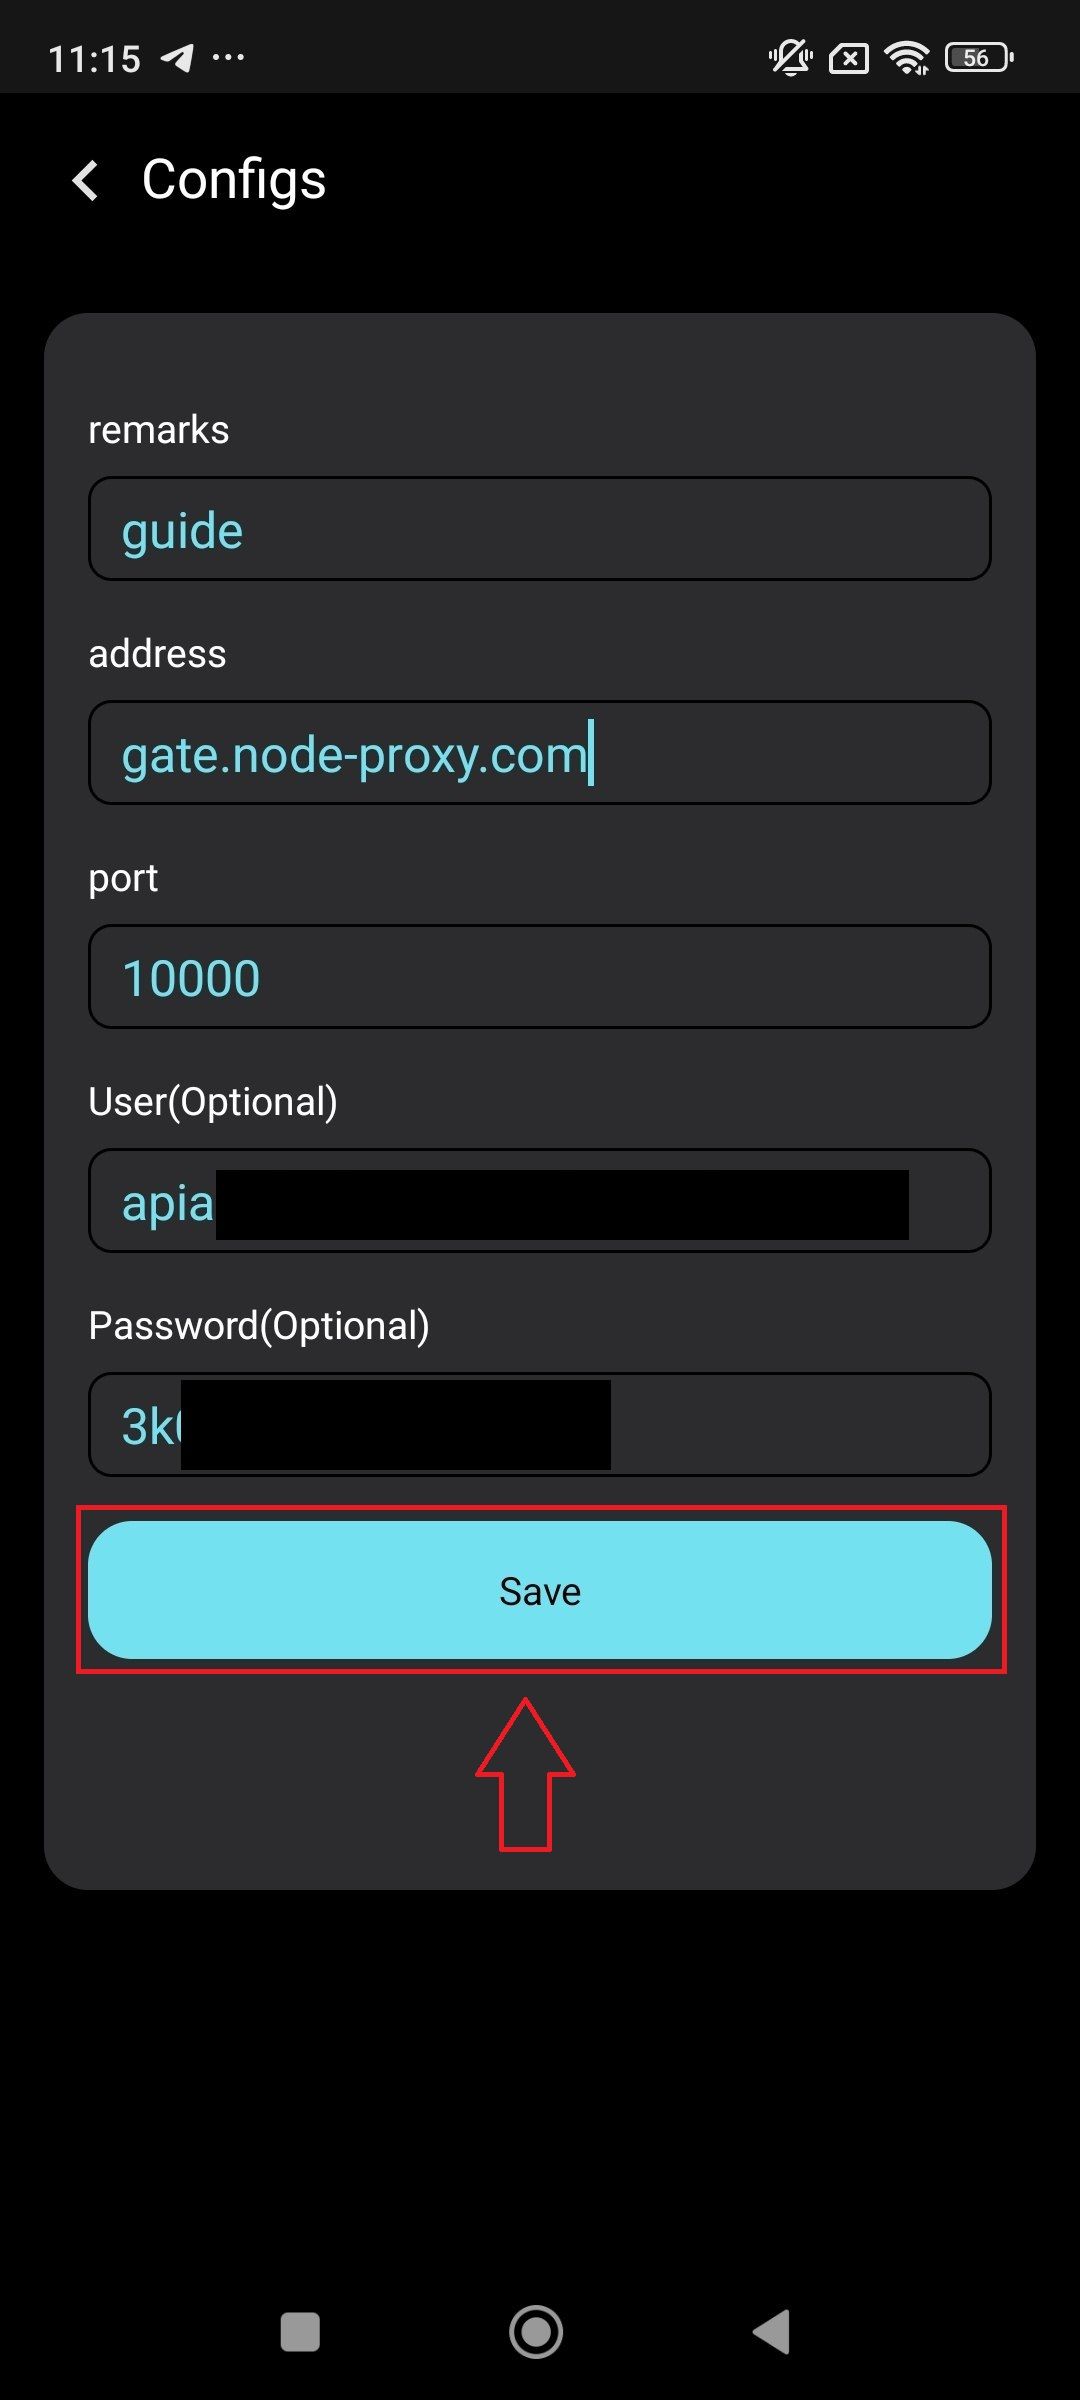
In the configuration creation window, specify the following:
• Remarks – configuration name;
• Address (Host) – proxy server address;
• Port – port number;
• User and Password – authentication credentials, if required.
After filling in all the fields correctly, click Save to save the configuration.
5. Start the Connection
After saving the configuration, select it and tap Auto-connect.
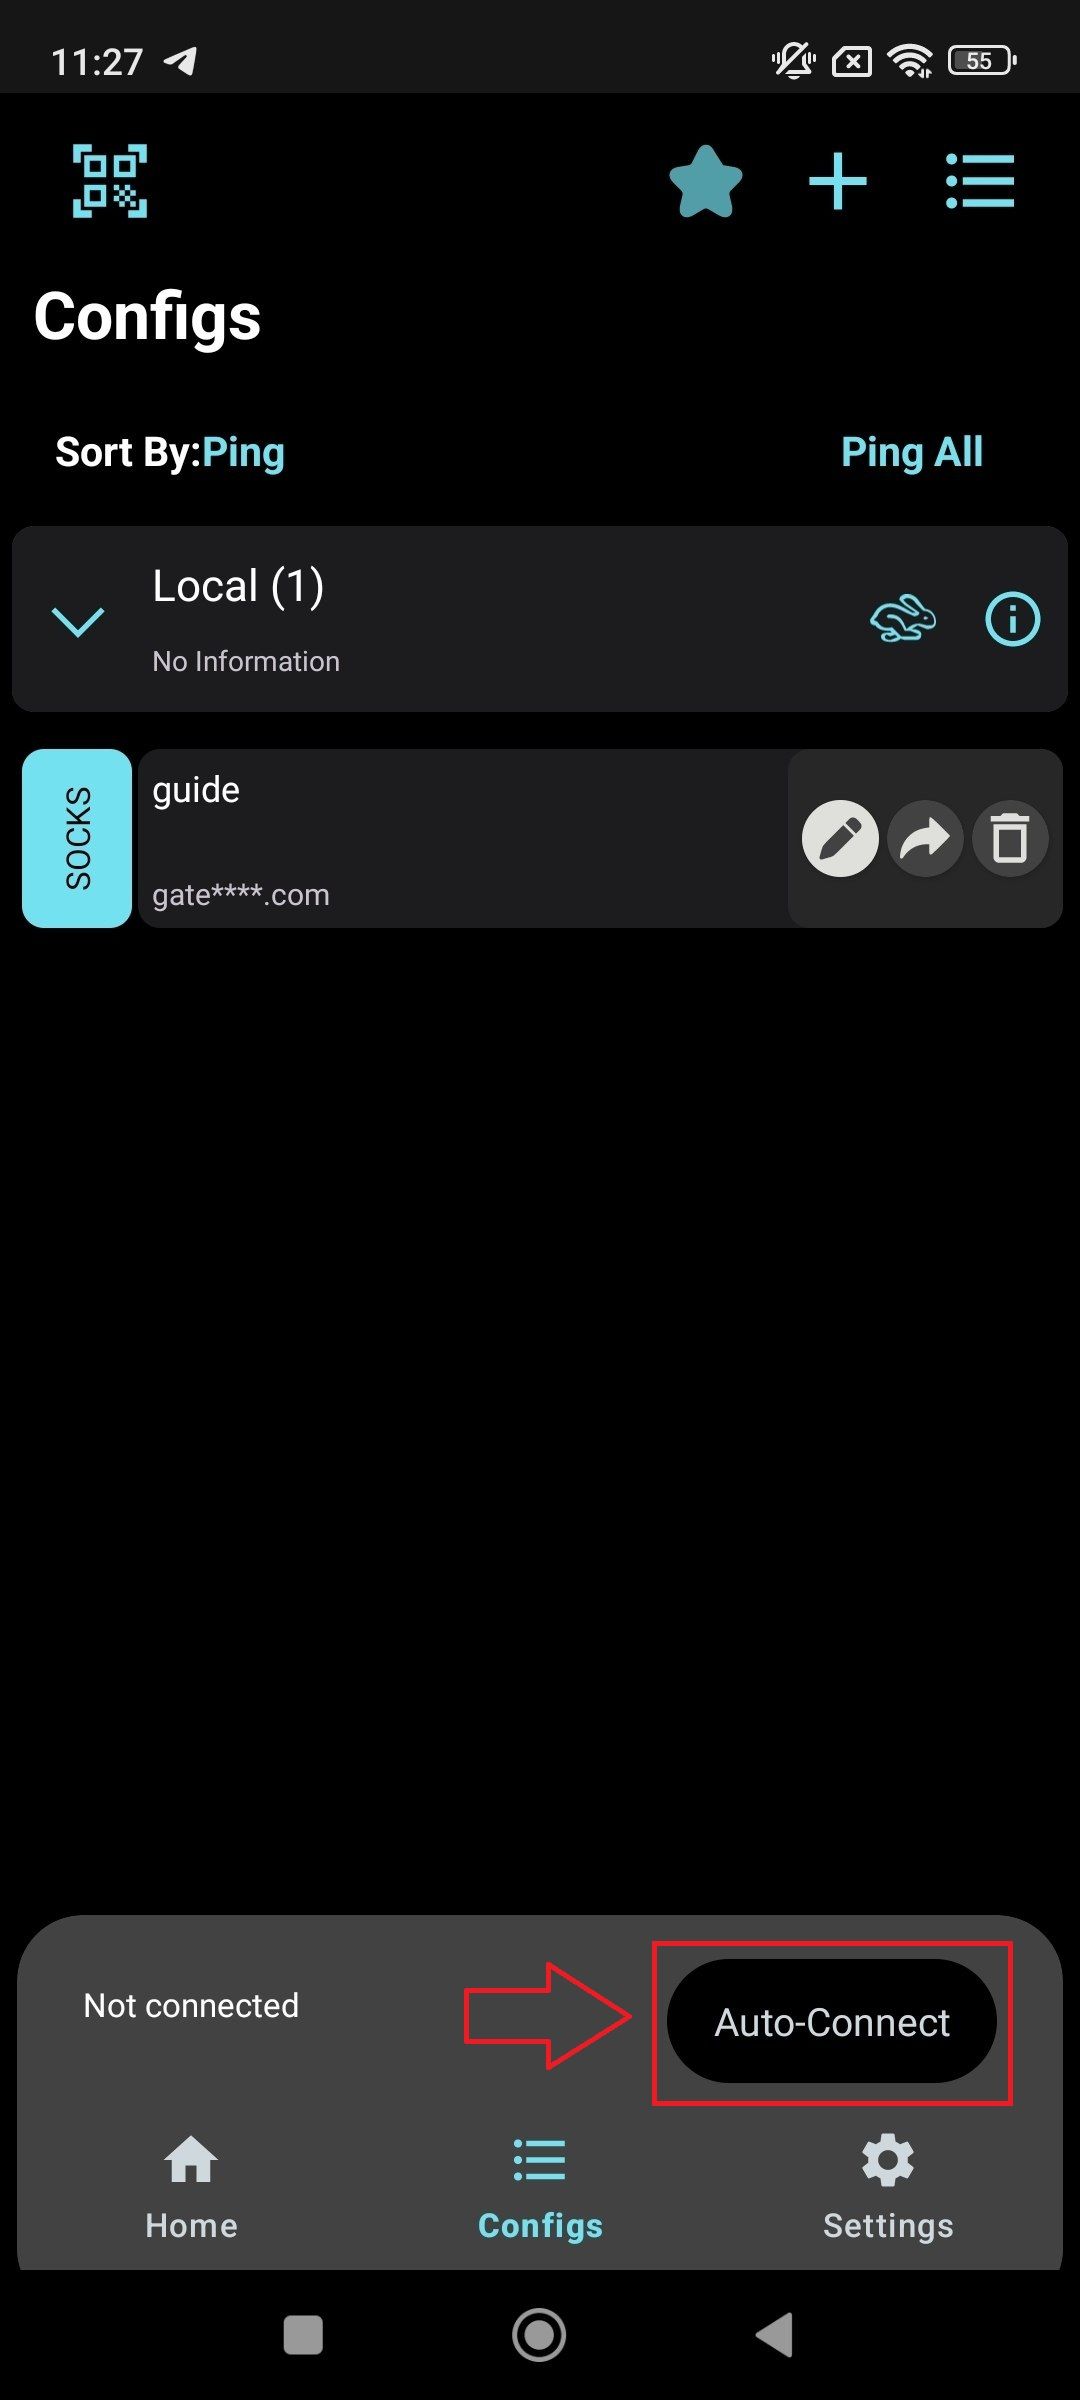
Once the connection is successfully established, a VPN icon will appear in the status bar. This indicates that the application has created a local network connection to route traffic through the selected proxy.
Verifying the Connection
To make sure the connection has been configured correctly, open your browser and visit any IP address checking service (for example, 2ip.io). If the displayed IP address matches the IP address of the proxy server you are using, the configuration has been completed correctly.