How to Configure a Residential Proxy in the Maskfog Browser
 ·August 13, 2026·10 min read
Maskfog is an antidetect browser for working with multiple isolated browser profiles. It allows you to create separate working environments for different accounts, projects, advertising accounts, marketplaces, research tasks, and team workflows. Each profile stores its own cookies, browser parameters, fingerprint settings, and proxy settings, so sessions do not mix with each other.
Proxies in Maskfog are configured so that each profile works through a separate network address. This is useful when managing multiple working environments, checking how websites are displayed from different regions, testing advertising campaigns, monitoring search results, analyzing marketplaces, and performing other tasks where it is important to separate profiles by technical parameters.
Complete Your Antidetect Setup with Real IPs
Residential proxies fit naturally into multi-account workflows.
Main Maskfog Features
Maskfog combines browser profile management, fingerprint configuration, and proxy connection in one interface. For everyday work, this is convenient: the user creates a profile, sets the required parameters, and launches it as a separate browser.
Key Maskfog features:
• creating multiple independent profiles;
• separate cookies, storage, and settings for each profile;
• configuring browser fingerprint parameters;
• connecting a proxy to a specific profile;
• importing cookies;
• batch adding accounts;
• working with profile groups;
• team functions and activity logs;
• installing extensions through the Application Center;
• global settings for optimizing workflows.
In the advanced settings, you can manage WebRTC, Canvas, Time Zone, User-Agent, and other characteristics of the browser environment. This helps configure a profile more precisely for a specific task.
What Maskfog Is Used For
Maskfog is suitable for specialists who need to separate working sessions and manage a large number of profiles without confusion.
In e-commerce, the browser is used to work with different stores, seller accounts, listings, and regional versions of platforms. In advertising, it helps check how campaigns are displayed on different devices and in different geolocations. In marketing analytics, Maskfog is used to monitor prices, product ranges, local offers, and competitor activity.
The browser can also be useful for brand protection. It can be used to check how a company’s products, names, and visual elements are presented on different regional platforms.
Which Proxies Are Best to Use with Maskfog
Maskfog supports connecting custom proxies. In the settings, you can specify the proxy type, host, port, login, and password. The exact format depends on the provider.
For stable operation, it is better to use paid proxies from a reliable provider. Free options are often unstable: they may disconnect frequently, change parameters, or be overloaded. For regular work with profiles, this is inconvenient because you have to constantly check the connection and change settings.
Before configuration, prepare the proxy data. This information can be found on our website, node-proxy.com:
• Host;
• Port;
• Username;
• Password;
• connection type, if specified by the provider.
You will need these details when adding a proxy in Maskfog.
How to Configure a Proxy in Maskfog
Step 1. Install and Open Maskfog
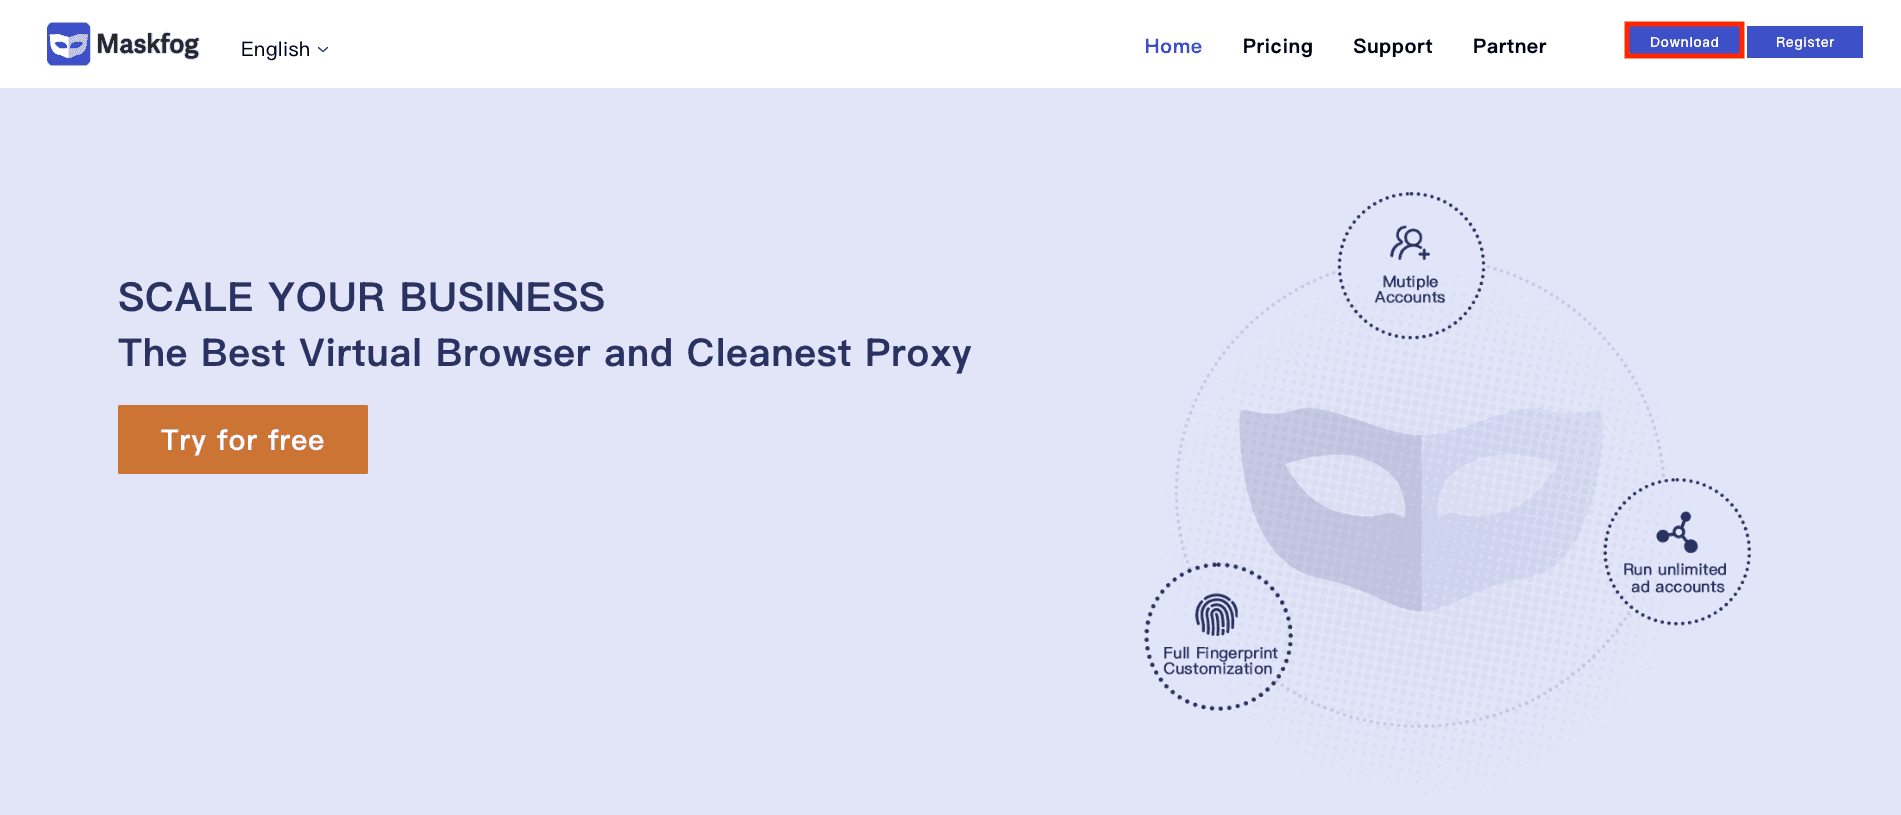
Go to the official Maskfog website, download the version for your operating system, and install the application.
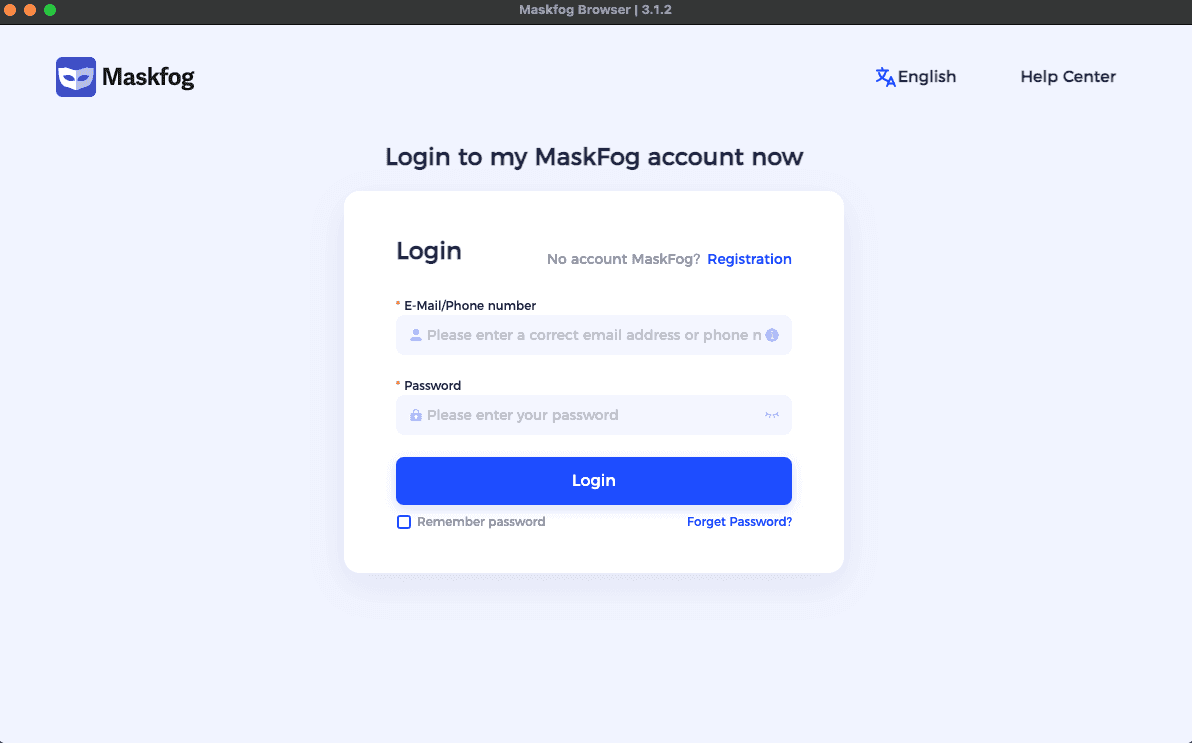
After launching it, log in to an existing account or register if you are using the browser for the first time.
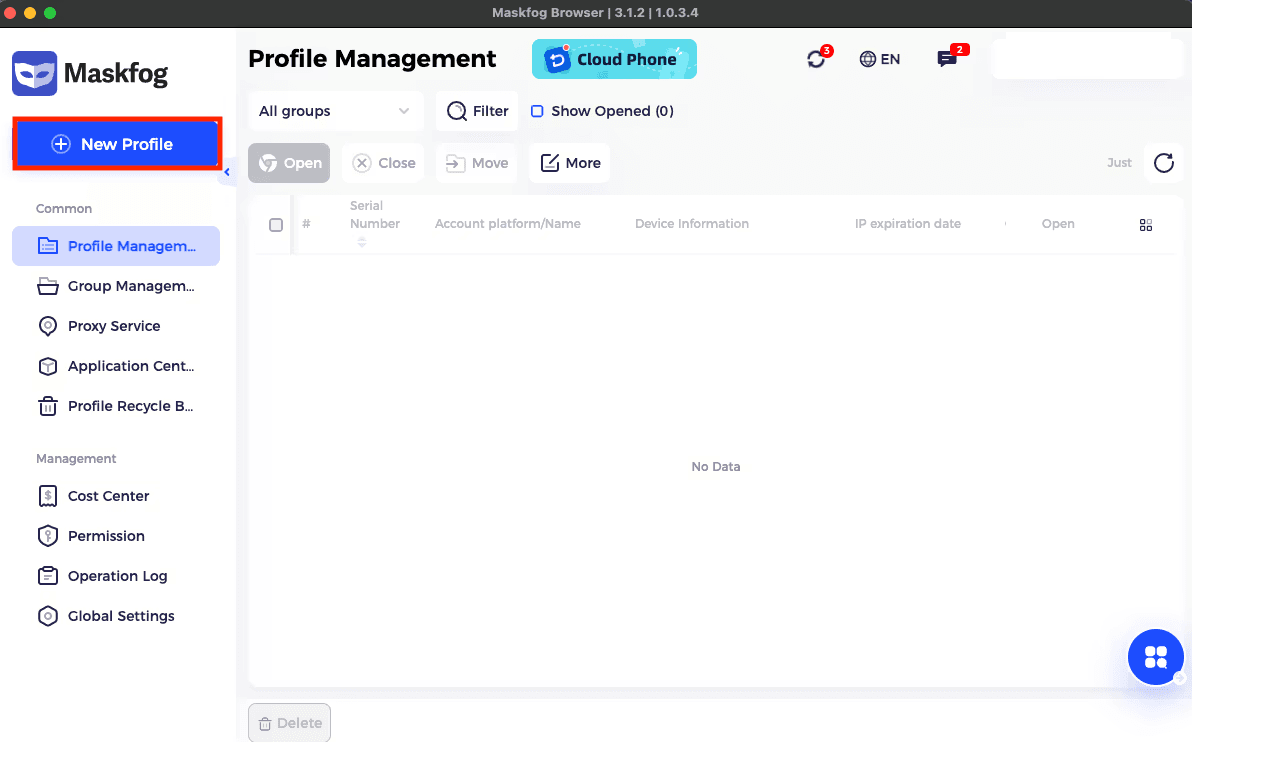
After logging in, the main control panel will open. The left menu contains sections for working with profiles, proxies, extensions, and general settings.
Step 2. Create a New Profile
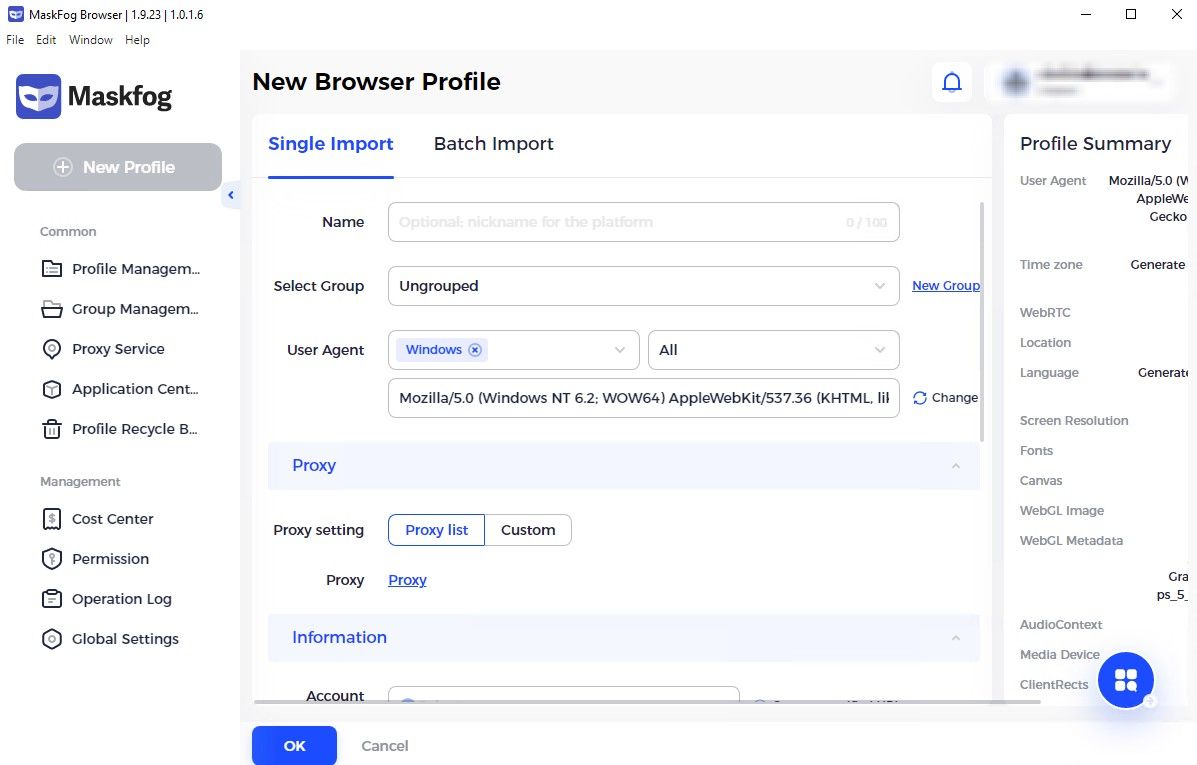
Click New Profile. In the window that opens, enter a profile name.
In the same window, you can configure the fingerprint, group, cookies, and additional profile parameters.
Step 3. Open the Proxy Section
In the Maskfog interface, go to the Proxy section. This section contains proxy settings that can be used in profiles.
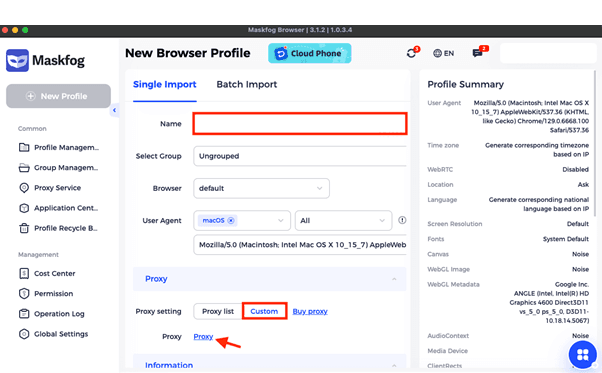
Select the custom proxy option, Configure Device.
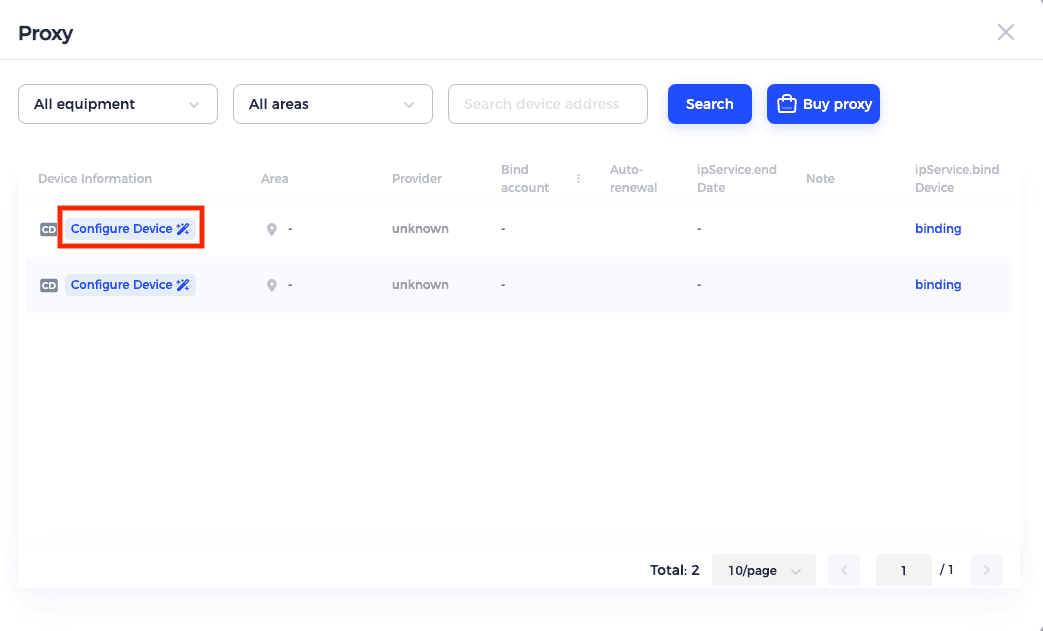
A proxy editing window will open.
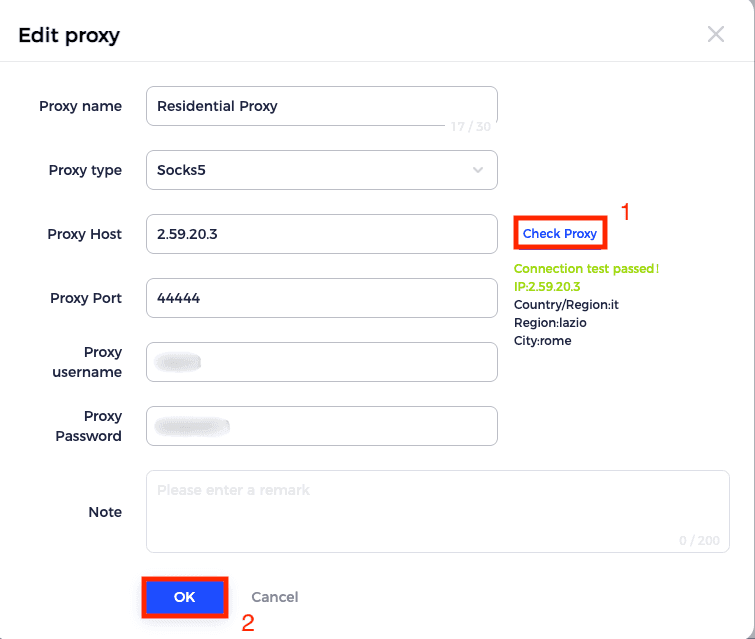
Step 4. Enter the Proxy Parameters
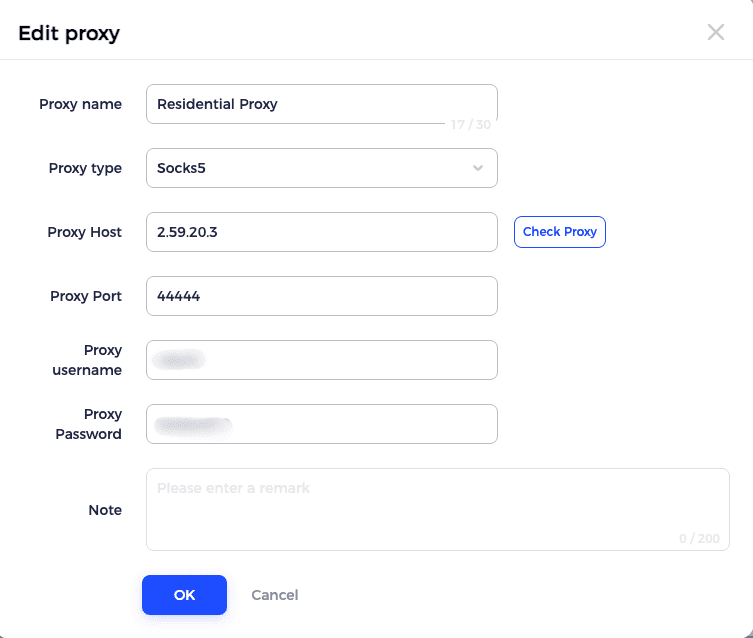
In the settings window, enter the data received from the provider:
• proxy type;
• host;
• port;
• username;
• password.
Check that all fields are filled in correctly. Common configuration errors include extra spaces, mixed-up port and host values, an incorrect proxy type, or outdated credentials.
Step 5. Check the Connection
After filling in the fields, click Check Proxy. Maskfog will check the connection and show the result.
If the check is successful, save the settings by clicking OK. If the connection is not established, check the data again, especially the port, login, password, and selected connection type. Also make sure that the proxy is active in the provider’s personal account.
Step 6. Launch the Profile and Check Operation
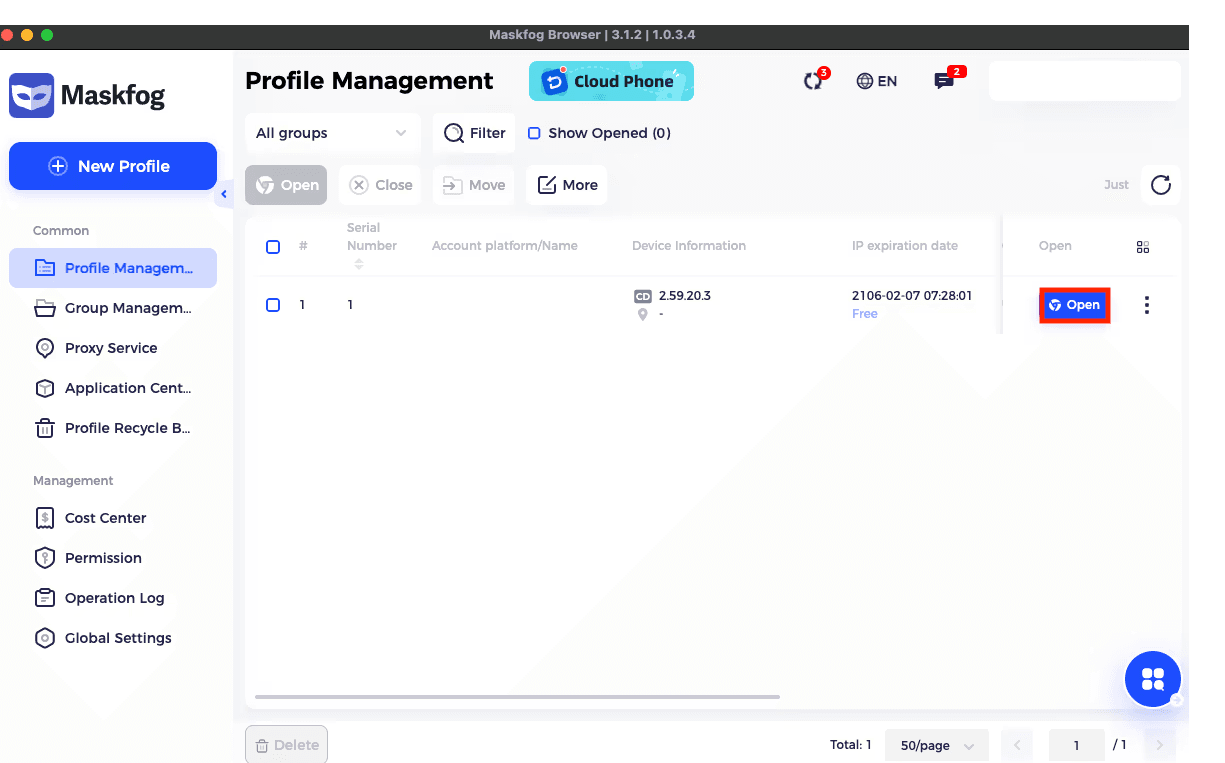
In the profile list, click Open next to the profile you created. After launch, you can check the connection through any service that displays connection parameters and region.
If the data is displayed correctly, the configuration is complete. The profile is ready for work.
Additional Maskfog Settings
In addition to proxies, Maskfog allows you to configure browser environment parameters. The Advanced Settings section includes options for WebRTC, Canvas, Time Zone, User-Agent, and other characteristics. These should only be changed when the task is clearly understood, because inconsistent parameters can reduce profile stability.
In the Application Center section, you can install extensions. For example, an ad blocker, cookie management tools, or other add-ons required for a specific workflow.
Global Settings contains general account and profile parameters. They help organize work, especially when many profiles are used or access is shared among several team members.
What to Pay Attention to When Working with Proxies
For stable operation, it is important to use proxies that match the task. If a profile is created for a long-term project, it is better not to change network parameters unnecessarily. A sudden change in settings may lead to session errors or additional checks by services.
It is also worth maintaining a clear profile structure: give profiles meaningful names, group them by project, and regularly delete outdated ones. This reduces the risk of confusion and speeds up everyday work.
Before launching important tasks, it is useful to check the connection through the built-in Check Proxy function. It takes little time but helps detect an inactive proxy or a settings error in advance.
Conclusion
Configuring a proxy in Maskfog comes down to several actions: obtaining data from the provider, creating a profile, and assigning the required proxy to it. After saving, the profile will launch with the specified parameters.
Maskfog is convenient for working with multiple isolated browser environments, while proxies make it possible to separate profiles more precisely by technical characteristics. With careful configuration, the browser helps organize work with accounts, advertising accounts, marketplaces, analytics tasks, and team processes.