How to Set Up a Proxy in X-Browser on Windows: Step-by-Step

X-Browser does not support entering proxy settings directly in the profile interface, so the setup is done in two stages: first, the proxy is configured at the Windows level, and then the corresponding location for the profile is specified in the browser itself. This order matters: without the system-level configuration, X-Browser will not be able to use the required network route, and without the correctly selected geolocation, the profile will be configured inconsistently.
What to Consider Before Setup
Before you begin, prepare your proxy details: IP address, port, and, if necessary, the username and password for authentication. If you use Node Proxy residential proxies, this information can be found in the client panel.
It is also worth deciding in advance whether you need exceptions. In Windows, you can add websites that should open without using the proxy. This is convenient if some resources need to work through a regular connection.
Residential Proxies for Browsers
Connect Node Proxy to your browser and use IPs from the location you need.
Stage 1. Configuring the Proxy in Windows
Since X-Browser does not have a built-in section for manually entering a proxy server, you first need to enable the proxy in the operating system settings.
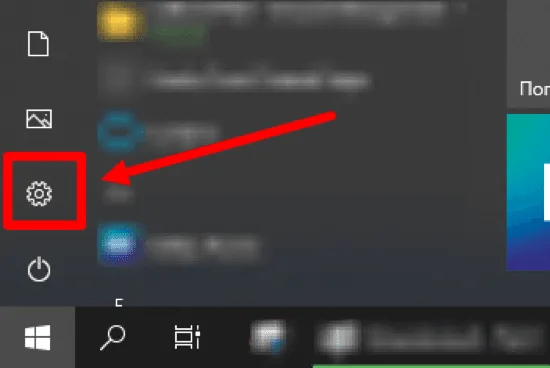
Open the Start menu and go to Settings.
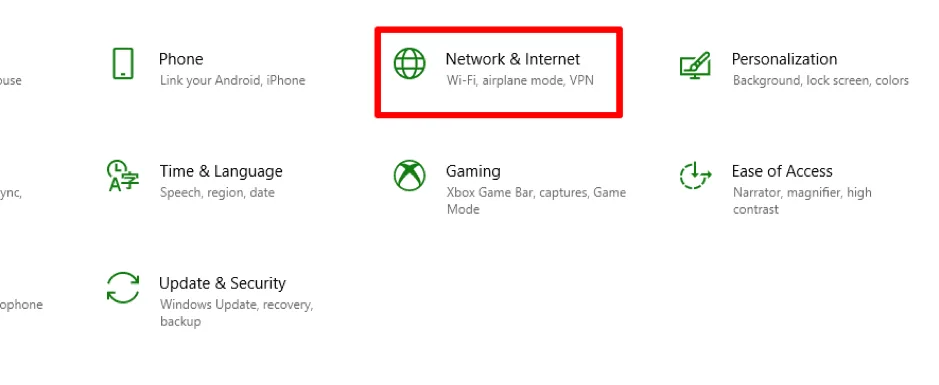
Then open the Network & Internet section.
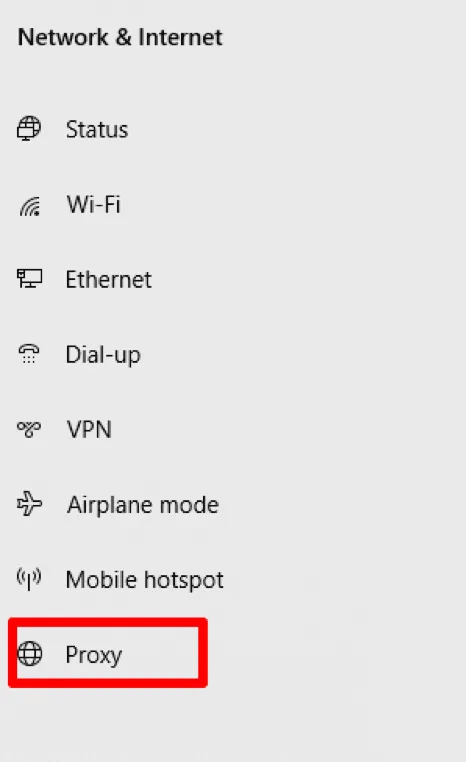
Select the Proxy tab.
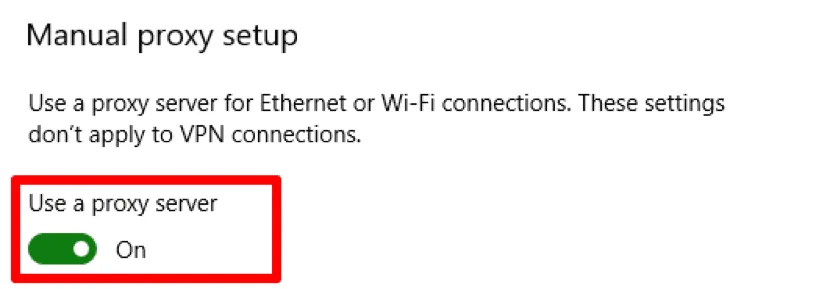
In the manual setup block, enable the use of a proxy server.
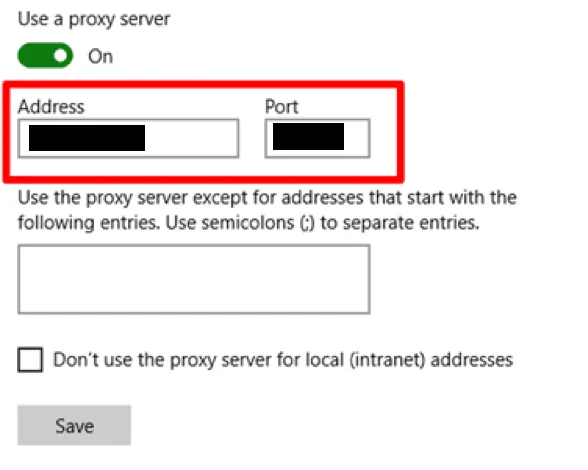
After that, enter the connection parameters: IP address and port (Node Proxy users can copy them from the client panel).
Below that, if necessary, add the addresses of websites that should work without the proxy. After filling in the fields, click Save.
If the proxy requires authentication, the system or browser will show a login window by default. In this case, you need to enter the username and password and confirm the login.
Stage 2. Linking the Settings to a Profile in X-Browser
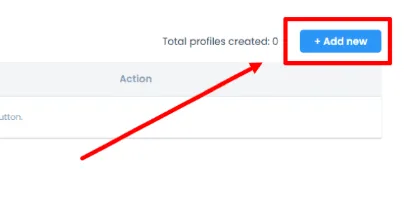
Once the system connection has already been configured, you can move on to the browser itself. Open X-Browser and sign in to the application. Then create a new profile using the Add New button.
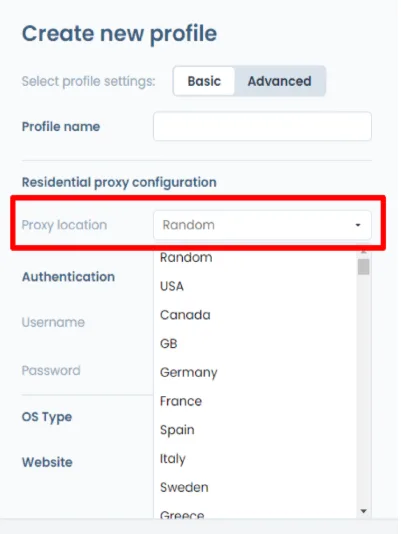
When creating the profile, pay attention to the Proxy Location parameter. Here, you need to select the country that matches the proxy being used (see the available proxy locations). This does not replace the system-level configuration but complements it: the profile should reflect the same geography as the network connection.
After that, fill in the remaining profile settings and save the configuration by clicking Save & Exit.
Checking After Setup
After saving the profile, it is worth making sure that the system is using the required proxy without errors. In practice, the check comes down to three points:
1. The proxy is saved in Windows
The entered IP and port should remain in the system settings, and manual setup should be enabled. To confirm that the proxy is alive and see its exit IP and location, use our free proxy checker.
2. Authentication works correctly
If the proxy is private and requires a username and password, there should be no repeated login prompts or access errors after launch.
3. The profile geolocation matches the proxy
The country selected in Proxy Location should match the country of the server being used. This helps avoid inconsistency between the profile settings and the network connection.
Typical Setup Errors
One of the most common problems is trying to find proxy input directly inside X-Browser. This browser does not use that scheme: the proxy is configured in Windows first, and only after that is a profile created with the required location.
The second common mistake is a mismatch between the proxy country and the selected value in the profile. Even if the connection works, such a discrepancy creates an incorrect configuration.
Another issue is an incorrect data format: an error in the IP address, port, or credentials leads to the connection not being established or the system constantly requesting repeated authentication.
X-Browser Proxy FAQ
Can I enter a proxy directly in an X-Browser profile?
No. X-Browser has no field for entering a proxy server in the profile. The proxy is enabled in Windows settings, and in the profile you only select the matching Proxy Location.
How do I set up a proxy for X-Browser?
Open Windows Settings, go to Network and Internet, then Proxy, enable manual setup and enter the IP address and port. Then create a profile in X-Browser with Add New and select the proxy country.
Why does X-Browser keep asking for a login?
Repeated login prompts usually mean the username or password was entered with an error. Check the credentials from your proxy provider and enter them again.
Which country should I choose in Proxy Location?
Choose the same country as your proxy server. A mismatch between the proxy country and the profile settings makes the configuration inconsistent.
Conclusion
Proxy setup in X-Browser is performed not in the browser itself, but through Windows settings. The working scheme looks like this: manually enable the proxy in the system settings, enter the address and port, complete authentication if necessary, then create a profile in X-Browser and specify the country corresponding to the proxy server. If both stages are completed in sequence, the profile will be configured correctly and ready for use.