Setting Up a Residential Proxy in the Hidemyacc Browser
 ·July 28, 2026·4 min read
Hidemyacc is a browser in which proxies are configured at the level of individual profiles and through a shared list manager. This approach is convenient when you need to separate work environments, assign different network settings to different profiles, and centrally manage several connections at once.
What Hidemyacc Is
Hidemyacc is designed for working with multiple browser profiles, where each profile receives its own set of settings. Within the service, you can create separate configurations, adjust profile settings, connect proxies, and, if necessary, use automation tools.
For each scenario, you can prepare a separate browser environment with the required network settings. In this setup, proxies become part of the profile configuration: they determine which IP address and port the connection will use, and, if required, authentication via username and password.
Looks Natural. Works Professional.
Residential proxies built for serious work.
How to Set Up a Single Proxy in Hidemyacc
Connecting a single proxy in Hidemyacc is done by creating or editing a browser profile.
1. Install and open Hidemyacc
First, download the application from the official website and launch it. After signing in to the interface, you can proceed to create a new profile.
2. Create a new profile
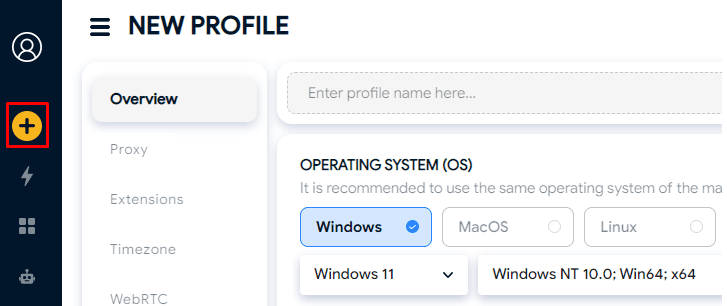
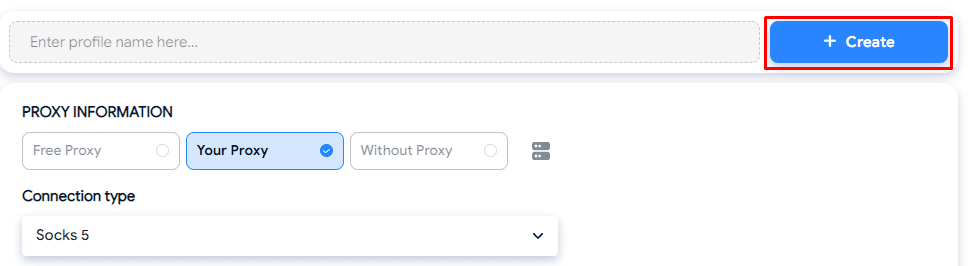
In the left part of the interface, select the option to create a new profile. At this stage, the foundation of the future configuration is defined: the profile name and the basic settings with which it will be used later.
3. Go to proxy settings
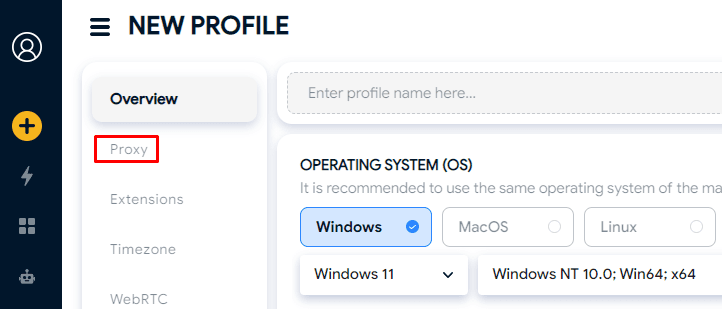
After creating the profile draft, open the Proxy section. This is where the connection settings are specified: proxy type, address, port, and authentication details.
4. Select the proxy type
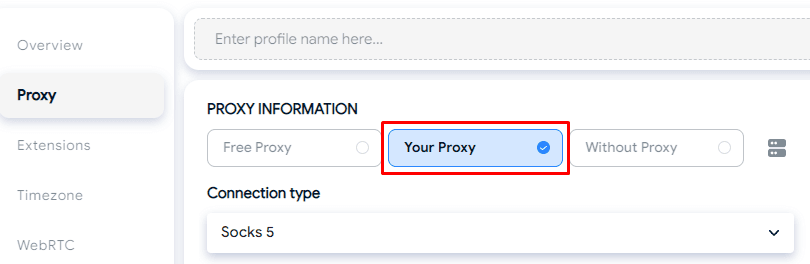
For manual connection, use the custom proxy mode — Your Proxy. Then select the protocol you use.
Hidemyacc supports several options, including HTTP, HTTPS, and SOCKS5.
5. Enter the connection parameters
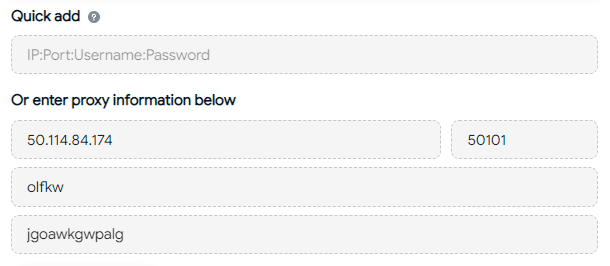
Proxy details can be added manually by filling in the fields or as a single line if that format is supported in the current settings window. You will need:
• IP address;
• port;
• username;
• password.
If the proxy does not require authentication, the address and port are sufficient. All values must be entered accurately: even an inaccuracy in a single character will result in a connection failure.
6. Check the connection
After entering the parameters, run the built-in check using the Check Proxy button. This function allows you to immediately verify that the proxy is responding and that the configuration is set correctly.
If the check ends with an error, it is worth verifying again:
• proxy type;
• IP and port;
• username and password;
• line input format.

7. Save the profile
Once the check has been completed successfully, save the profile. After that, it will be ready to launch with the specified network settings.
Bulk Proxy Import via Proxy Manager
If you need to work not with one connection, but with a large number of them at once, it is more convenient to use Proxy Manager. It allows you to upload a proxy list centrally and then distribute the proxies among profiles.
This method is especially useful when a set of separate addresses has already been prepared for different profiles and there is no sense in adding them manually one by one.
How to Import a Proxy List
Bulk upload is performed through a separate proxy manager inside Hidemyacc.
1. Prepare the list
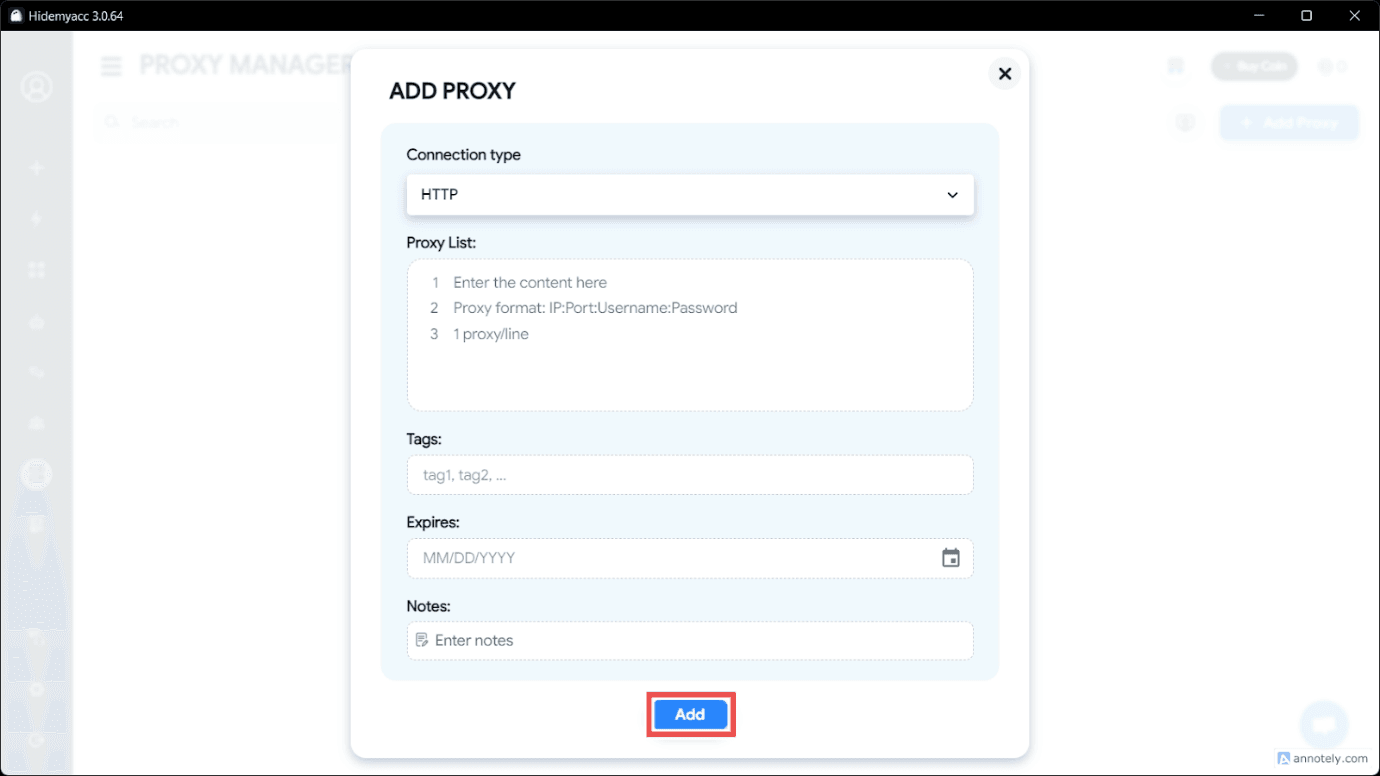
Before importing, the list must be brought to the required format. The usual format is:
IP:Port:Username:Password
Each proxy must be placed on a new line. This is important because the manager processes entries line by line.
2. Open Proxy Manager
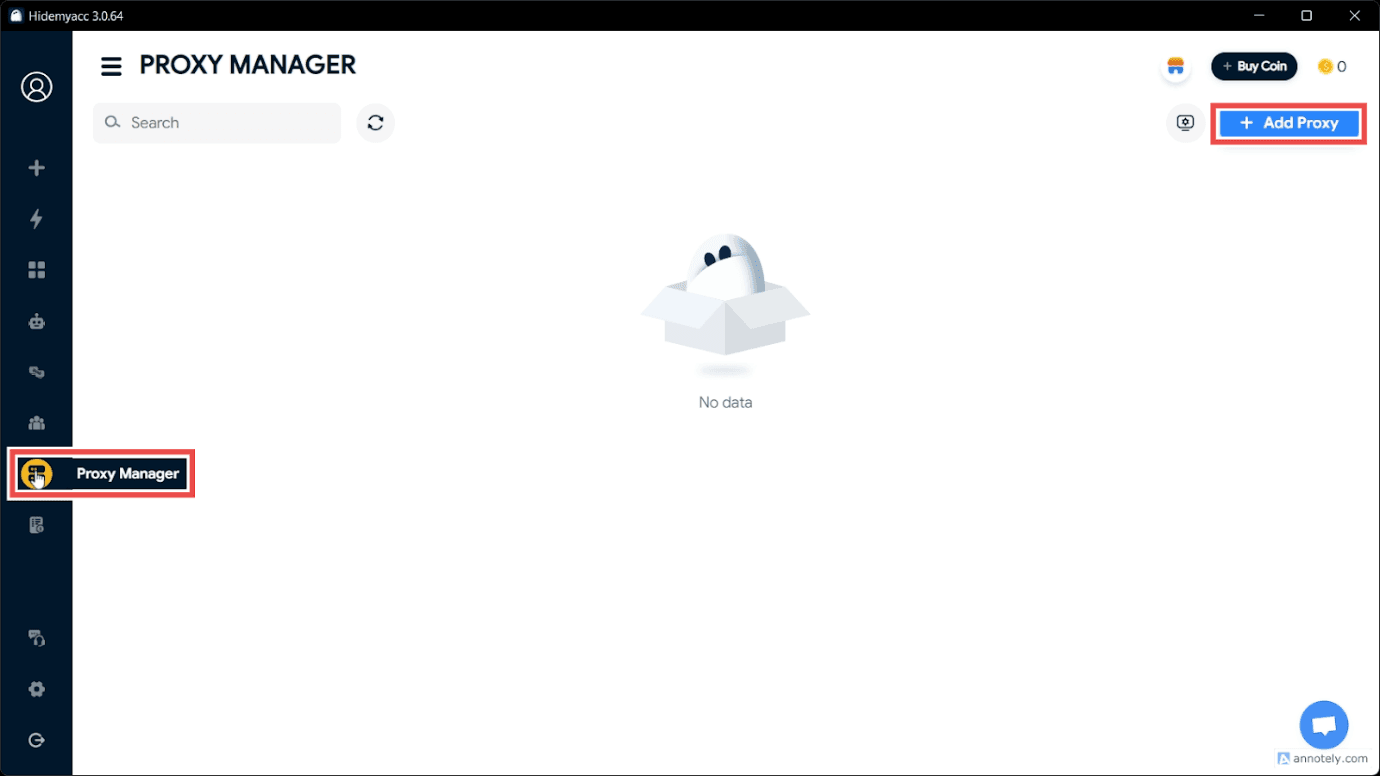
In the sidebar, open the Proxy Manager section and select the option to add proxies. After that, a field for bulk list insertion will become available.
3. Paste the list into the import window
Copy the prepared list in advance and paste it into the text field. If the format is recognized correctly, the entries will automatically be distributed into the table below.
4. Check the recognition status
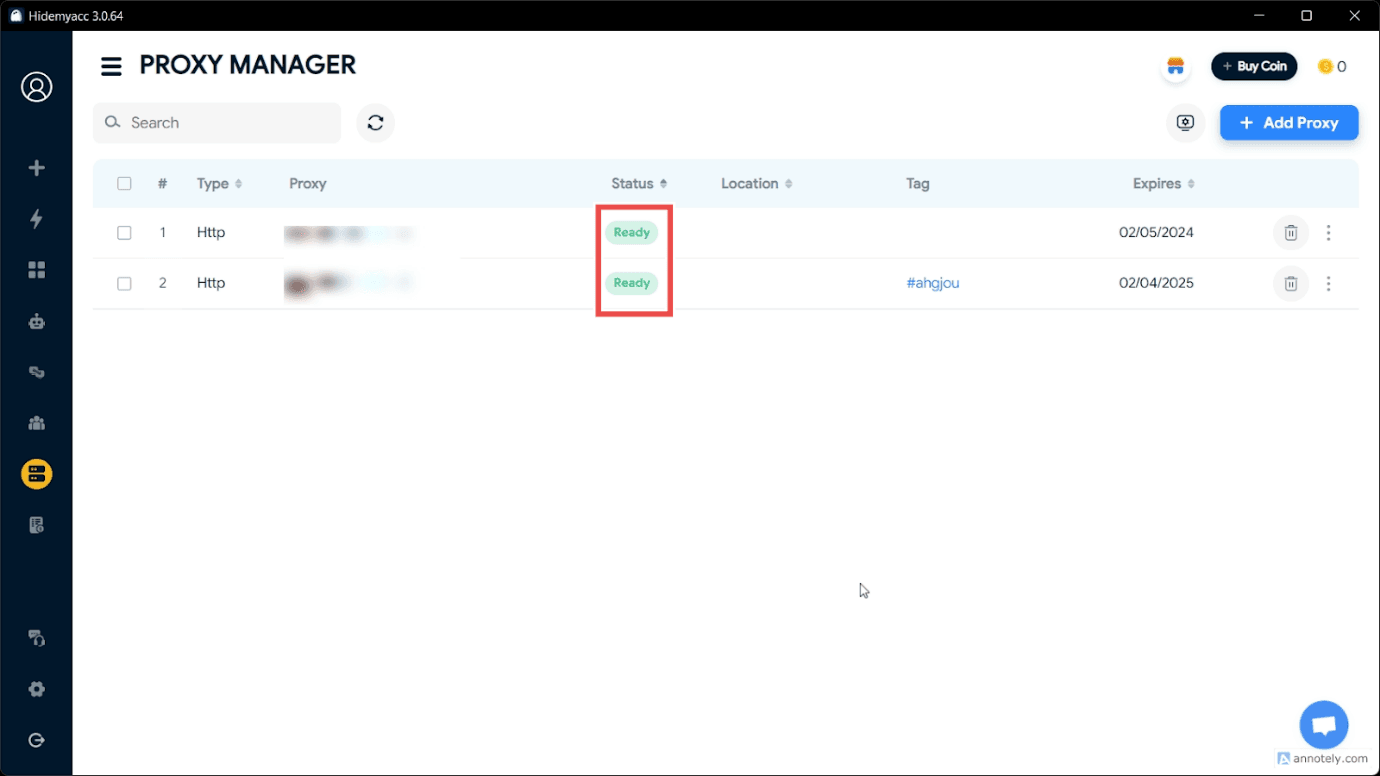
After insertion, the system should correctly identify the values. If everything is filled in correctly, the status usually shows that it is ready to be added. This means the lines have been parsed without errors and the list can be saved.
5. Complete the import
After confirmation, the list will be added to the manager. These proxies can then be assigned to the required browser profiles, replaced, detached, or deleted as needed.
What Is Important to Consider During Bulk Upload
Bulk import has several practical limitations that are better checked in advance.
If the proxy type is not specified separately in the entry, HTTP may be used by default. At the same time, the manager itself usually supports several connection types, including HTTP, HTTPS, SSH, and SOCKS5.
In addition, there are format requirements for the lines. One proxy must occupy one line. Up to 100 entries are usually allowed per upload.
Why Use Proxies in Hidemyacc
Connecting proxies in Hidemyacc solves several practical tasks at once.
First, it allows the separation of network settings between profiles. Each profile can work through its own connection, which simplifies environment organization.
Second, it provides more flexible work with the geography of IP addresses if a project requires addressing from certain regions.
Third, it improves convenience when scaling. When the number of profiles grows, manual work with network settings quickly starts taking extra time. Proxy Manager partially removes this burden through bulk import and centralized management.
It is also worth noting the built-in connection check. It makes it possible to quickly identify an error at the setup stage, without moving on to launching the profile and additional diagnostics.
Conclusion
In Hidemyacc, proxies can be configured in two main ways: through the settings of a specific profile and through Proxy Manager for bulk upload. The first option is suitable for point-by-point setup, while the second is intended for working with large lists of connections.
The basic sequence of actions is the same in both cases: select the proxy type, correctly specify the parameters, check the connection, and save the configuration.
With this setup, Hidemyacc allows flexible management of network settings both in simple scenarios and in larger-scale workflows.