Residential Proxy Setup in Aezakmi Browser
 ·August 4, 2026·4 min read
Aezakmi Browser allows you to create separate browser profiles with individual settings. One of the key steps when working with a profile is connecting a proxy. The proxy server is specified at the stage of creating or editing a profile and is then used automatically when the profile is launched.
Proper configuration is important not only for a stable connection but also for the consistent operation of the profile settings. In Aezakmi, after a proxy is connected, some system characteristics may be adjusted to match the IP address, which helps avoid conflicts between network and local environment settings.
Flexibility in Every Connection
Rotate by request, by time, or use sticky sessions.
How to Add a Proxy in Aezakmi Browser
Before getting started, you need to install Aezakmi and open the application. After launch, the setup is performed by creating a new profile.
1. Create a new profile
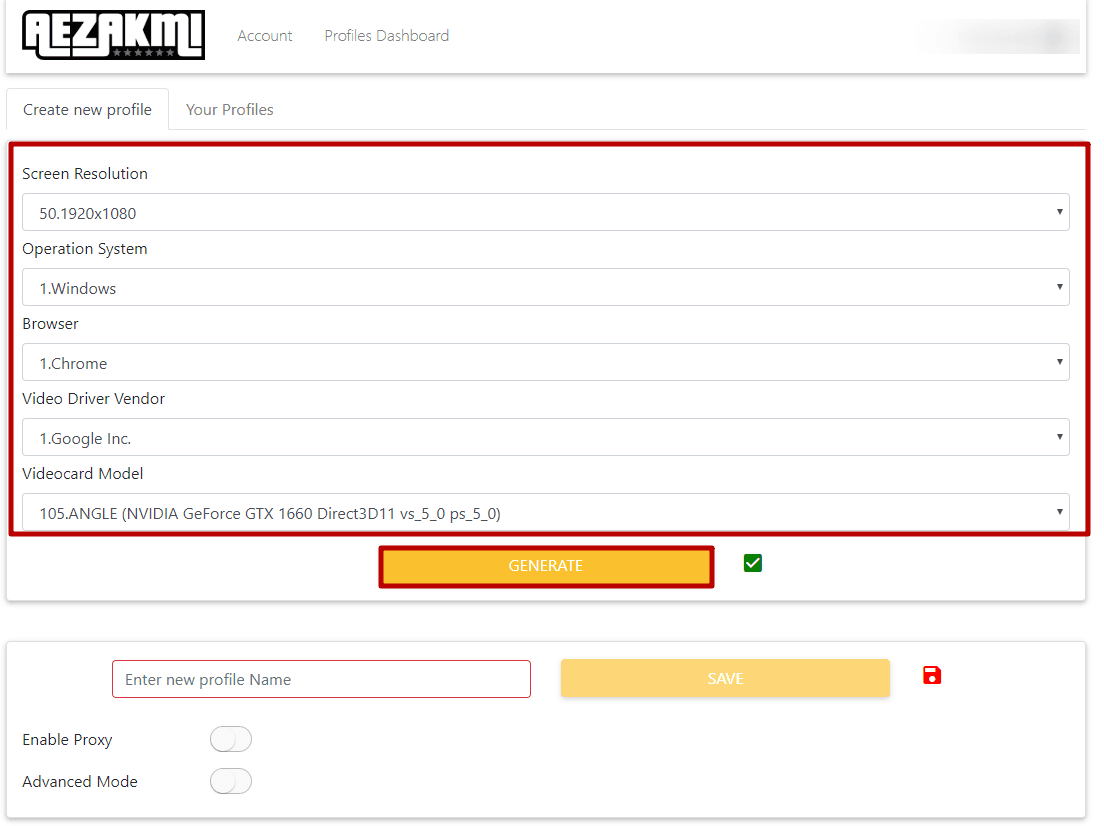
On the main panel, open the profile creation section. At this stage, the main environment settings are selected in sequence: operating system, browser, screen resolution, and video driver. After selecting the settings, click GENERATE — the system will create a new profile with the specified characteristics.
2. Specify the profile name
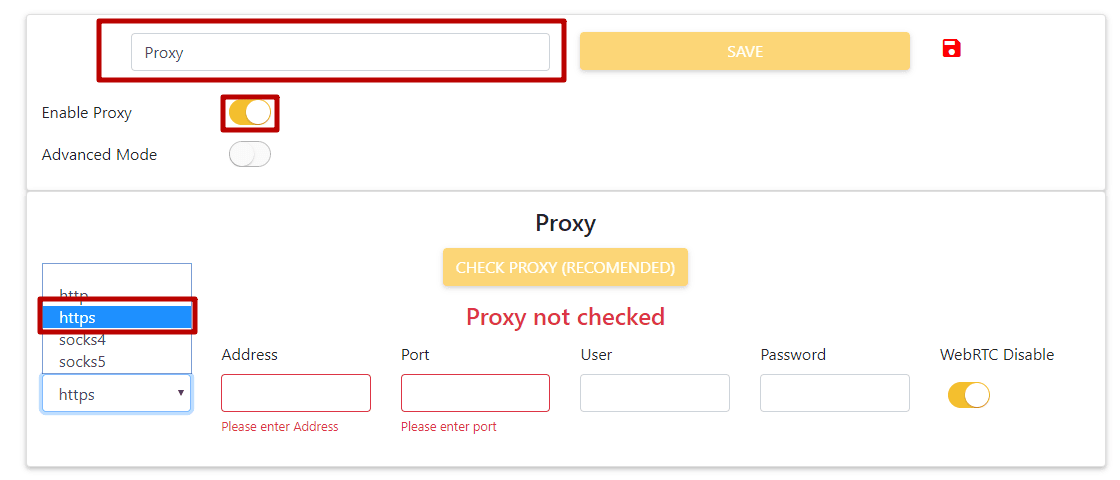
After generation, assign the profile any convenient name. This will allow you to quickly find it in the list and avoid confusing it with other configurations.
3. Enable proxy usage
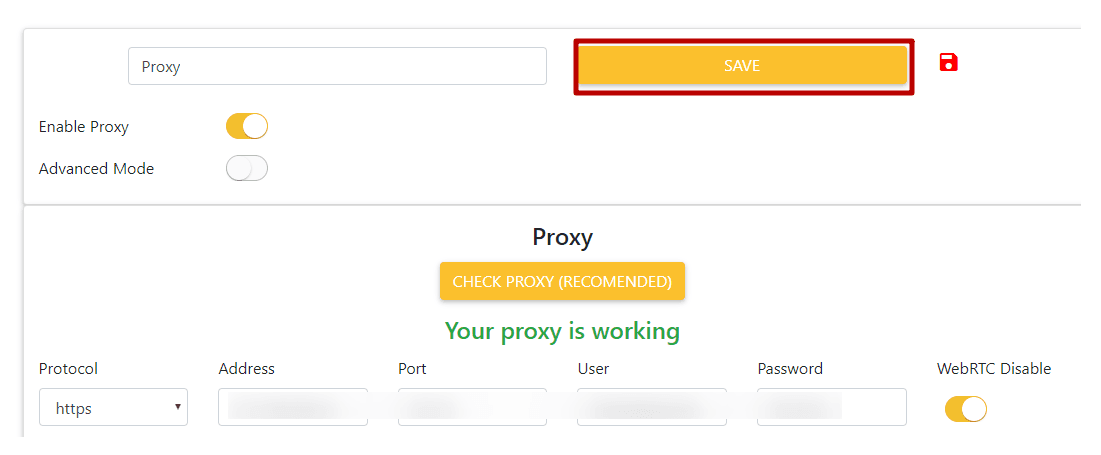
Activate the Enable Proxy option. After that, the form for entering network data will become available. In the drop-down list, select the required protocol. The instructions most often recommend using HTTPS.
4. Fill in the connection settings
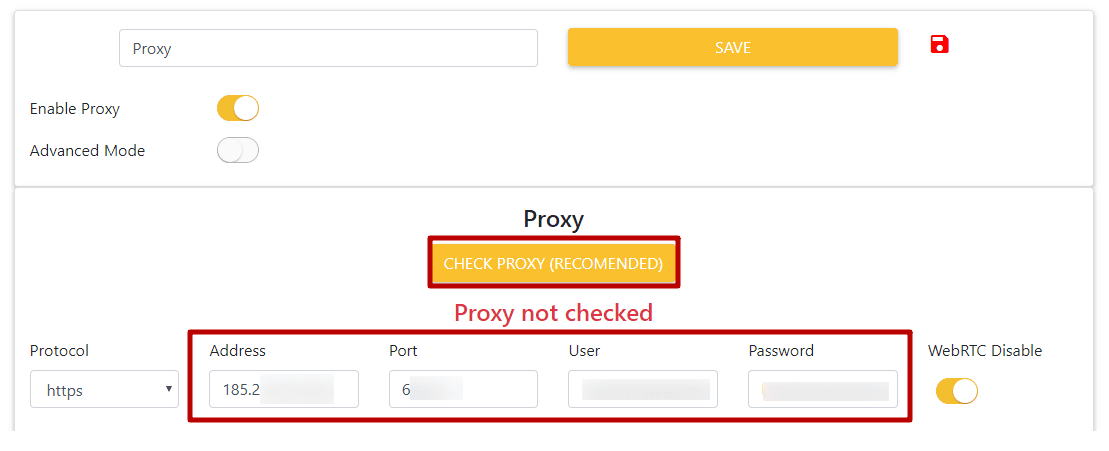
Enter the proxy data in the corresponding fields:
• Address — server address;
• Port — port;
• User — login;
• Password — password.
You can get this data from our website, node-proxy.com.
5. Check the proxy before saving
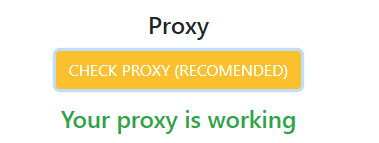
After entering the settings, click CHECK PROXY. This check allows you to make sure that the server is available and that the data has been entered correctly. If the connection is established correctly, the application will show a successful check result.
It is better not to skip this step: it helps rule out problems in advance with authorization, an unavailable address, or an incorrect port.
6. Save the profile
After a successful check, click SAVE. From this point on, the proxy will be assigned to the selected profile and will be used automatically when it is launched.
What happens after connecting a proxy
When a proxy is added, Aezakmi may automatically adjust some environment settings to match the IP address being used. This applies to geographic and system characteristics, including language, time settings, and related profile parameters. Such synchronization is important because a mismatch between IP geography and environment settings may raise questions for anti-fraud systems.
If the proxy is not activated, some fingerprints will be generated based on the device’s current connection rather than on the IP address that the profile is supposed to use.
How to launch a profile with a proxy
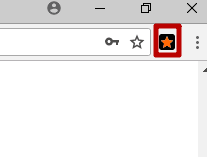
After saving, open the extension with the star icon on the right side of the browser.
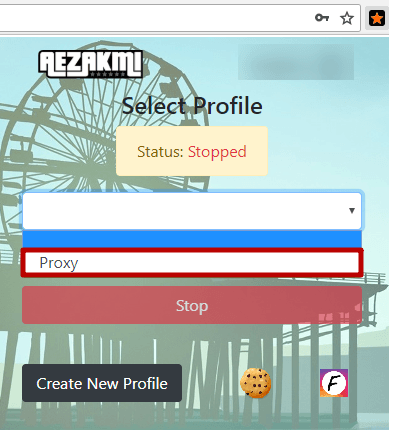
In the drop-down list, select the profile you have just created, then click the A-E-Z-A-K-M-I button. After that, the profile will launch with the assigned settings and the configured proxy.
What is important to check before starting work
To ensure that the profile works correctly, before launching it, it is worth making sure of several things: the proxy passes the check without errors, the correct protocol is selected, and the login and password have been entered without typos.