How to Set Up a Proxy in Antik Browser


What is important to know before setup
In Antik Browser, proxies can be used in two scenarios:
1. add a new proxy directly when creating a profile;
2. first import a list of proxies into the browser, and then select the required address from the saved list.
Both options work. The first is suitable when you need to quickly create one profile with a specific connection. The second is more convenient if there are several proxies and they need to be checked, stored, and distributed across profiles.
Antik Browser supports detailed profile configuration, including User-Agent, language, time zone, system, display, WebRTC, and WebGL settings. Because of this, proxies in the browser are not used in isolation, but as part of a separate profile with predefined characteristics.
Preparation for setup
Before you begin, you need to:
• install Antik Browser on your device;
• log in to your account;
• prepare your proxy data.
Usually, the following are required for connection (this information can be found on our website):
• IP address or host;
• port;
• username;
• password;
• protocol type, if предусмотрено by the settings.
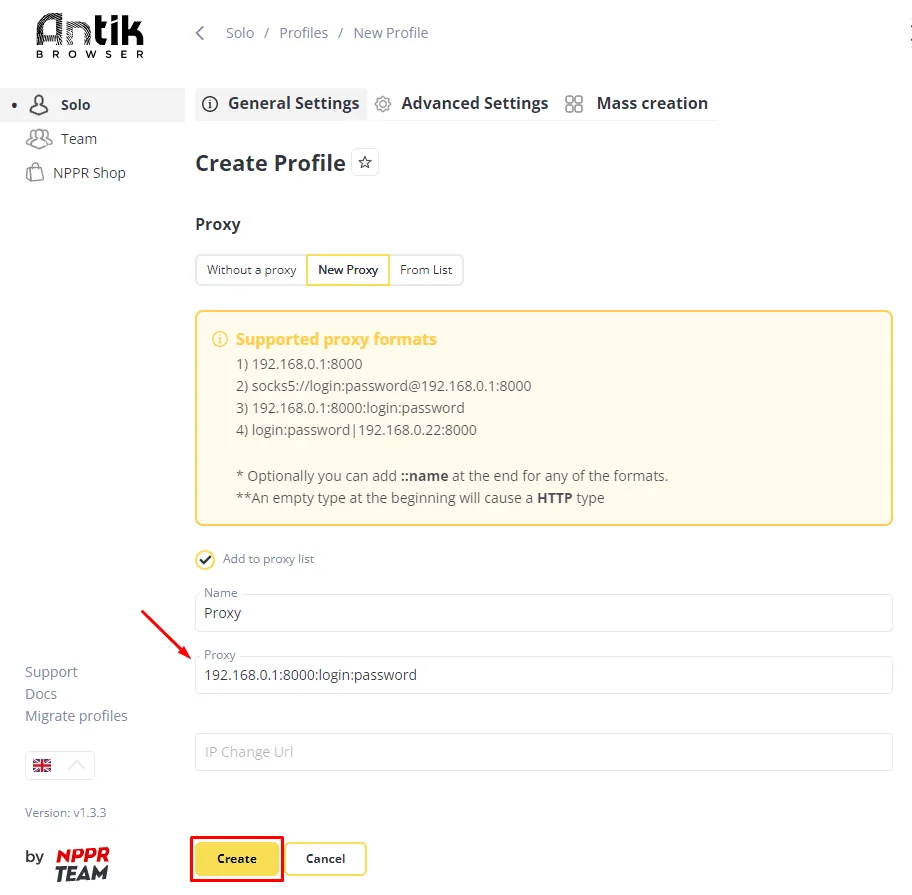
If proxies are added as a list, Antik Browser usually recognizes the standard entry format: host:port:username:password.
Built for Performance and Reliability
Leverage trusted residential IPs, a massive global IP pool, flexible pay-as-you-go pricing, and industry-leading connection success rates.
Method 1. Setting up a proxy when creating a new profile
This is the most straightforward option if you are creating a profile from scratch.
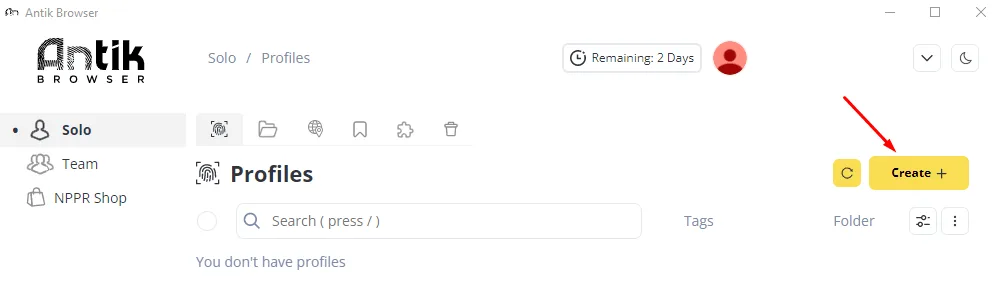
1. Open the profile creation window
After launching Antik Browser, click Create. The new profile creation form will open.
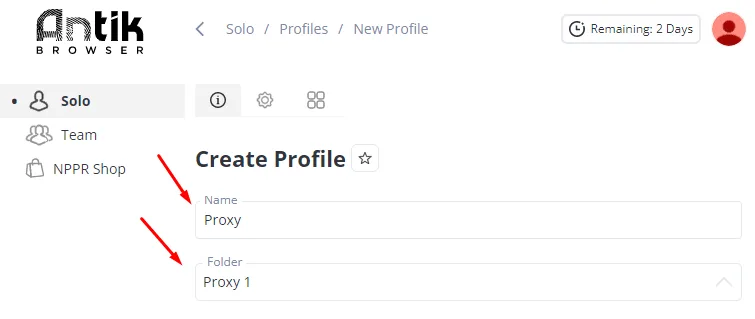
2. Specify the main profile data
Enter the profile name and, if necessary, set a folder name. This will make navigation easier if you have many profiles.
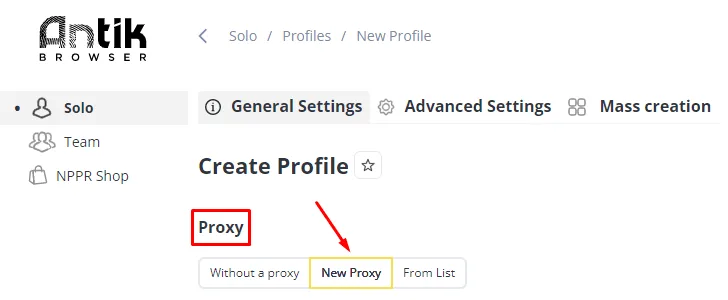
3. Go to the Proxy section
Find the Proxy block and open the new connection setup. Depending on the interface version, this may be a New Proxy button or a separate field for entering proxy parameters.
4. Enter the proxy data
Specify the IP address and port. If authorization is used, add the username and password.
After entering the data, check the connection status. If the connection is detected correctly, the browser usually shows a successful check with a color indicator.
Click Create to save the profile together with the connected proxy.
After that, the profile will be ready to launch with the specified network parameters.
Method 2. Importing a proxy list into Antik Browser
This option is convenient when you need to load several proxies in advance and then assign them to different profiles.
1. Open the proxy management section
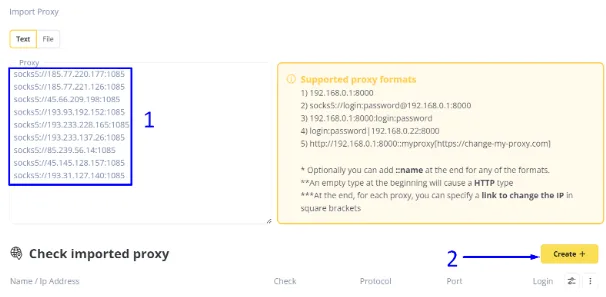
After logging in to Antik Browser, click the Proxy icon. The proxy import and check window will open.
2. Prepare the proxy list
Copy the proxies in the format supported by Antik Browser. Generate the list and copy it to the clipboard.
3. Add proxies to the browser
1) Then paste the proxy list into the Proxy text field.
2) To complete the import, click the Create button.
How to assign an imported proxy to a profile
When the proxy list has already been loaded into Antik Browser, it can be linked to a specific profile.
1. Create a new profile
Go to the Profiles tab and click Create.
2. Go to the Proxy section
In the connection settings block, select the From List option.
3. Select the required proxy
Choose one of the previously imported addresses from the list.
4. Save the profile
Click Create. After that, the selected proxy will be assigned to the profile.
5. Launch the profile
Click Start to open the browser window and begin working with the specified parameters.
How to check that the proxy works correctly
After launching the profile, it is useful to make sure that the connection is applied specifically to it.
For verification, it is usually enough to:
• open an IP address detection service;
• check the country and provider;
• make sure that the address matches the selected proxy.
If several profiles are used in the browser, such a check helps quickly eliminate errors when assigning addresses.
What to pay attention to when working with proxies in Antik Browser
To avoid problems during setup, it is worth considering several practical points:
Input format
If proxies are imported as a list, it is important to use a format that the browser recognizes without additional editing.
Check before use
Even if the proxies have been added successfully, it is better to run the built-in check before assigning them to profiles. This saves time and allows you to immediately filter out non-working addresses.
Conclusion
Setting up a proxy in Antik Browser comes down to two main actions: adding addresses and assigning them to the required profiles. If you need a single launch, the proxy can be specified directly when creating the profile. If there are several addresses, it is more convenient to first import them into the browser, check them, and then select them from the list.