How to Set Up a Residential Proxy in VMMask

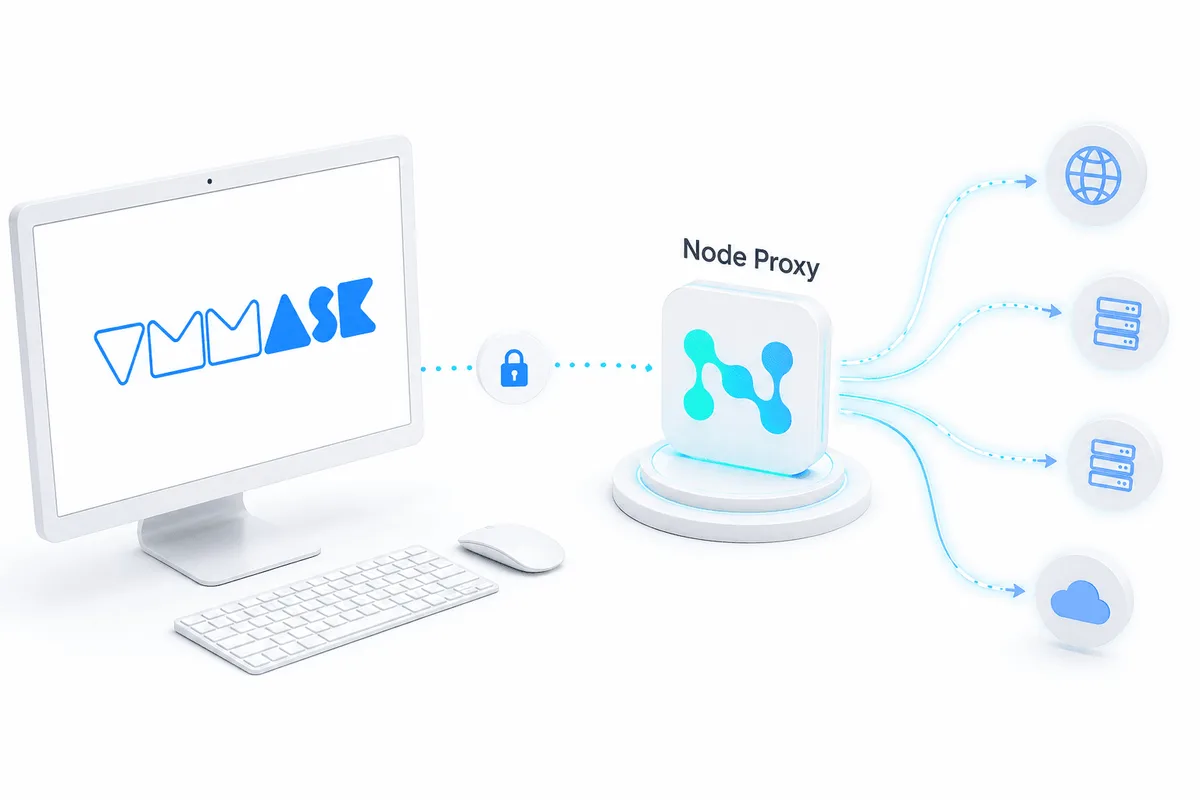
VMMask is a browser for working with multiple profiles, each with its own environment settings. To set up a proxy in VMMask, create a profile, click Add Proxy IP, enter the protocol, IP address, port, username and password, test the connection and save the profile. Below is a step-by-step guide with screenshots.
What Proxy Setup in VMMask Provides
VMMask is designed for separate work with multiple accounts and profiles. Within the program, you can specify separate settings for each profile, including network settings. As a result, profiles do not have to be launched in the same configuration, and switching between them becomes faster and more convenient.
Connecting a proxy in VMMask is primarily needed so that each profile operates through its own IP address. This is especially important in cases where it is necessary to separate sessions, use different profiles within the same service, or build a separate working environment for different tasks.
Another advantage of VMMask is that the program allows you to prepare several profiles with different settings in advance and then launch them as needed.
Stop Hunting for IPs. Use the Entire Pool.
Access thousands of residential IPs and pay only for the traffic you consume.
How to Set Up a Proxy in VMMask Step by Step
The setup is performed through the profile creation menu. The sequence of actions is as follows:
Step 1. Open the Profiles Section
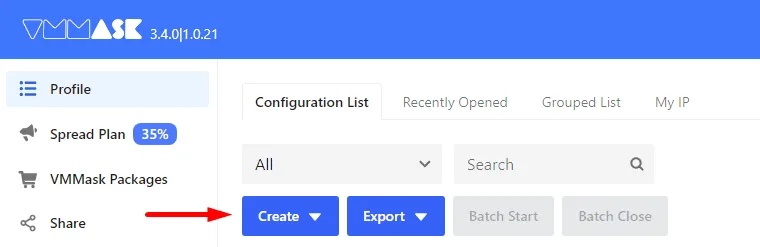
After installing and launching VMMask, go to the Profile tab. Click Create to open the new profile creation menu.
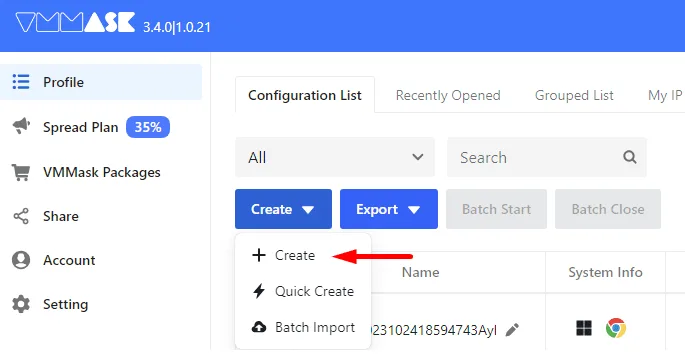
In the drop-down list, select Create again.
Step 2. Create a New Profile
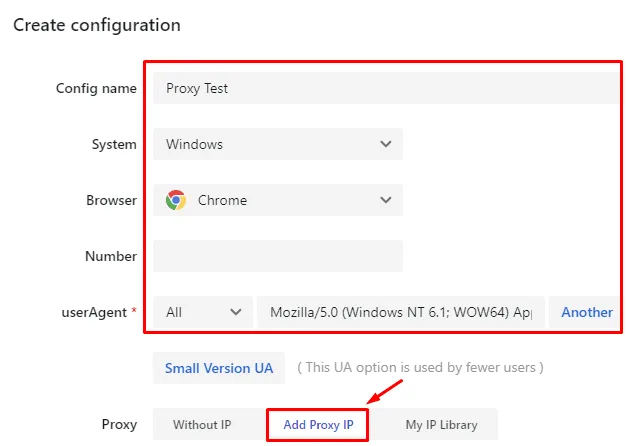
On the profile setup page, specify the profile name. Here you can also set other system characteristics that will be used in this profile.
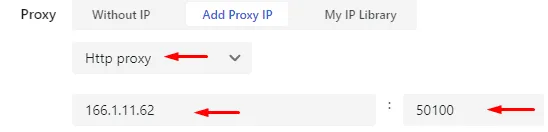
In the network settings block, click Add Proxy IP. After that, a form for entering proxy server data will open.
Step 3. Enter the Proxy Connection Settings
Select the required protocol, then enter the IP address and port. You can find these details for your residential proxies in the Node Proxy client panel.
If the proxy works with authentication, also enter the username and password. Click Test Connection to make sure the proxy connects correctly.
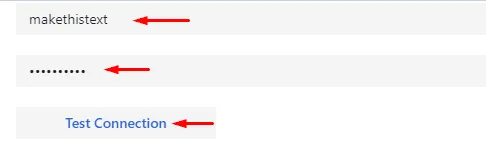
If the data is entered correctly and the connection is established, the system will display a notification that the check was successful.

Step 4. Save the Profile
After checking, save the settings. Depending on the scenario, you can choose Save or Save And Open. In the second case, the profile will immediately open in the browser with the settings already applied.
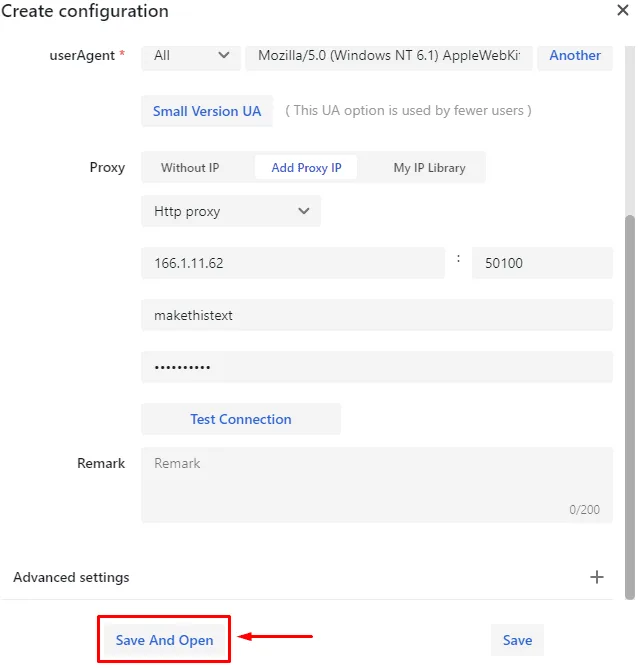
Step 5. Launch the Profile
After saving, the new profile will appear in the general list. To start working, all that remains is to click the launch button or the start icon for the required profile.

For the profile to work stably, the proxy settings must be entered without errors: protocol, address, port, and authentication data, if required.
VMMask Proxy FAQ
How do I add a proxy in VMMask?
Open the Profile tab, click Create, then click Add Proxy IP in the network settings block. Select the protocol, enter the IP address, port, username and password, test the connection and save the profile.
Can I use a different proxy for each VMMask profile?
Yes. Network settings are set separately for each profile, so every profile can work through its own IP address.
How can I check that the proxy works in VMMask?
Click Test Connection after entering the proxy details. If the data is correct, VMMask shows a notification that the check was successful.
Why does the proxy check fail in VMMask?
Usually the protocol, address, port or login details are entered with an error. Compare them with the data from your proxy provider and run the test again.
Conclusion
Setting up a proxy in VMMask comes down to creating a profile, adding the proxy server settings, and checking the connection before launch. This approach makes it possible to prepare separate working profiles with different network settings and quickly launch them from the general list. If all parameters are specified correctly, the profile will be ready to use immediately after saving.