How to Set Up a Proxy in Wade Browser: Import a List or Add One Manually

Wade Browser offers two routes for proxies. You can load a whole list through Proxy List → Import and then attach entries to profiles, or open a single profile, expand its Proxy block, switch it to Manual and type the server details. Both end the same way: you press Run, and that profile goes online through its own IP.
Wade is a desktop antidetect browser that keeps each profile in a separate environment with its own fingerprint, cookies and network route. The screenshots below come from version 1.1.0. Along with the basic steps, you will see what the IP Change URL and Generate from string fields do, how Wade uses the proxy to fill WebRTC and geolocation, and how to catch dead addresses with Scan All.
Datacenter proxies in bulk
Fast proxy lists ready to import into Wade Browser
Before You Start
Get the connection data from your provider:
- protocol (SOCKS5 or HTTP);
- host or IP and port;
- username and password, if the server uses them;
- an IP change link, for rotating plans only.
For a list import, have the proxies in a plain text file, one per line. Large batches of identical-format addresses are typical for datacenter proxies, which providers usually hand out as exactly such a list.
Option 1. Importing a Proxy List
Step 1. Open Proxy List
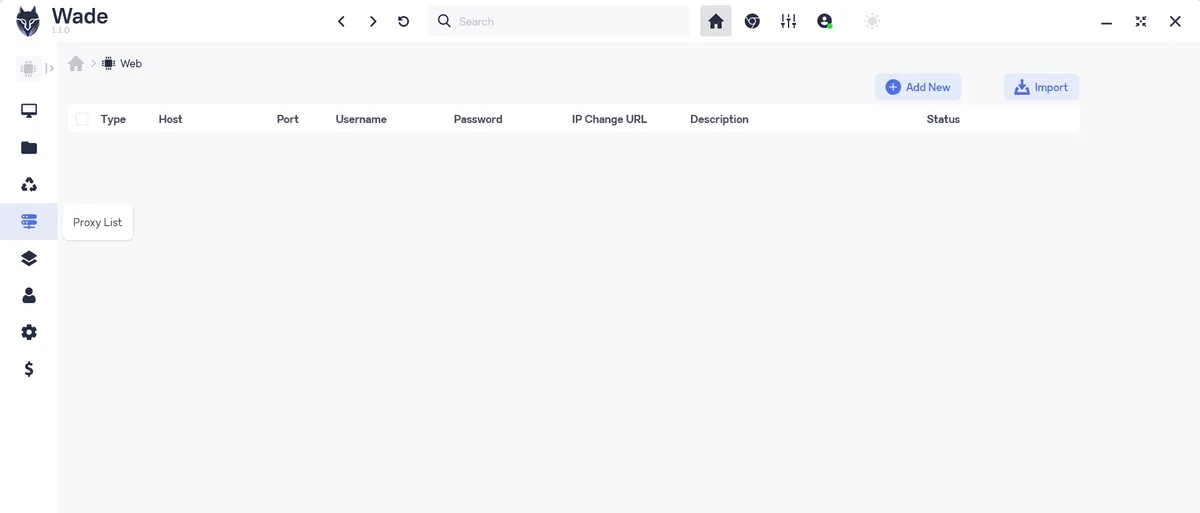
In the narrow icon bar on the left, hover over the icons until the tooltip reads Proxy List and click it. The table has columns for Type, Host, Port, Username, Password, IP Change URL, Description and Status. Above it are Add New, for a single entry, and Import.
Step 2. Paste the List and Confirm
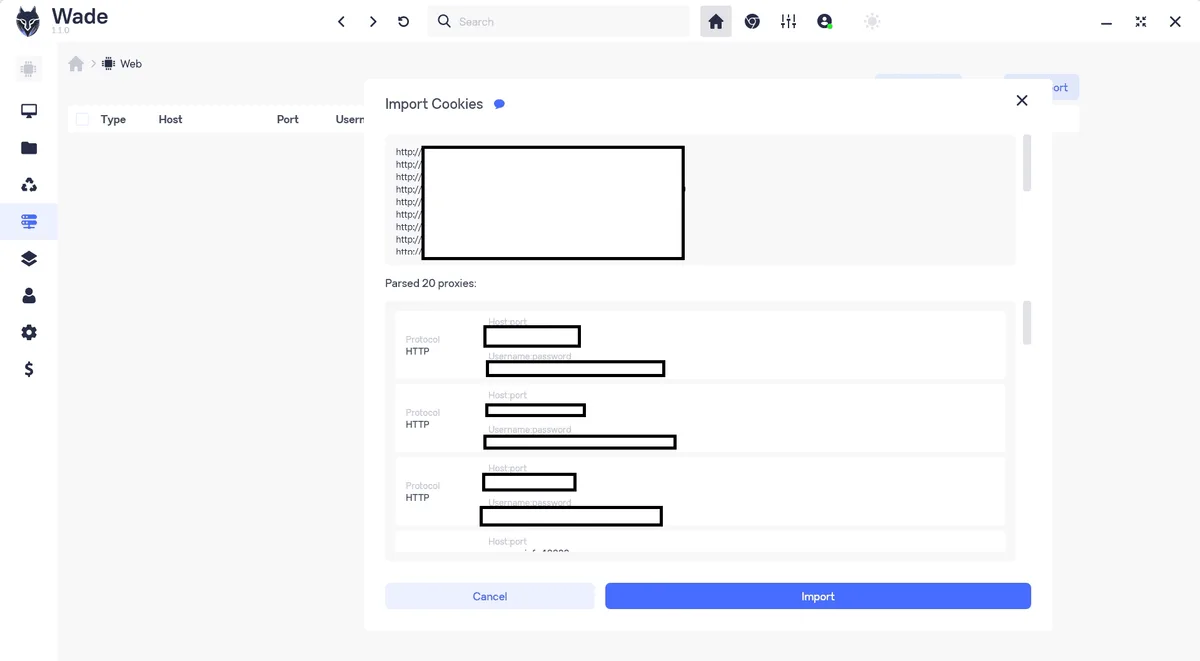
Click Import, paste your proxies with Ctrl + V and look at the preview. In version 1.1.0 the dialog is titled "Import Cookies", a label glitch; what matters is the line under the text box, for example "Parsed 20 proxies", and the cards listing protocol, host:port and username:password for each entry. If the count matches your file, press Import.
Step 3. Scan the Imported Entries
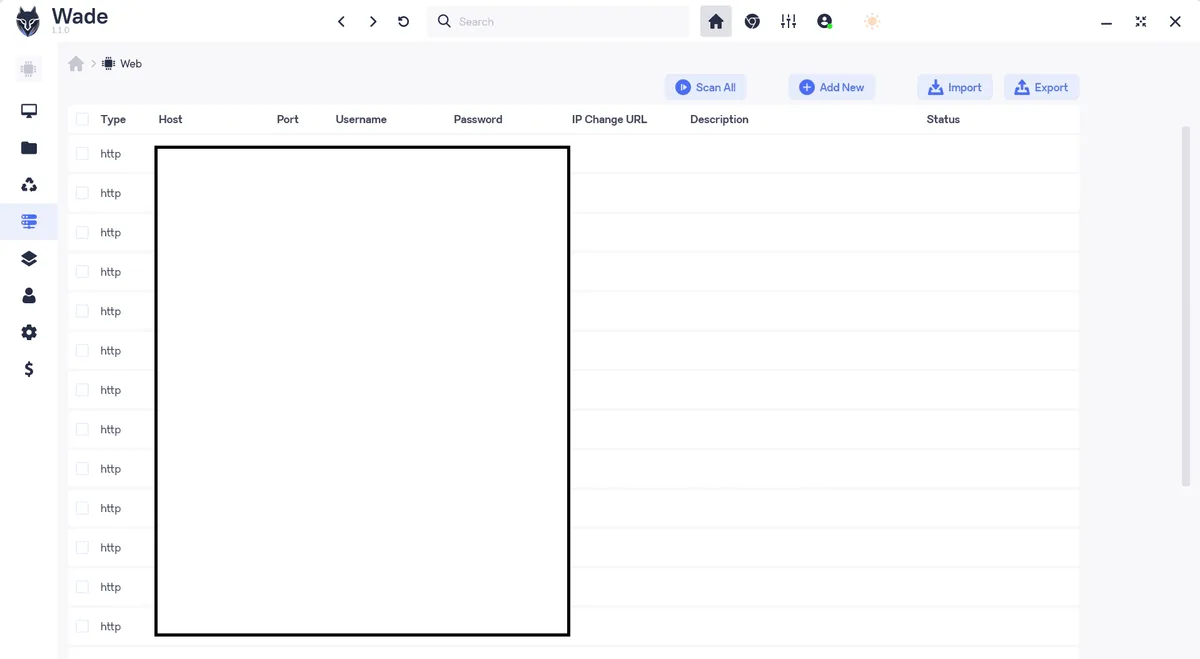
The proxies now fill the table, and new buttons appear: Scan All checks every address and writes the result to the Status column, Export saves the list back to a file. Run Scan All straight after the import and delete the entries that fail.
Option 2. Adding One Proxy to a Profile
Step 1. Create a Profile
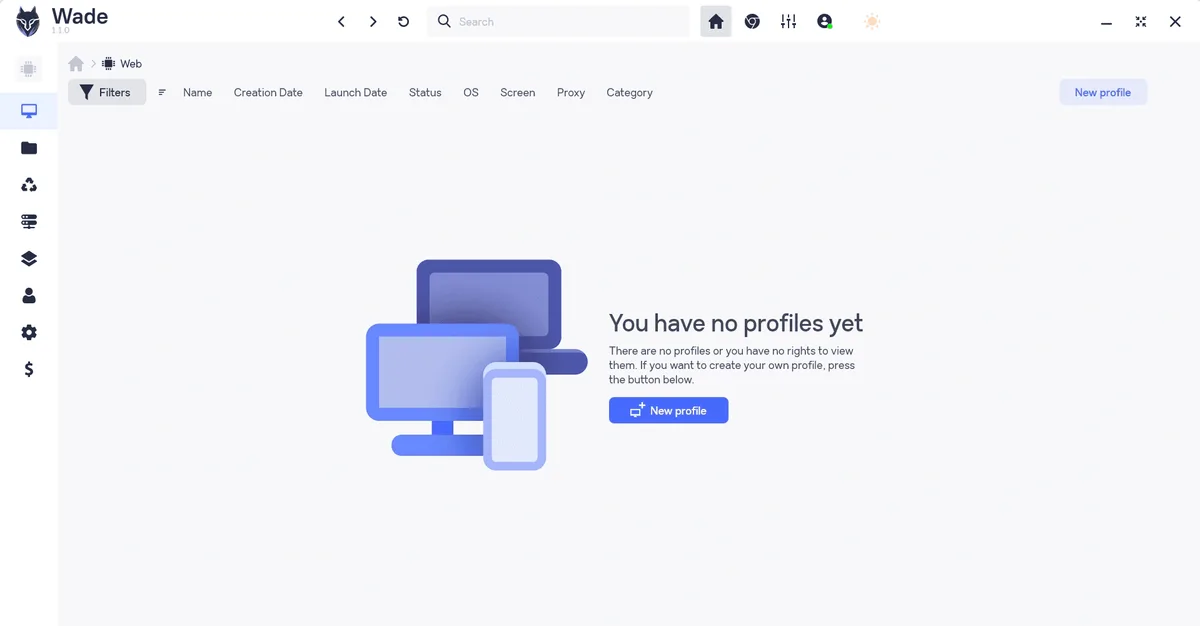
Click the monitor icon at the top of the left bar to open the profile list. In an empty workspace Wade shows "You have no profiles yet" and a New profile button; the same button sits in the upper right corner later.
Step 2. Review the Profile Card
The editor has three areas. General on the left holds the parent container, owner, profile name, description and presets (category, status, tags). Management on the top right holds Run and Delete. Below it are the Proxy block, marked Off by default, and Fingerprint, where you pick Windows, macOS or Linux and press Generate for a new set of parameters.
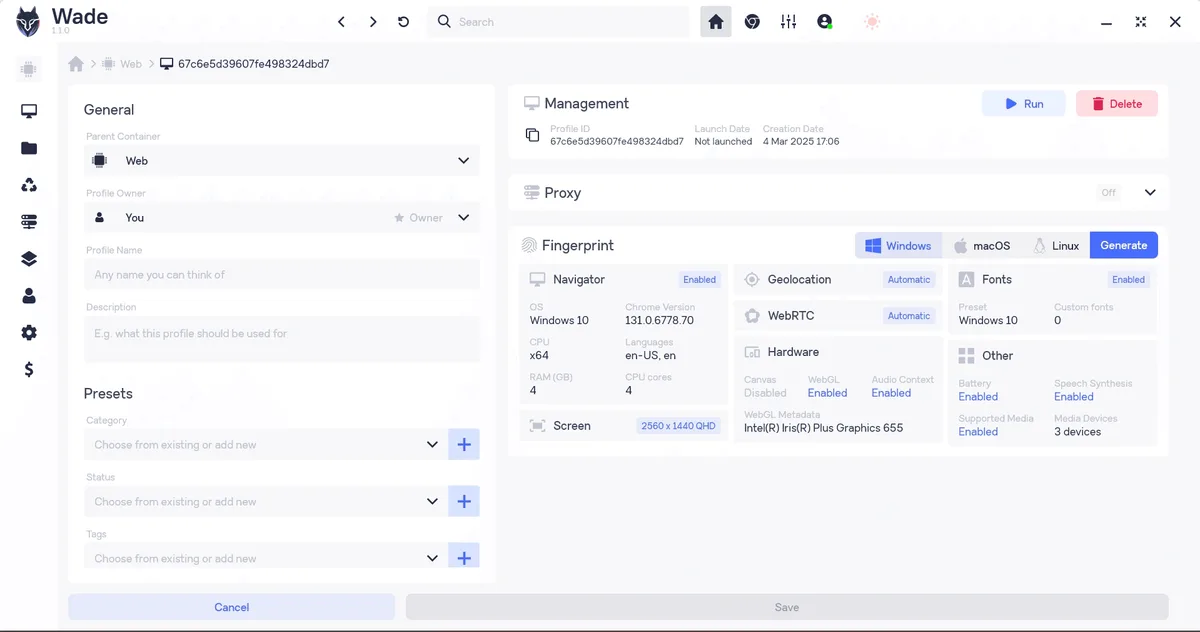
Notice that Geolocation and WebRTC in the Fingerprint block are set to Automatic. Wade fills them from the proxy at launch, so the profile's location follows its IP.
Step 3. Switch Proxy to Manual and Fill the Fields
Expand Proxy. Three modes are available: Off, Manual and Proxy List. Choose Manual and fill in:
- Type: the protocol, for example SOCKS5;
- Host and Port (1 to 65535);
- Username and Password: optional, leave empty for IP-whitelisted servers;
- IP Change URL: optional rotation link.
Instead of typing each field, paste the whole proxy into Generate from string, using the pattern [protocol://][username:password@]host:port[ip-change-url], and Wade spreads it across the fields. To use an address from the imported table, pick the Proxy List mode instead.
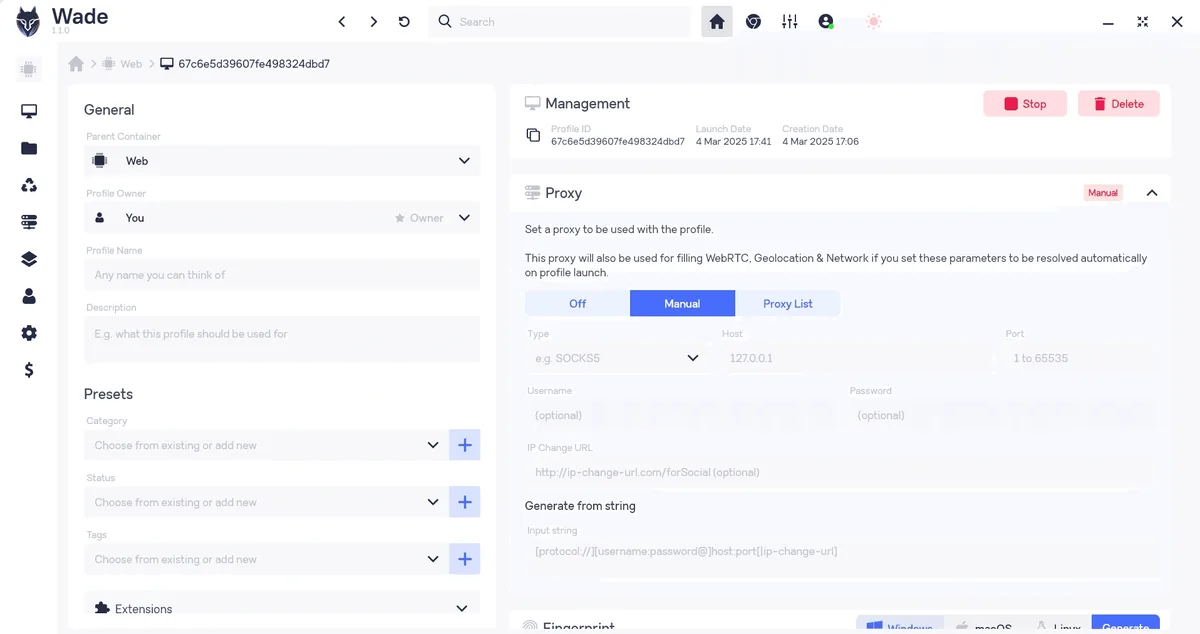
The IP Change URL matters only for rotating plans. Our guide on sticky and rotating proxies explains when a profile should keep one IP and when changing it on demand makes sense.
Step 4. Save and Run
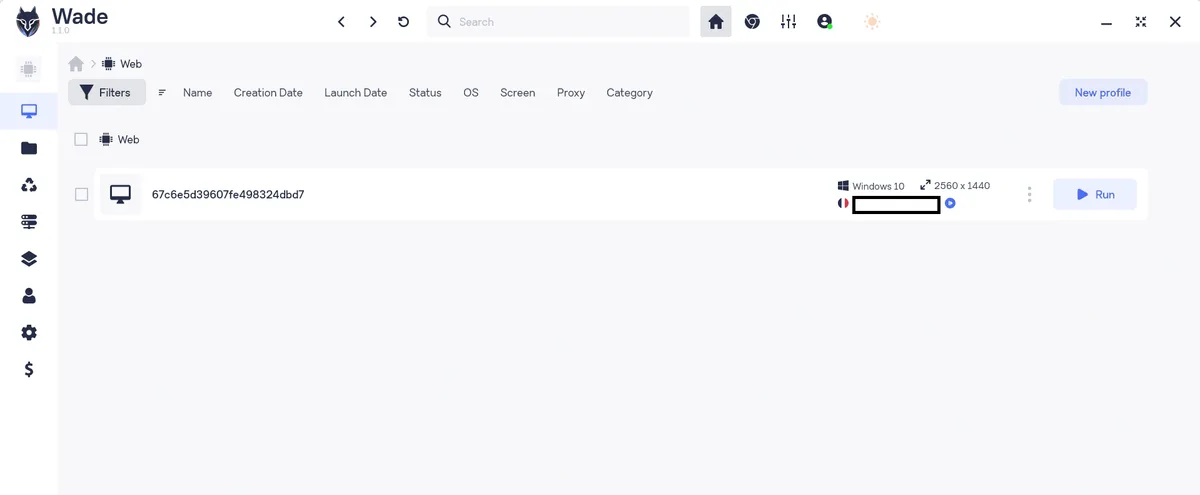
Press Save at the bottom of the editor. The profile appears in the list with its OS, screen size and a flag of the proxy country; click Run to launch it.
Import or Manual Entry?
| Situation | Better route |
|---|---|
| Dozens of profiles, a list from the provider | Proxy List → Import, then Proxy List mode in each profile |
| One or two profiles | Manual mode inside the profile |
| Rotating plan with a change link | Either route, with IP Change URL filled |
| Need to check many addresses fast | Import, then Scan All |
Confirming the Proxy Works
Inside the running profile, open an IP lookup site. The address and country must match the proxy, and the timezone should correspond to that country, since Wade fills geolocation automatically. To test a server apart from the browser, use our free proxy checker.
Common Problems
Status shows an error after Scan All. The address is offline, expired or the login has changed. Compare it with your provider's panel.
Import parses fewer lines than expected. Some lines use a different format or contain extra spaces. Bring the file to one format and import again.
The profile opens with your own IP. The Proxy block was left on Off, or changes were not saved. Reopen the profile and check the mode.
Authentication fails. In Manual mode, check that username and password are not swapped; with Generate from string, verify the username:password@ part.
Wrong location in the profile. Make sure Geolocation and WebRTC are set to Automatic so Wade takes them from the proxy.
For other browsers of this kind, see our collection of antidetect browser proxy guides.
Wade Browser proxy FAQ
Can I import many proxies into Wade Browser at once?
Yes. Open Proxy List, click Import, paste the list and confirm. Wade shows how many proxies it parsed before adding them.
What is the difference between Manual and Proxy List modes?
Manual stores proxy data inside one profile. Proxy List lets the profile use an entry from the shared table you imported earlier.
What does Generate from string do?
It splits a full proxy line into Type, Host, Port, Username, Password and IP Change URL, so you do not fill each field separately.
How do I check all imported proxies in Wade?
Click Scan All in the Proxy List section. The Status column then shows which entries respond.
Does Wade adjust WebRTC and geolocation to the proxy?
Yes, when those parameters are set to Automatic in the Fingerprint block. Wade then fills them from the proxy at profile launch.