Setting Up a Residential Proxy in Migrant Bird Browser (MBbrowser)
Migrant Bird Browser allows you to add proxy servers at the connection manager level and then assign them to individual profiles. This approach is convenient when working with multiple sessions: the connection settings are saved in the browser, after which the required proxy can be selected when creating a new profile. As a result, each session is launched with predefined network settings and isolated environment parameters.
Work Through Real IPs
Access a global network of residential IP addresses with Node Proxy.
How to Add a Proxy in MBBrowser
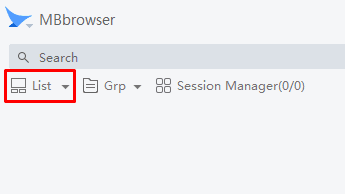
Before you begin, install the browser and launch it on your device. After that, open the top menu List.
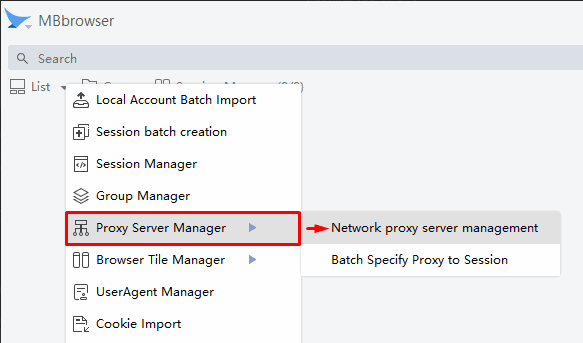
Go to the Proxy Server Manager section and select the option for managing network proxy servers. In this window, connections can be added, tested, and imported.
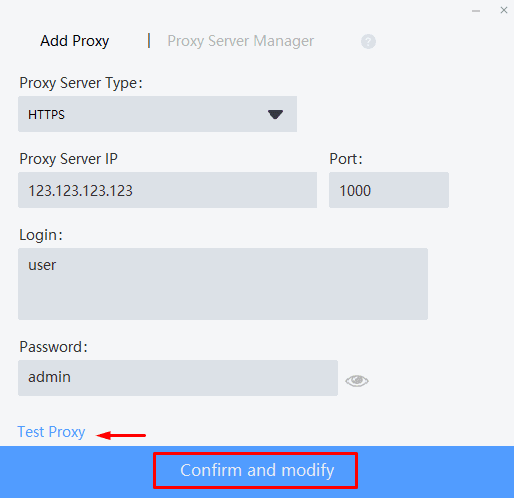
To create a new connection, click Add Proxy. In the settings form, specify the proxy type in the Proxy Server Type field, then fill in the main parameters: IP address and port. If a proxy with authorization is used, additionally enter the username and password.

After entering the data, test the connection using the Test Proxy button. If the browser confirms that the connection is valid, save the settings.
After that, the proxy will appear in the list of available entries in the Proxy Server Manager window.
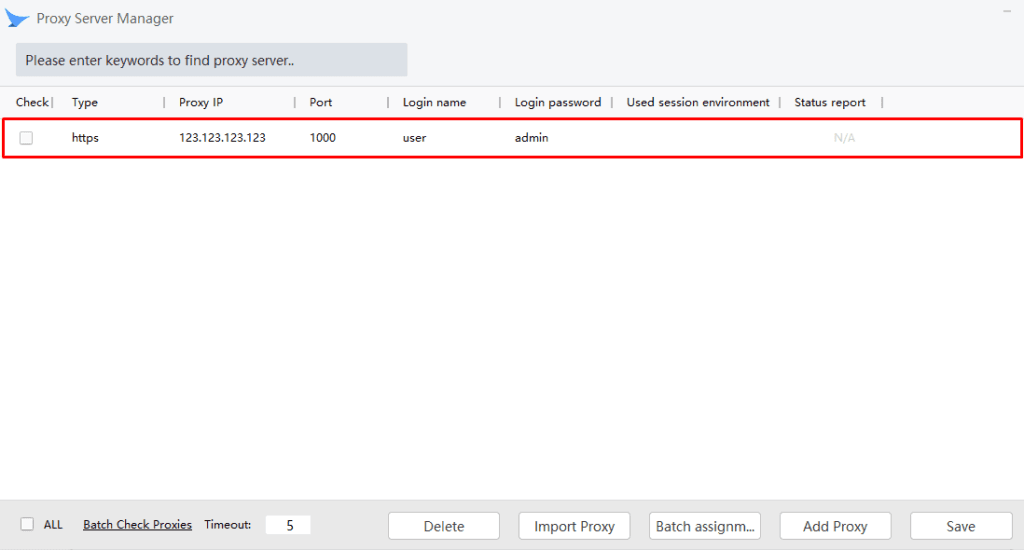
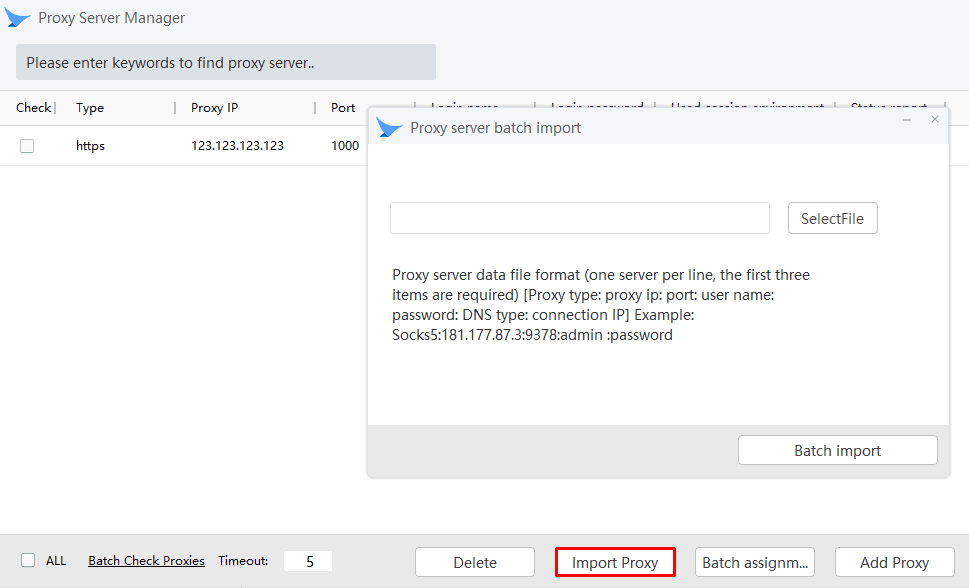
If you need to add several addresses at once, use the Import Proxy function. It allows you to upload a list of proxies in a supported format and then apply them to different profiles without manually entering each connection.
What Is Important to Check Before Launch
- Make sure the selected proxy type (HTTP, HTTPS, or SOCKS5) matches your proxy server's protocol.
- If your proxy requires authentication, double-check the username and password, as even a single incorrect character can prevent the connection from working.