Setting Up a Residential Proxy in the MASQ Browser
 ·July 30, 2026·4 min read
Setting Up a Proxy in the MASQ Browser
MASQ allows you to assign separate network settings to each profile. This is necessary when different tasks require different IP configurations, and when it is important to isolate work environments and manage them from a single interface. The setup is performed during profile creation and takes a few steps: first, fingerprint parameters are specified, then the proxy details are entered and the connection is checked.
Why set up a proxy in MASQ
Proxies in MASQ are used at the profile level. This is convenient in situations where you need to:
• work with multiple profiles independently from one another;
• assign a separate IP address to each profile;
• use different types of proxies depending on the scenario;
• centrally manage connection settings within one browser.
MASQ supports common proxy formats, and the setup itself is built into the standard profile creation process.
Choose the Right IP for the Job
195+ locations and flexible rotation options.
How to set up a proxy in MASQ
1. Create a new profile
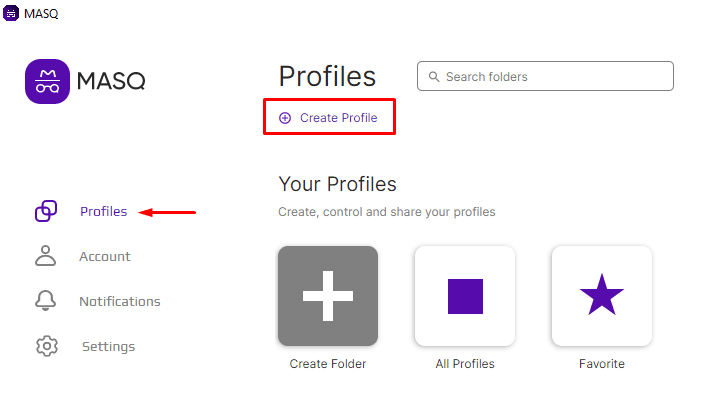
After installing and launching MASQ, open the Profiles tab on the main page and click Create Profile. This step begins the creation of a separate working environment in which the network settings will then be configured.
2. Enter the profile name
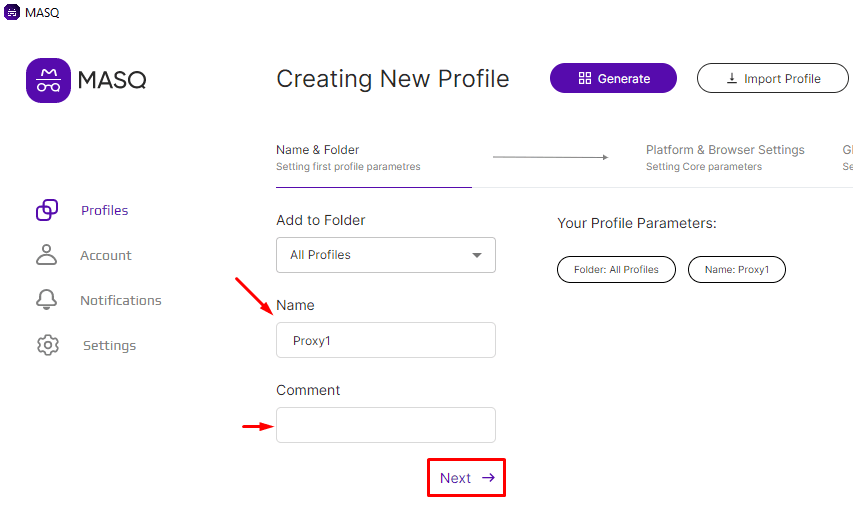
In the Name field, enter the profile name. If necessary, add a comment in the Comment field to make navigation easier if there will be many profiles. Then click Next.
3. Select fingerprint parameters
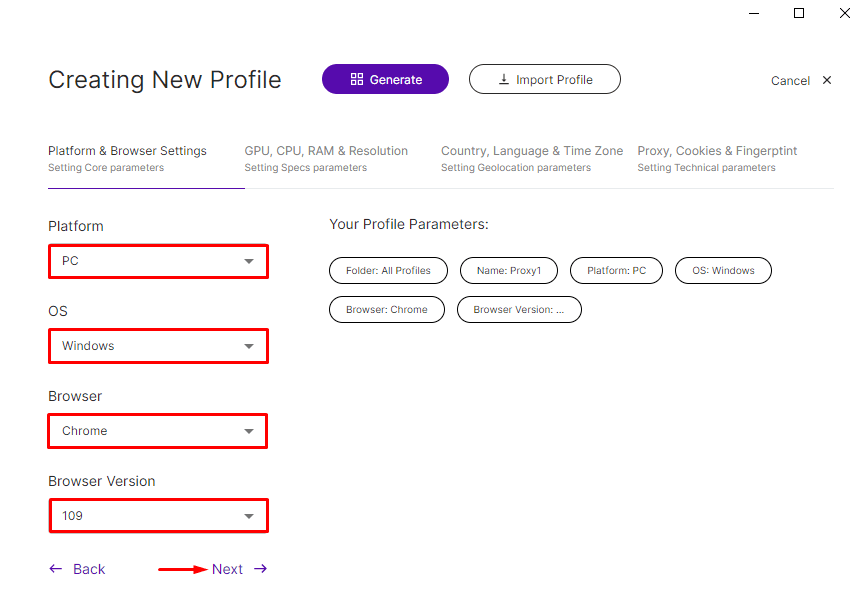
On the next screen, the basic profile characteristics are configured. Usually, this is where the device type, operating system, and its version are selected. These parameters form the basis of the future profile, so they are configured before moving to the network section. Click Next to continue.
4. Configure additional characteristics
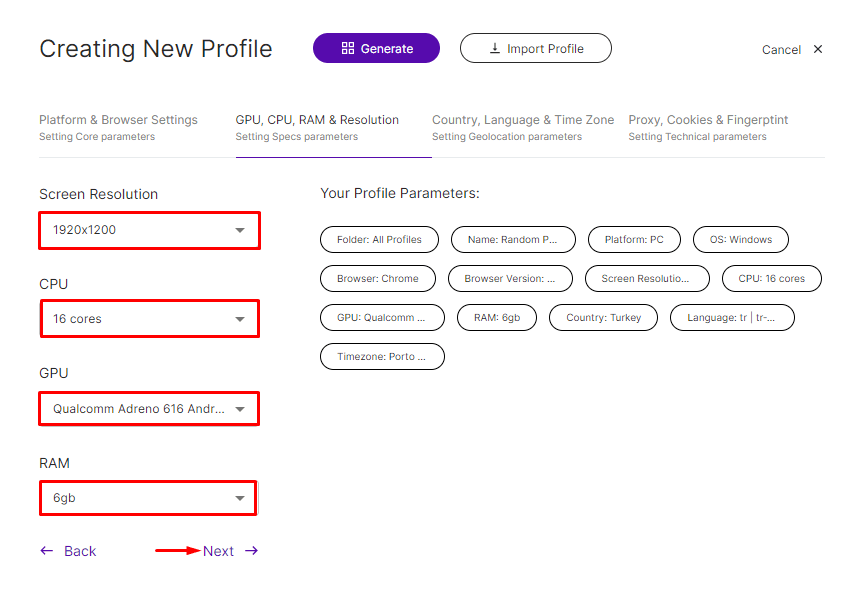
Next, MASQ will prompt you to specify advanced profile parameters: screen resolution, number of processor cores, graphics card settings, and RAM size. These settings help configure the profile more precisely for the required working conditions. After filling them in, click Next again.
5. Set geo parameters
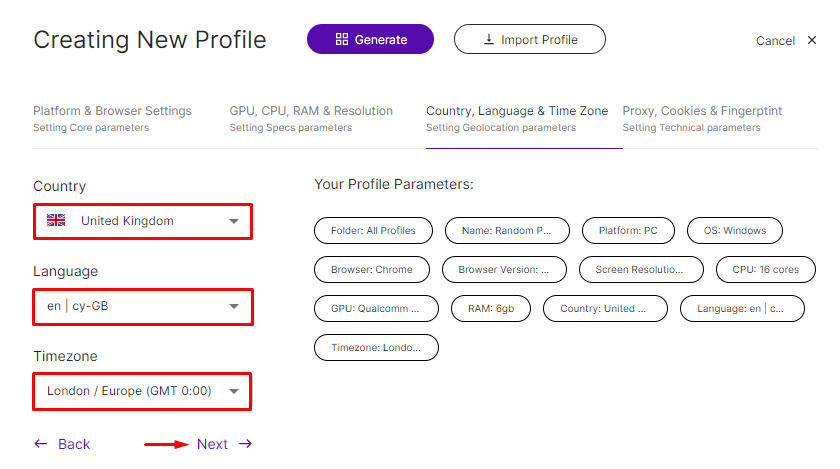
The next step is to select the country, language, and time zone. These parameters also belong to the overall profile configuration and are specified before connecting the proxy. After selecting the required values, click Next.
6. Go to the proxy settings
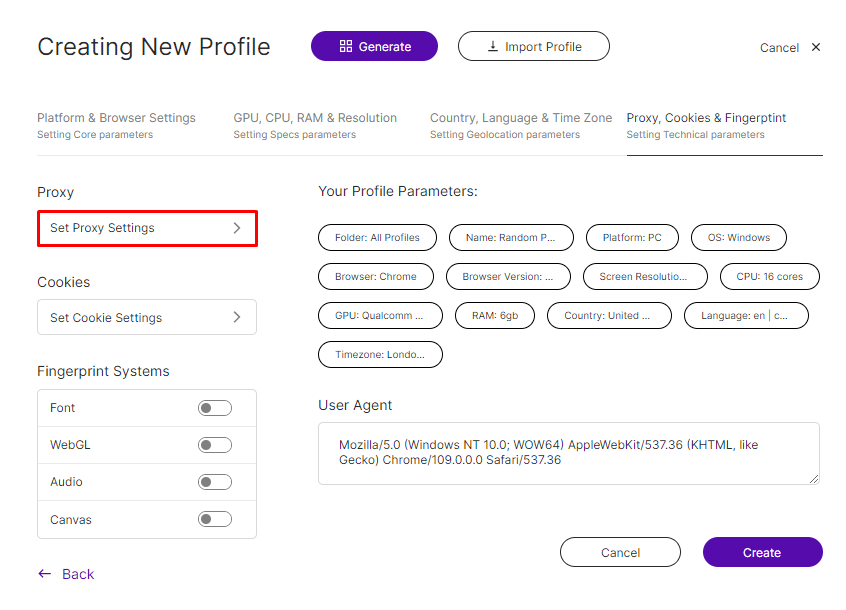
After completing the basic configuration, a window with additional profile parameters will open. Cookie settings, fingerprint settings, and the current User Agent are available here. To proceed to the network connection settings, click Set Proxy Settings.
7. Enter the proxy details
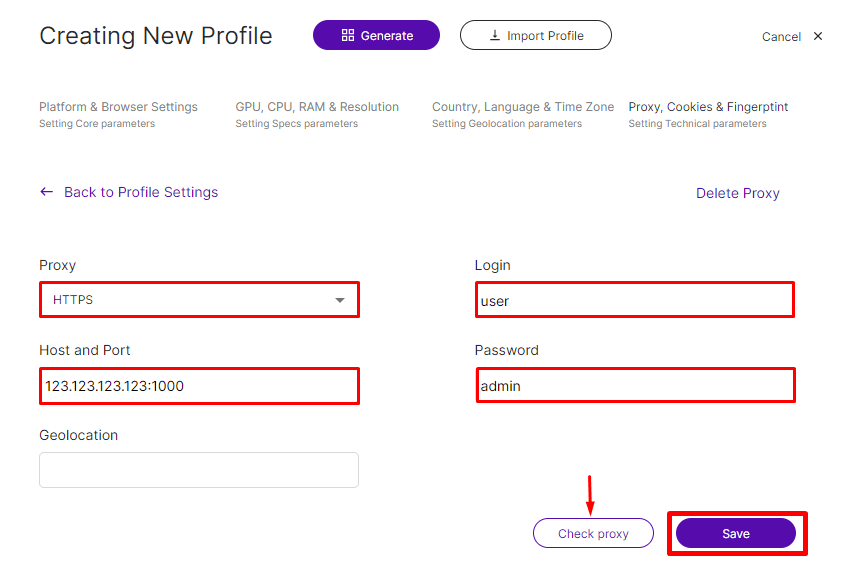
In the pop-up window, select the connection protocol and specify the proxy parameters (this information can be found on our website node-proxy.com):
• IP address;
• port;
• login;
• password, if required.
If a private proxy is used, the authentication details must be filled in completely. It is important to carefully check all fields: an error in even one character will result in the connection not being established.
After entering the details, click Check proxy. MASQ will perform a connection check and display the result in a pop-up notification. It is better not to skip this step: it allows you to immediately verify that the proxy is available and entered without errors.
If the check is successful, click Save.
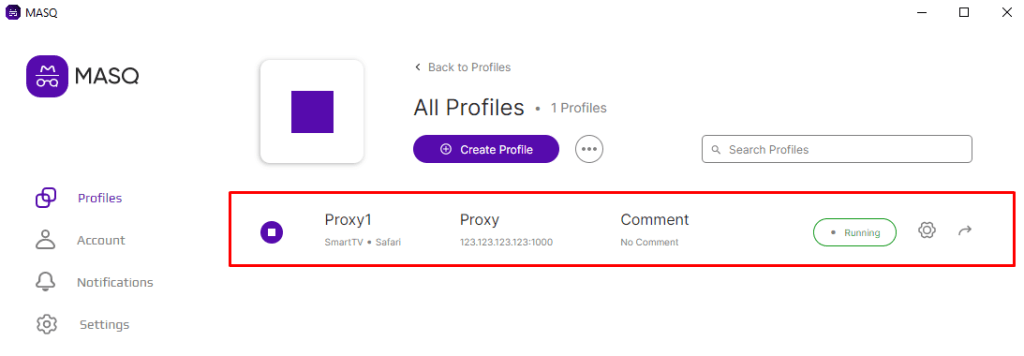
After saving, the profile will appear in the Main Page > Profiles list. From that point on, it can be launched with the assigned network settings already in place.
What to check after setup
After creating the profile, it is worth making sure that:
• the profile appears in the general list;
• the proxy has been saved without errors;
• the connection has been verified through Check proxy;
• the profile parameters match the selected configuration.
If you plan to work with multiple profiles, they can be created using the same scheme: configure the fingerprint, geo parameters, and proxy separately for each one.
Conclusion
Setting up a proxy in MASQ is built into the profile creation process and does not require any separate complex actions. The basic logic is simple: first the profile is created, then the network settings are assigned to it, after which the connection is checked and saved. This approach makes it possible to organize work in the browser neatly and manage profiles with the required configuration from a single interface.