How to Connect a Residential Proxy in Omnilogin
 ·August 4, 2026·4 min read
Omnilogin is a browser designed for working with isolated profiles, where each session exists as a separate environment with its own data and settings. Each such profile stores its own cookies, cache, local storage, and browser settings. This makes it possible to separate different work tasks and keep them from mixing with one another.
Omnilogin differs from a regular browser in that it allows you to manage not only the content of a profile, but also its technical characteristics. A separate set of parameters can be defined for each environment: operating system, interface language, time zone, screen resolution, and other values that make up the browser session profile. This approach is convenient wherever careful organization of multiple profiles and centralized control over their settings are required.
A separate part of the configuration is proxy connection. In Omnilogin, it is configured separately for each profile. As a result, individual work environments receive their own network parameters, and the overall workflow becomes more segmented and manageable.
Residential Proxies for Every Task
Real IP addresses for reliable access to web services.
Why proxies are connected separately to each profile
If several profiles work through the same connection, external services see a common source of network activity. Even with separate cookies and different browser settings, such overlap remains visible. That is why in Omnilogin proxies are usually assigned not to the browser as a whole, but to a specific profile.
This setup method provides several practical advantages. First of all, each profile gets its own IP address and an independent network route. In addition, it becomes easier to maintain a consistent configuration: one profile, one connection, one set of parameters. This is especially convenient in cases where profiles are used regularly.
Omnilogin works with common proxy types, including HTTP, HTTPS, and SOCKS5. Before saving the settings, the connection can be checked directly in the interface to immediately see whether the address, port, and authorization data have been entered correctly.
What Omnilogin can do besides proxy configuration
The browser’s capabilities are not limited to network parameters. It is designed to work with a large number of profiles and allows flexible control over their state.
Separate profiles
Each profile represents a separate workspace with its own set of data. This simplifies parallel work with multiple sessions and helps prevent information from being mixed between them.
Environment parameter configuration
When creating a profile, you can choose characteristics that affect its configuration: platform, language, screen settings, and other properties of the browser environment.
Copying ready-made configurations
If there is already a successfully configured profile, it can be used as the basis for new ones. This saves time and makes it easier to scale identical work setups.
Team collaboration
The system supports profile transfer and access management. This makes it possible to distribute tasks among team members without manually rebuilding the environment for each employee.
Proxy setup procedure in Omnilogin
A proxy is connected either while creating a new profile or when editing an existing one. In both cases, the sequence of actions is almost the same.
1. Launch Omnilogin and open the Profile Management section.
2. Create a new profile using the New Profile button.
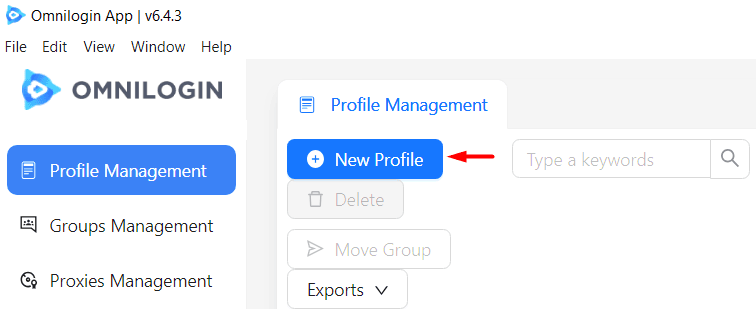
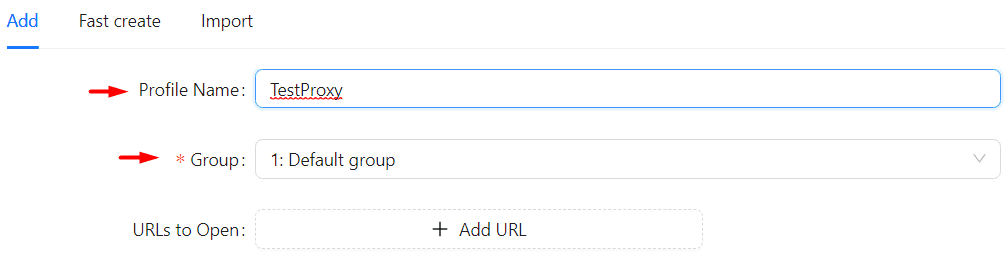
3. Enter the profile name and, if necessary, select the group where it will be stored.
4. Find the Proxy block and switch it to Custom mode.
5. Select the required connection protocol.
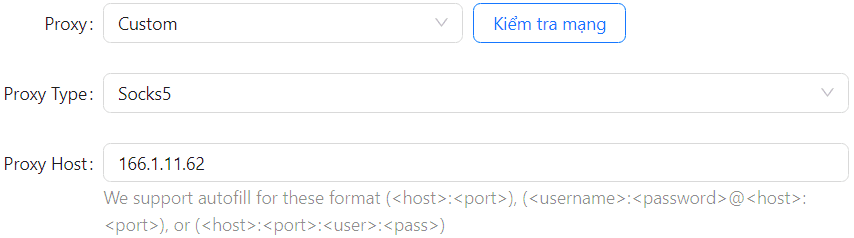
6. Enter the IP address and port of the proxy server (this information can be found on our website, node-proxy.com).
7. If private access is used, add the login and password.
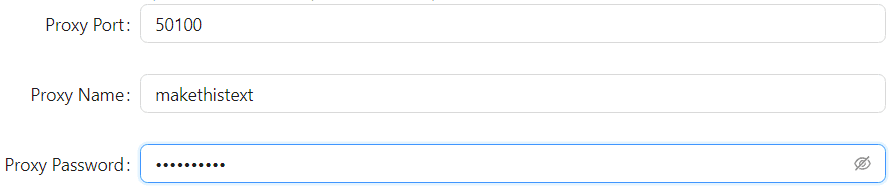
8. Run the connection check using the built-in test button next to the proxy settings.
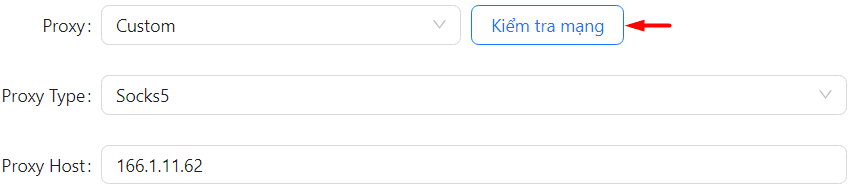
9. After a successful check, complete the profile configuration: specify the remaining environment parameters and save the changes using the OK button.
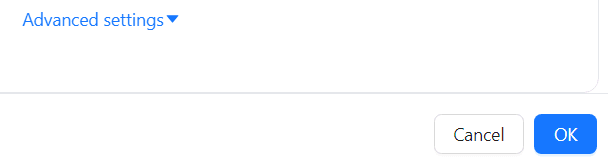
After that, the profile will be created with the proxy already attached. The same method can be used to prepare any number of profiles with different connection parameters.
What is important to consider when creating a profile
When configuring a profile, it is worth looking not only at whether the IP address and port were entered correctly. For a stable configuration, it is better for the parameters inside the profile not to contradict one another. If a certain language, time zone, and platform are set for the environment, the network settings should also correspond to them.
Another practical point is profile organization inside the browser. As the number of profiles grows, a convenient system of names and groups greatly simplifies navigation, editing, and transferring the environment to other team members.
Omnilogin usage terms
The service offers a free option and paid configurations with customizable parameters. In the basic version, you can create a limited number of profiles, while extended plans allow you to increase their number and add team mode. The specific cost depends on the selected volume.
Conclusion
Omnilogin is suitable for working with isolated browser profiles. Connecting a proxy in this system is done at the level of an individual profile, which helps build a cleaner and more independent workflow structure.
The setup itself comes down to a few steps: create a profile, select custom proxy mode, specify the connection type, enter the address and port, add authorization if necessary, check the connection, and save the configuration. After that, the profile is ready to work with its own network parameters.