How to Set Up a Residential Proxy in NST Browser


What Is NST Browser
NST Browser is an antidetect browser for creating and managing separate browser profiles. Each profile can have its own parameters: operating system, browser core, fingerprint, network settings, and connected proxy.
The tool is suitable for tasks where it is important to separate work environments and not mix data from different sessions. NST Browser is available for Windows, macOS, and Linux. Depending on the version and plan, it can be used both locally and through cloud infrastructure.
Among the browser’s capabilities are:
- creating separate profiles with individual parameters;
- connecting static and rotating proxies;
- combining proxies into groups;
- bulk import of lists;
- checking proxy functionality before launch;
- supporting scenarios with a large number of profiles.
Before setup, it is worth preparing the proxy data in advance: host, port, login, and password, or a ready-made connection string in the format supported by your provider. For Node Proxy residential proxies, these details are shown in the client panel.
Residential IPs Websites Trust
Node Proxy provides real residential proxies for smoother online operations.
What You Need Before Starting
For setup, you will need:
- NST Browser installed;
- an NST Browser account;
- a working proxy or a list of proxies;
- connection data: IP or domain, port, username, and password;
- if necessary, a CSV template for bulk import.
Proxies can be static or rotating. A static proxy keeps the same IP address throughout the session. A rotating proxy changes the IP according to the provider’s logic or upon a new connection. The choice depends on the tasks: for stable work with one profile, the static option is more often used; for a large number of similar operations, rotating proxies or pre-prepared lists are used.
Installing and Logging in to NST Browser
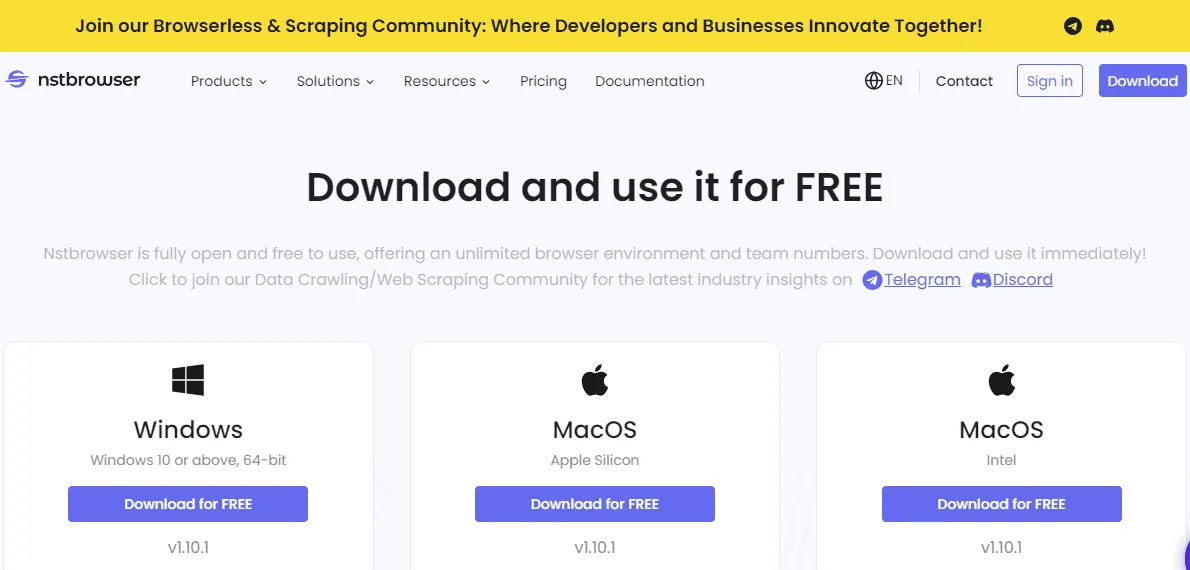
First, you need to download NST Browser from the official website and install the version for your operating system.
After launch, the application will prompt you to log in to your account.
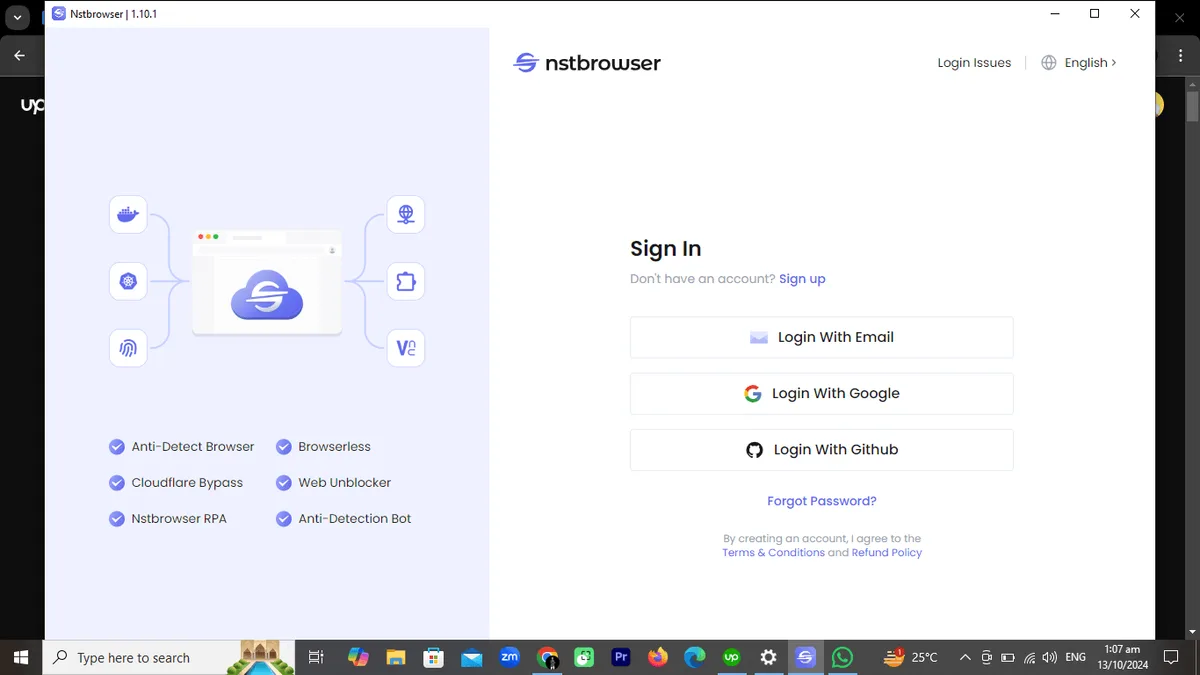
After logging in, the NST Browser workspace opens. It contains the main sections: profiles, proxies, groups, browser environment settings, and management tools.
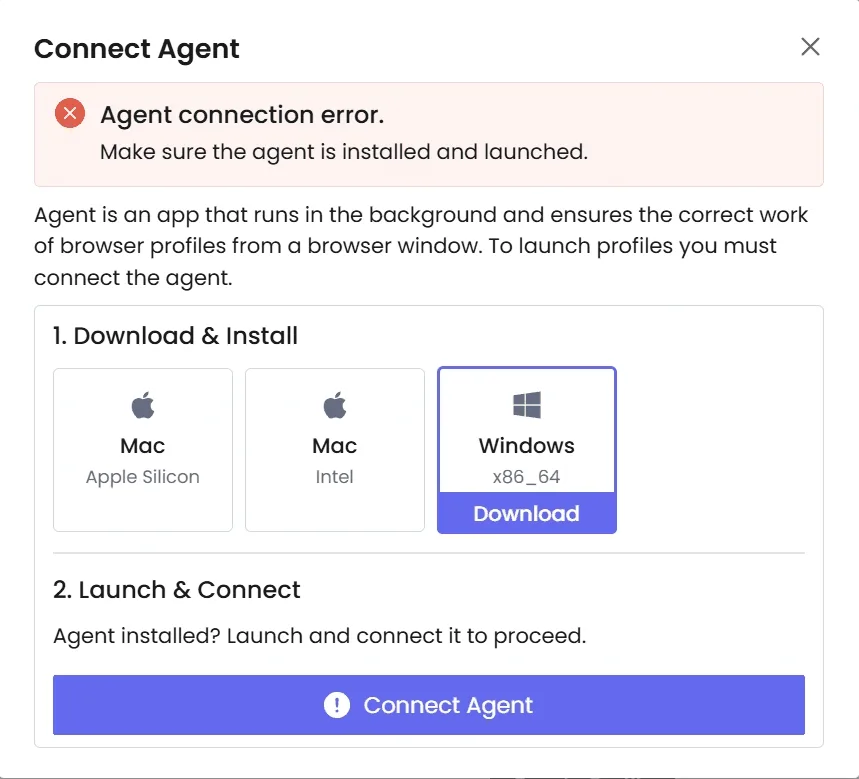
If a local agent is used, it must be installed and connected to the account. After installation, the agent is usually detected automatically, and you can proceed to creating profiles and adding proxies.
How to Add One Proxy in NST Browser
To connect one proxy, open the Proxies section, then the Proxy Configuration block.
Next, follow these steps:
- Click to add a new proxy.
- Select the proxy type, if required: HTTP, HTTPS, or SOCKS5.
- Specify the server IP address or domain.
- Enter the port.
- Add the login and password if the proxy uses authorization.
- Click Check proxy to test it.
- After a successful check, save the settings.
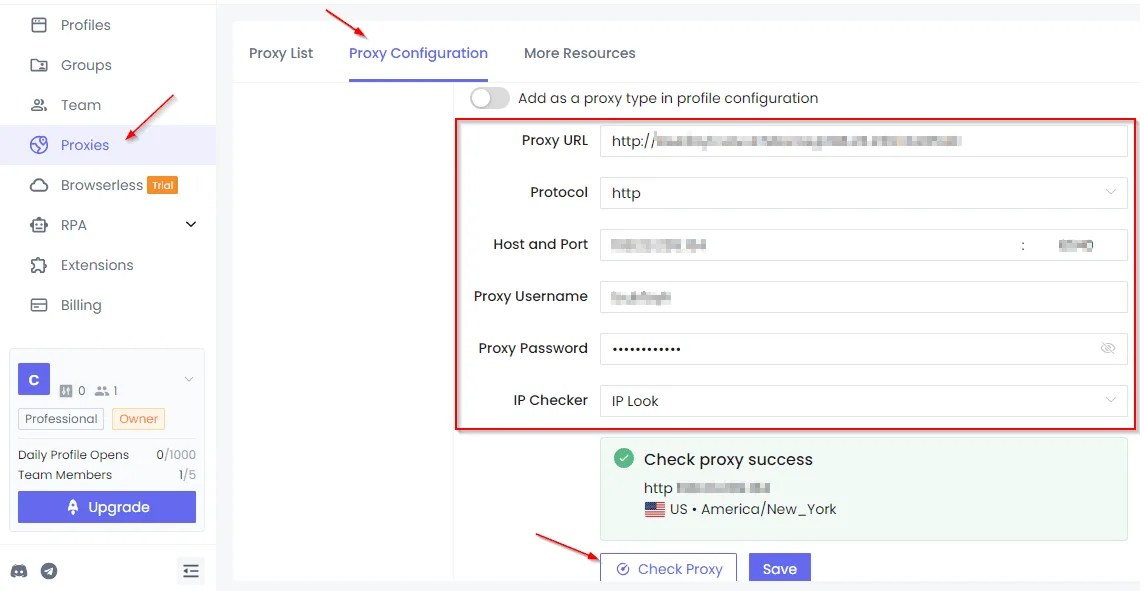
It is better not to skip the check. It shows whether the browser accepts the connection data and whether the proxy server responds. If the check fails, you need to verify the format, port, protocol type, and credentials.
Common causes of errors:
- incorrect port;
- the wrong proxy type is selected;
- an error was made in the login or password;
- the proxy is unavailable;
- the IP address is restricted by the provider’s settings;
- the connection string was inserted in an unsuitable format.
After saving, the proxy can be assigned to a separate profile.
Assigning a Proxy to a Profile
To launch a profile with the required proxy, open the profile settings and go to the network parameters section. There, select the option to use a saved proxy.
The usual order is as follows:
1. Open Profiles.
2. Create a new profile or edit an existing one.
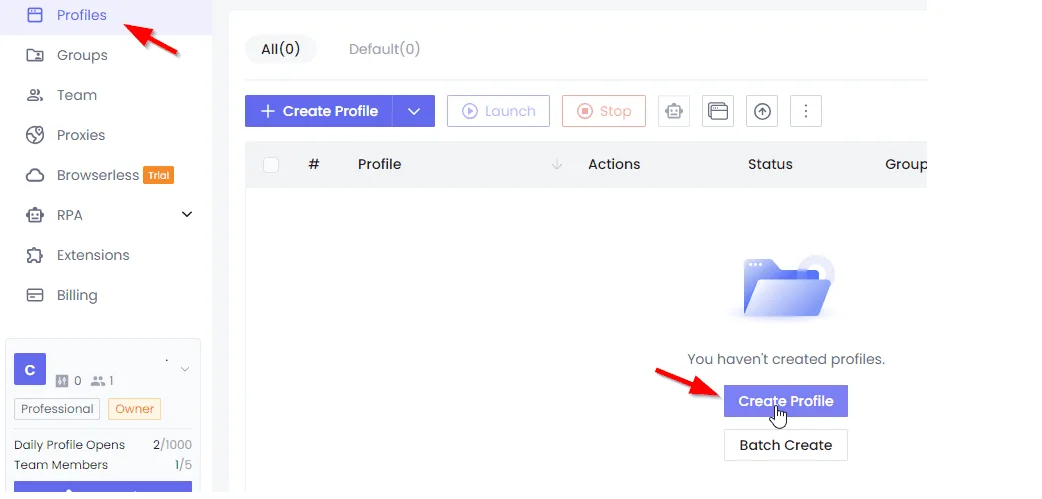
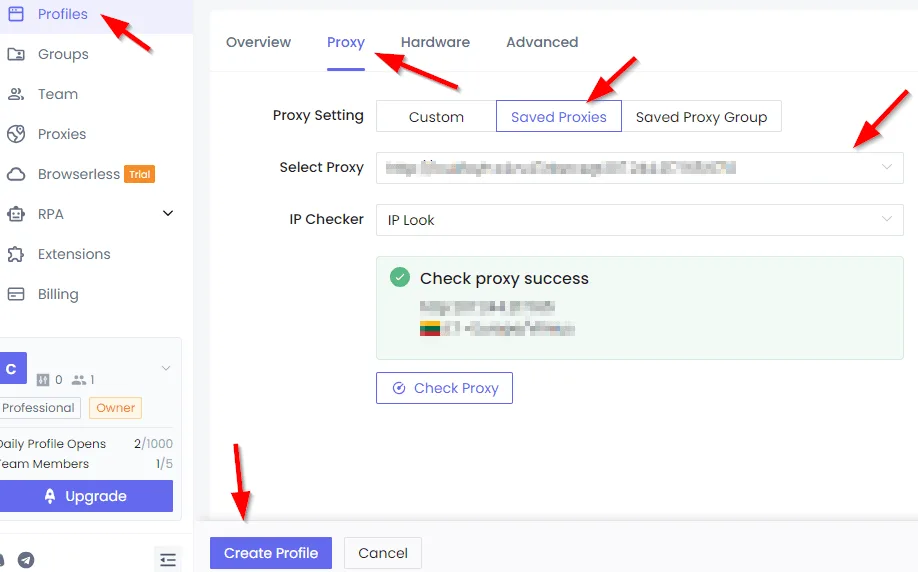
3. Go to the Proxy section.
4. Select the saved proxy from the list.
5. Check the connection.
6. Save the profile.
7. Launch the profile using the launch button.
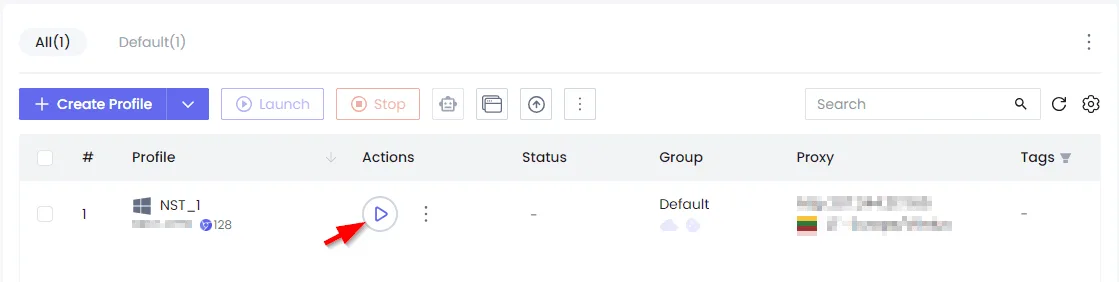
After the browser window opens, you can additionally check the external IP address through any IP-checking service, for example the free proxy checker. The address should match the one you connected in the settings.
Setting Up a Proxy Group
If there are several proxies, it is more convenient to combine them into a group. This helps assign the required connections to profiles faster and keep projects organized.
To create a group, open Proxies, then click Create Group.
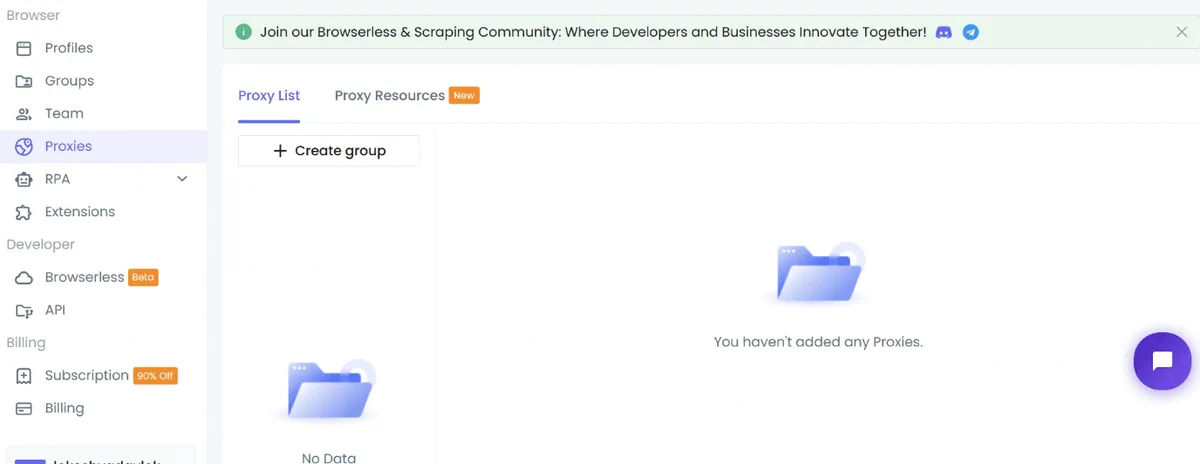
Specify the group name and save it.
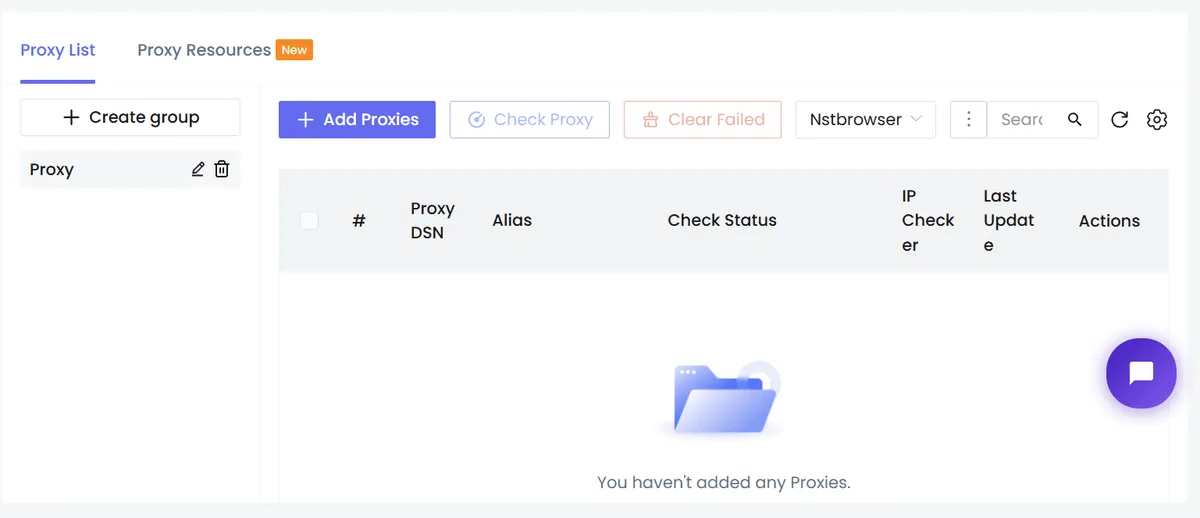
After that, add one or more proxies to the group.
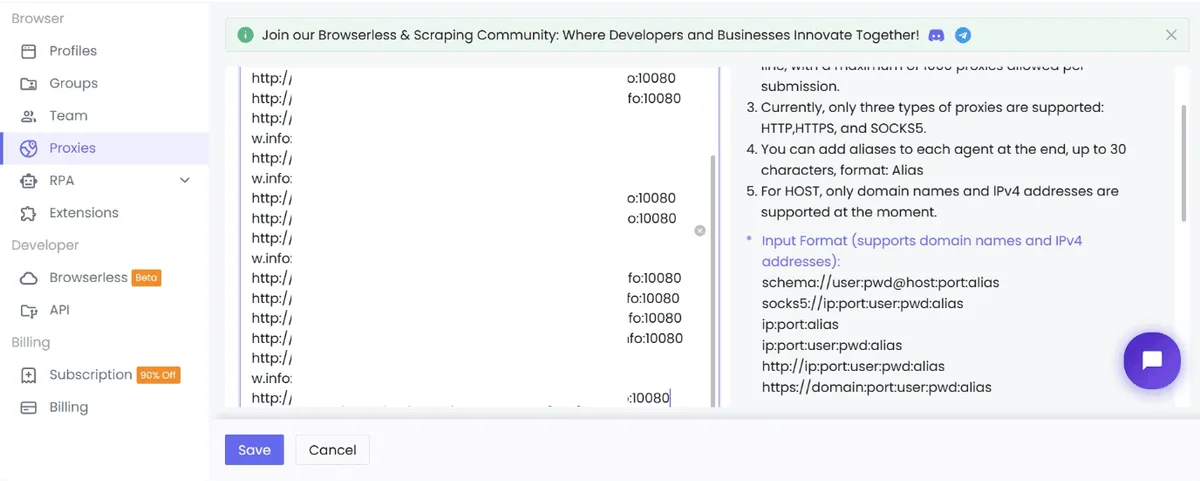
It is convenient to name groups according to a clear principle:
- by project;
- by country or region;
- by proxy type;
- by provider;
- by profile purpose.
After adding the group, return to the profile settings and select the required proxy from the saved list. Before launching, check the connection again.
Bulk Proxy Import
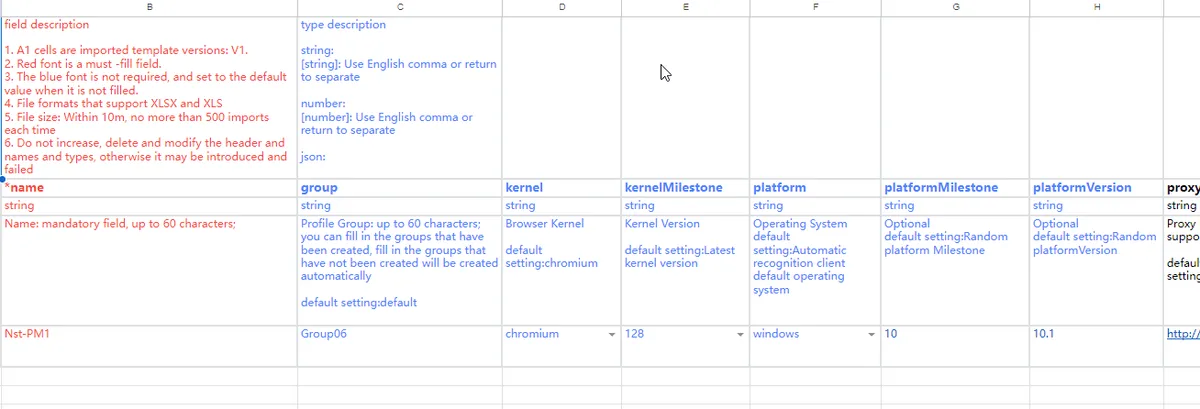
If you need to add a large list of proxies, manual setup will take a lot of time. For such cases, NST Browser provides bulk import.
It is usually performed through a CSV or Excel template:
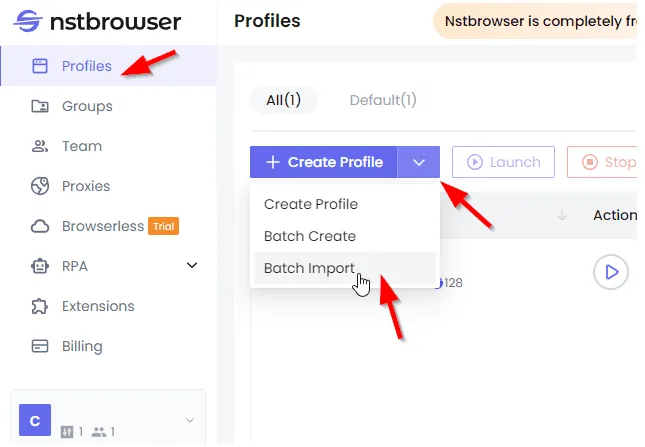
1. Go to the Profiles section.
2. Find the Batch import function.
3. Download the template.
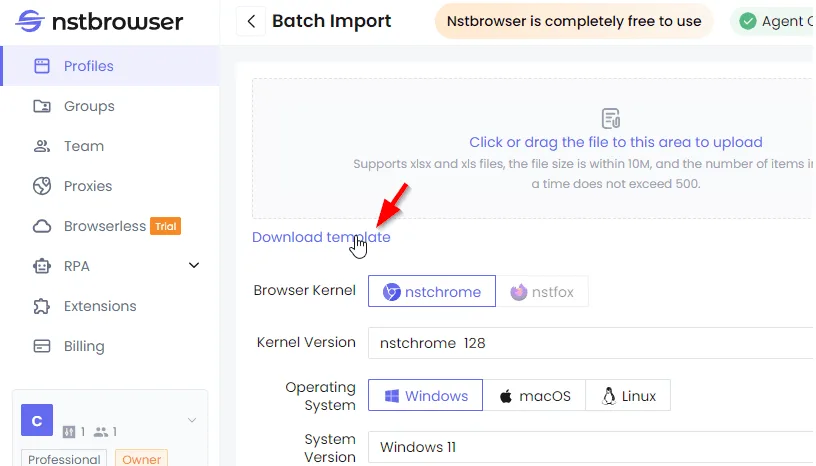
4. Fill it with proxy data.
5. Save the file.
6. Upload it back to NST Browser.
7. Save the result.
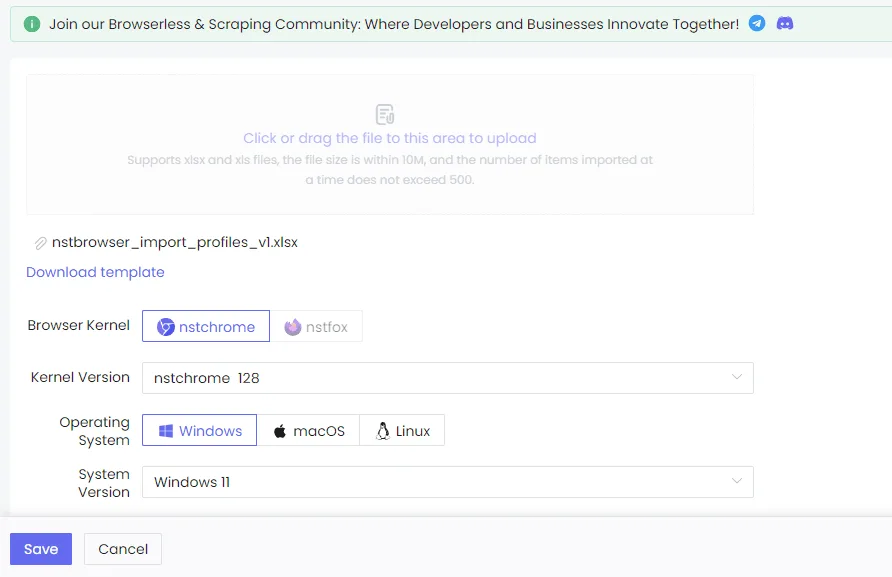
The template usually includes the following data:
- proxy type;
- host or IP;
- port;
- login;
- password;
- name or group;
- additional parameters, if provided.
Before importing, it is worth checking the file format. If the columns in the table are broken, extra characters are used, or data is inserted into the wrong fields, the import may be processed incorrectly.
After uploading the list, it is recommended to selectively check several proxies and then perform a bulk check.
Checking Operation After Setup
After adding a proxy and linking it to a profile, you need to make sure that the browser is actually using the selected connection.
To do this:
- Launch the profile.
- Open an IP-checking service.
- Compare the displayed IP with the proxy data.
- Check the country, city, and provider if these parameters are important.
- Restart the profile and make sure the settings are saved.
If the IP has not changed, the proxy was probably not assigned to the profile, or the profile was launched with default settings. In this case, you need to return to the profile parameters and check the Proxy section.
Practical Recommendations
For stable operation, it is better not to mix different tasks in one profile. A separate environment should be created for each scenario, with the required proxy specified in advance. This reduces the likelihood of confusion and simplifies control over settings.
It is also useful to maintain a clear naming structure. When there are many profiles and proxies, chaotic names quickly interfere with work. Names should show the purpose, connection type, and project affiliation.
Before launching profiles in bulk, it is worth checking proxies in advance. Non-working connections are better deleted or moved to a separate group so that they do not end up in work scenarios.
NST Browser Proxy FAQ
How do I add a proxy in NST Browser?
Open the Proxies section and the Proxy Configuration block, add a new proxy, select HTTP, HTTPS, or SOCKS5, and enter the server, port, login, and password. Click Check proxy and save the settings.
How do I assign a proxy to a profile?
Open or create a profile, go to its Proxy section, select the saved proxy from the list, check the connection, and save the profile.
Can I import many proxies into NST Browser at once?
Yes. Use the Batch import function, download the CSV or Excel template, fill it with proxy data, and upload it back to NST Browser.
Which operating systems does NST Browser support?
NST Browser is available for Windows, macOS, and Linux. Download it from the official website and install the version for your system.
Conclusion
Setting up proxies in NST Browser comes down to several basic actions: add the connection data, check the proxy, save it, assign it to the required profile, and make sure the profile launches with the correct IP. For individual tasks, manual addition is sufficient. For a large number of profiles, it is more convenient to use groups and bulk import.
A well-organized profile structure, clear group names, and regular connection checks help maintain order and avoid technical errors. NST Browser provides the necessary tools for this work: separate profiles, support for different proxy types, connection checking, and list import. Proxy setup in Afina antidetect browser follows similar steps, and if you need a proxy for apps outside the browser on Windows, see the guide to the Throne proxy client.